Cesium 上手不完全指北

文章目录
Cesium 上手不完全指北
将最近学习的CesiumJS做一个系统梳理,从项目配置开始,记录常用API的使用。
环境搭建与安装
首先,什么是 Cesium,Cesium 是一款开源的基于 JavaScript 的 3D 地图框架,即地图可视化框架。产品基于 WebGL 技术,可以使用 CesiumJS 创建虚拟场景的 3D 地理信息平台。其目标是用于创建以基于 Web 的地图动态数据可视化。在提升平台的性能、准确率、虚拟化能力、易用性方面提供各种支持。
更多介绍和信息可通过官网进行学习。
注册
Cesium ion 是一个提供瓦片图和 3D 地理空间数据的平台,Cesium ion 支持把数据添加到用户自己的 CesiumJS 应用中。使用二三维贴图和世界地形都需要 ion 的支持,如果没有自己的数据源需要 cesium 提供的数据源就需要申请 ion 的 token,具体可以通过以下链接申请 access token。
在创建 Cesium Viewer 的时候,将 access token 填为自己的 access token 即可。
Cesium.Ion.defaultAccessToken = '<YOUR ACCESS TOKEN HERE>';项目搭建
进入项目搭建过程,项目选择在 Vue 平台上进行实现,首先创建项目安装 cesium 库:
vue create cesium-vue
cd cesium-vue
npm i cesium@1.61 --save
注意:目前使用 webpack 进行配置引用最新版本(1.71) cesium 暂时不能导入,实测 cesium@1.61 版本可以进行 import 导入。
项目配置
根目录下新建 vue.config.js 配置文件,对项目进行基本配置:
const CopyWebpackPlugin = require('copy-webpack-plugin')
const webpack = require('webpack')
const path = require('path')

const debug = process.env.NODE_ENV !== 'production'
let cesiumSource = './node_modules/cesium/Source'
let cesiumWorkers = '../Build/Cesium/Workers'
module.exports = {
    publicPath: '',
    devServer: {
        port: 9999
    },
    configureWebpack: {
        output: {
            sourcePrefix: ' '
        },
        amd: {
            toUrlUndefined: true
        },
        resolve: {
            alias: {
                'vue$': 'vue/dist/vue.esm.js',
                '@': path.resolve('src'),
                'cesium': path.resolve(__dirname, cesiumSource)
            }
        },
        plugins: [
            new CopyWebpackPlugin([{ from: path.join(cesiumSource, cesiumWorkers), to: 'Workers'}]),
            new CopyWebpackPlugin([{ from: path.join(cesiumSource, 'Assets'), to: 'Assets'}]),
            new CopyWebpackPlugin([{ from: path.join(cesiumSource, 'Widgets'), to: 'Widgets'}]),
            new CopyWebpackPlugin([{ from: path.join(cesiumSource, 'ThirdParty/Workers'), to: 'ThirdParty/Workers'}]),
            new webpack.DefinePlugin({ CESIUM_BASE_URL: JSON.stringify('./') }),
            new CopyWebpackPlugin([{ from: path.join('./static', 'model'), to: 'model3D' }]),
            new CopyWebpackPlugin([{ from: path.join('./static', 'images'), to: 'images' }])
        ]
    }
}
在根目录下创建 static 文件夹用于后续 model 和 images 的存放。
组件实现
在 src/components/ 下新建 CesiumViewer.vue 进行组件实现:
<template>
  <div id="cesiumContainer"></div>
</template>

<script>
import Cesium from 'cesium/Cesium'
import 'cesium/Widgets/widgets.css'
export default {
    name: 'CesiumViewer',
    mounted () {
        // token
        Cesium.Ion.defaultAccessToken = 'your token';
        let viewer = new Cesium.Viewer('cesiumContainer');
    },
    methods: {}
}
</script>

<style>
#cesiumContainer {
    display: block;
    position: absolute;
    top: 0;
    left: 0;
    border: none;
    width: 100%;
    height: 100%;
    margin: 0;
    padding: 0;
    overflow: hidden;
}
</style>
可以看到地图在调用 Cesium 的 Viewer 时开始构建。Viewer 是 Cesium API 的起点,new Viewer 后便可以看见地球对象。
组件声明
在 App.vue 中引用组件:
<template>
  <div id="app">
    <CesiumViewer></CesiumViewer>
  </div>
</template>

<script>
import CesiumViewer from './components/CesiumViewer'
export default {
  name: 'App',
  components: {
    CesiumViewer
  }
}
</script>
运行查看效果:
npm run serve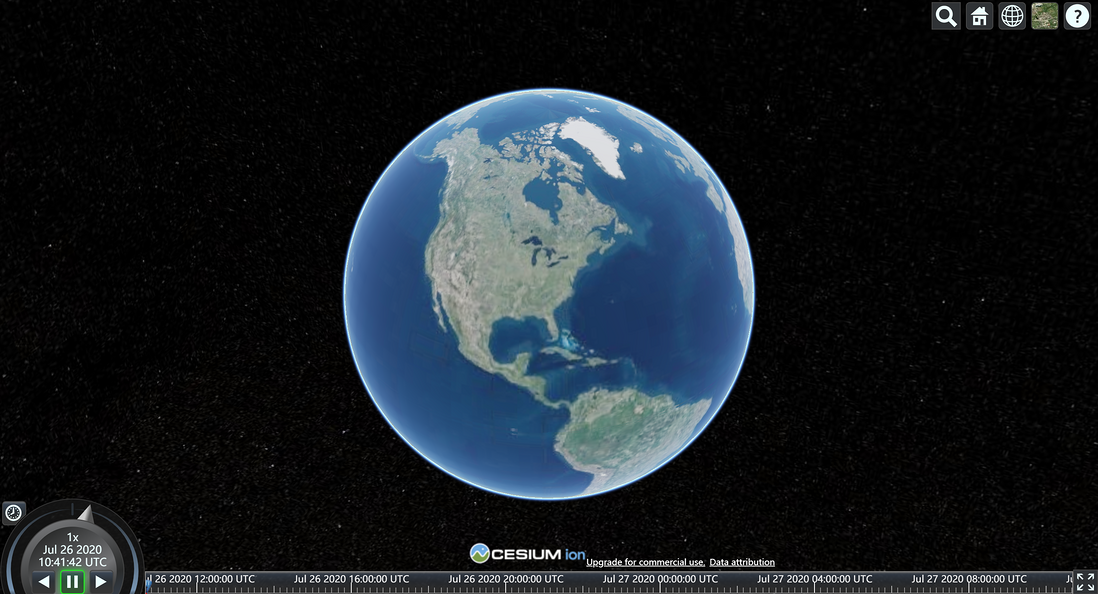
此时,已经可以看见最开始的地球🌏效果,我们进行一些简单配置和调整:
<script>
import Cesium from 'cesium/Cesium'
import 'cesium/Widgets/widgets.css'
export default {
    name: 'CesiumViewer',
    mounted () {
        this.init();
    },
    methods: {
        init () {
            let viewerOption = {
                geocoder: false,                // 地理位置搜索控件
                homeButton: false,              // 首页跳转控件
                sceneModePicker: false,         // 2D,3D和Columbus View切换控件
                baseLayerPicker: false,         // 三维地图底图切换控件
                navigationHelpButton: false,    // 帮助提示控件
                animation: false,               // 视图动画播放速度控件
                timeline: false,                // 时间轴控件
                fullscreenButton: false,        // 全屏控件
                infoBox: false,                 // 点击显示窗口控件
                selectionIndicator: false,      // 实体对象选择框控件
                scene3DOnly: true               // 仅3D渲染,节省GPU内存
            }
            // token
            Cesium.Ion.defaultAccessToken = 'your token';
            let viewer = new Cesium.Viewer('cesiumContainer', viewerOption);

            // 隐藏Logo
            viewer.cesiumWidget.creditContainer.style.display = "none";
        }
    }
}
</script>
npm run serve最终效果如下:

至此,最开始的构建运行就已经完成了,下面对具体 API 进行学习。
Imagery 图层
开始 API 学习之前,为了方便方法实现,使用 ref 在元素上注册一个引用信息,方便通过 ID 直接访问一个子组件实例。
修改如下,引用信息将会注册在父组件的 $refs 对象上,子组件通过 this.$viewer 进行访问。
这里引入图层的概念(Imagery),瓦片图集合根据不同的投影方式映射到虚拟的三维数字地球表面。依赖于相机指向地表的方向和距离,Cesium 会去请求和渲染不同层级的图层详细信息。
详细代码如下:
<template>
  <div id="cesiumContainer" ref="viewer"></div>
</template>

<script>
import Cesium from 'cesium/Cesium'
import 'cesium/Widgets/widgets.css'

export default {
    name: 'CesiumViewer',
    mounted () {
        // 初始化
        this.init();

        // 添加图层
        this.addLayers();
    },
    methods: {
        // 初始化
        init () {
            let viewerOption = {...}
            // token
            Cesium.Ion.defaultAccessToken = 'your token';

            this.$viewer = new Cesium.Viewer(this.$refs.viewer, viewerOption);

            this.$viewer.cesiumWidget.creditContainer.style.display = "none";
        },
        // 添加 `Imagery` (图层)
        addLayers () {
            // Remove default base layer
            // this.$viewer.imageryLayers.remove(this.$viewer.imageryLayers.get(0));

            // Add grid imagery
            this.$viewer.imageryLayers.addImageryProvider(new Cesium.GridImageryProvider());
        }
    }
}
</script>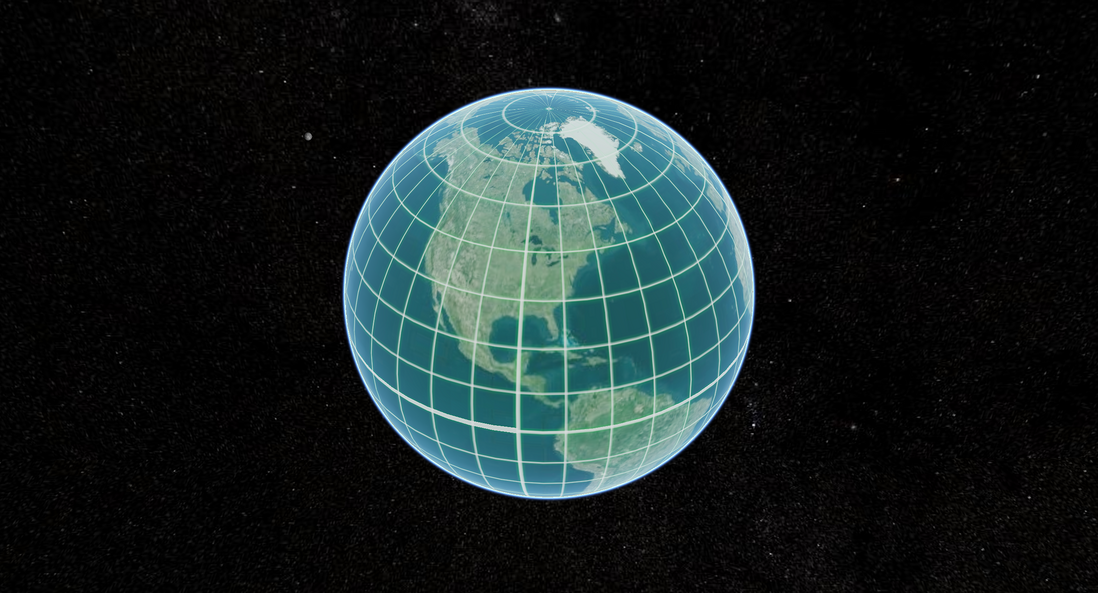
原理上和 PS 的图层一致,多个图层可以添加、移除和排序,渲染并适应到 Cesium 中。
Terrain 地形
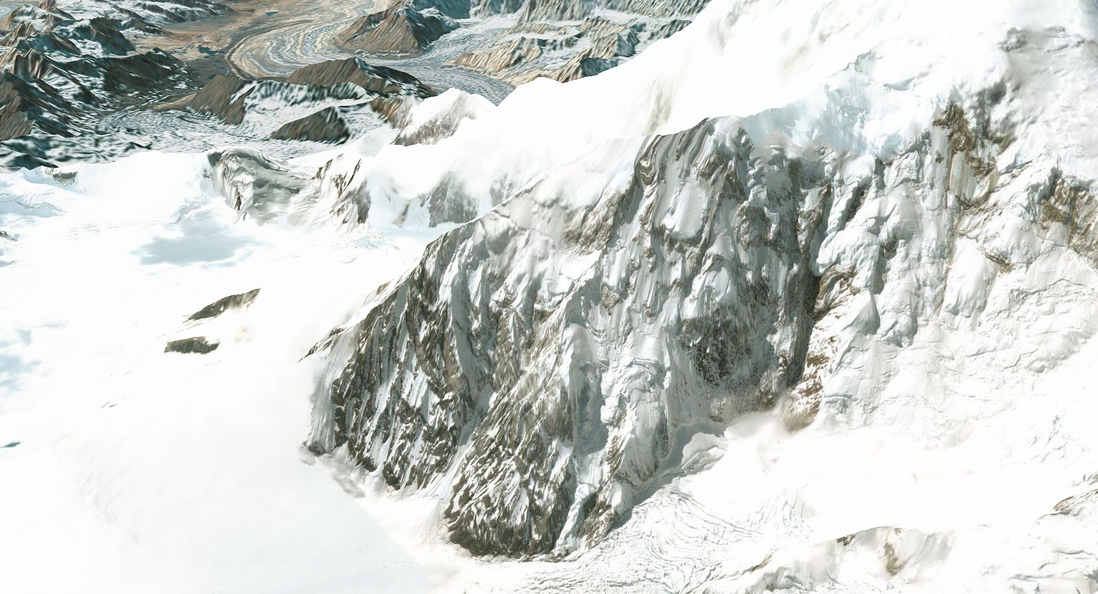
Cesium 的地形图层支持渐进式加载和渲染全球高精度地图,并且包括地形地势、水形数据,包括海洋、湖泊、河流、山峰、峡谷等效果。
为了添加地形数据,我们需要创建一个 CesiumTerrainProvider,通过 createWorldTerrain 函数创建一个由 Cesium ion 提供服务的 Cesium WorldTerrian,同时可提供配置项,请求额外的水和光数据,最终我们通过 camera 下的函数定位到创建的位置进行查看:
export default {
  name: "CesiumViewer",
  mounted() {
    // 初始化
    this.init();

    // 添加图层
    // this.addLayers();

    // 添加地形
    this.addTerrain();
  },
  methods: {
    // 初始化
    init() {...},
    // 添加图层
    addLayers() {...},
    // 添加地形
    addTerrain() {
      this.$viewer.terrainProvider = Cesium.createWorldTerrain({
        requestWaterMask: true, // required for water effects
        requestVertexNormals: true, // required for terrain lighting
      });

      // Enable depth testing so things behind the terrain disappear.
      this.$viewer.scene.globe.depthTestAgainstTerrain = true;

      this.$viewer.scene.camera.flyTo({
        destination: Cesium.Cartesian3.fromRadians(
          -2.6399828792482234,
          1.0993550795541742,
          5795
        ),
        orientation: {
          heading: 3.8455,
          pitch: -0.4535,
          roll: 0.0,
        },
      });
    },
  }
}
Viewer 控件
回到最开始的调整配置上,我们在 viewerOption 中对 Viewer 声明的一系列基本小控件做了移除和优化操作,具体 API 官方给出了如下描述:
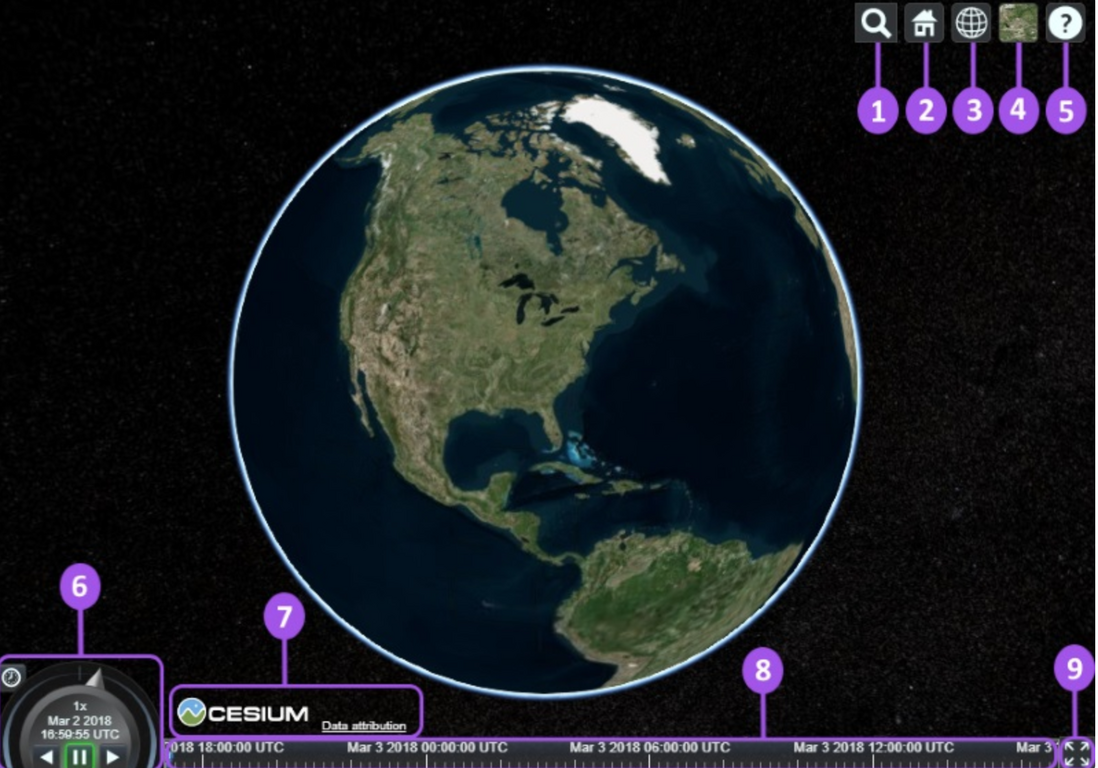
- Geocoder : A location search tool that flies the camera to queried location. Uses Bing Maps data by default.
- HomeButton : Flies the viewer back to a default view.
- SceneModePicker : Switches between 3D, 2D and Columbus View (CV) modes.
- BaseLayerPicker : Chooses the imagery and terrain to display on the globe.
- NavigationHelpButton : Displays the default camera controls.
- Animation : Controls the play speed for view animation.
- CreditsDisplay : Displays data attributions. Almost always required!
- Timeline : Indicates current time and allows users to jump to a specific time using the scrubber.
- FullscreenButton : Makes the Viewer fullscreen.
我们可以根据自身需求选择是否启用。
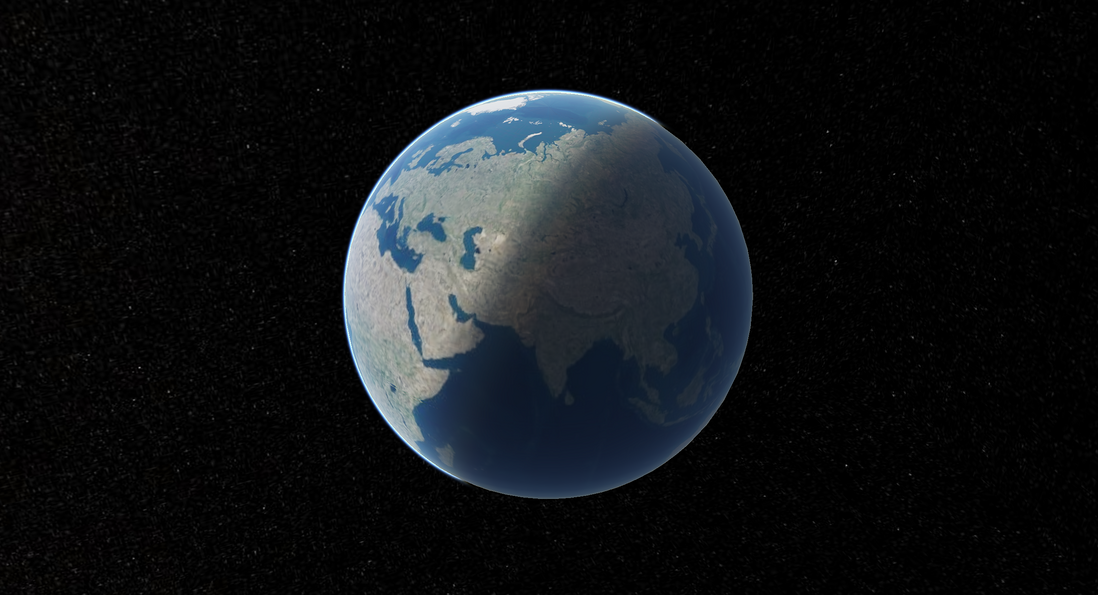
同时我们还可以对视窗进行配置,到达自己期望的效果,如开启根据动态时间激活太阳位置的光照,对真实地球进行模拟:
export default {
  name: "CesiumViewer",
  mounted() {
    // 初始化
    this.init();

    // 添加图层
    // this.addLayers();

    // 添加地形
    // this.addTerrain();

    // 配置视窗
    this.configScene();
  },
  methods: {
    // 初始化
    init() {...},
    // 配置视窗
    configScene() {
      // Enable lighting based on sun/moon positions(激活基于太阳位置的光照)
      this.$viewer.scene.globe.enableLighting = true;
    },
  }
}
更近一步,可以利用上一小节使用的 camera 实现主视窗的定位:
// 配置视窗
configScene() {
    // Enable lighting based on sun/moon positions(激活基于太阳位置的光照)
    this.$viewer.scene.globe.enableLighting = true;

    // Create an initial camera view
    let initialPosition = new Cesium.Cartesian3.fromDegrees(
        -73.998114468289017509,
        40.674512895646692812,
        2631.082799425431
    );
    let initialOrientation = new Cesium.HeadingPitchRoll.fromDegrees(
        7.1077496389876024807,
        -31.987223091598949054,
        0.025883251314954971306
    );
    let homeCameraView = {
        destination: initialPosition,
        orientation: {
            heading: initialOrientation.heading,
            pitch: initialOrientation.pitch,
            roll: initialOrientation.roll,
        },
    };
    // Set the initial view
    this.$viewer.scene.camera.setView(homeCameraView);
},
这里需要介绍的是 Scene 的概念,Scence 虚拟场景是所有3D 图形对象和状态的容器,通常不是由开发者直接创建,而是在 Viewer 或者 CesiumWidget 内部隐式创建的。
通过 Scene 场景,我们可以控制 Globe 地球(包括地形和图层)、Camera 相机、Primitives (默认矢量数据层)和 PostProcessStage (后期处理效果)等。
除了以上配置,现在我们需要了解的有以下 Cesium 基本类型的 API:
- Cartesian3 : 一个三维笛卡尔坐标——当它被用作相对于地球中心的位置时,使用地球固定框架(
ECEF)。 - Cartographic : 由经度、纬度(弧度)和
WGS84椭球面高度确定的位置。 - HeadingPitchRoll : 在东北向上的框架中关于局部轴的旋转(弧度)。航向是围绕负
Z轴的旋转。俯仰是围绕负Y轴的旋转。滚动是关于正X轴的旋转。 - Quaternion :以
4D坐标表示的3D旋转。
Camera 相机
Camera 是 Cesium 中常用的 API,属于 viewer.scene 中的属性,用来控制当前可见的域。可以控制场景的观察视角,例如旋转、缩放、平移以及飞行定位。
一些最常用的方法如下:
- Camera.setView(options): 在特定位置和方向立即设置相机。
- Camera.zoomIn(amount): 沿着视角矢量移动摄像机。
- Camera.zoomOut(amount): 沿视角矢量向后移动摄像机。
- Camera.flyTo(options): 创建从当前相机位置到新位置的动画相机飞行。
- Camera.lookAt(target, offset): 定位并定位摄像机以给定偏移量瞄准目标点。
- Camera.move(direction, amount): 朝任何方向移动摄像机。
- Camera.rotate(axis, angle): 绕任意轴旋转相机。
例子参考上一小节的视窗定位。
Clock 时钟
使用 viewer 的 Clock 和 Timline 可以控制 scene 的时间进度。
下面通过修改 init 函数实现一个日夜交替效果:
export default {
  name: "CesiumViewer",
  mounted() {
    // 初始化
    this.init();
  },
  methods: {
    // 初始化
    init() {
      let clock = new Cesium.Clock({
        startTime: Cesium.JulianDate.now(),
        currentTime: Cesium.JulianDate.now(),
        stopTime: Cesium.JulianDate.addDays(Cesium.JulianDate.now(), 1, new Cesium.JulianDate()),
        clockRange: Cesium.ClockRange.LOOP_STOP,
        clockStep: Cesium.ClockStep.SYSTEM_CLOCK_MULTIPLIER,
        multiplier: 9000,
        shouldAnimate: true
      });

      let viewerOption = {
        geocoder: false,
        homeButton: false,
        sceneModePicker: false,
        baseLayerPicker: false,
        navigationHelpButton: false,
        animation: false,
        timeline: false,
        fullscreenButton: false,
        infoBox: false,
        selectionIndicator: false,
        scene3DOnly: true,
        shadows: true,
        shouldAnimate: true,
        clockViewModel: new Cesium.ClockViewModel(clock)
      };

      // your token
      Cesium.Ion.defaultAccessToken = "token";

      this.$viewer = new Cesium.Viewer(this.$refs.viewer, viewerOption);

      // 隐藏Logo
      this.$viewer.cesiumWidget.creditContainer.style.display = "none";

      this.$viewer.scene.globe.enableLighting = true;
    },
  }
}
通过定义 clock,设置起始时间、速率和循环等配置,使用 clockViewModel 在实例中添加时钟视图模型,然后启用光照,实现效果。
注:此效果为演示,init 函数后续恢复为开始的创建实例状态,方便之后的例子使用。
Entity 实体
Cesium 中的所有空间数据都使用 Entity API来表示。Entity API 以一种有效提供灵活的可视化的方式,以便对 Cesium 进行渲染。Cesium Entity 是可以与样式化图形表示配对并定位在空间和时间上的数据对象。
在 Cesium 中,加载点线面矢量有两种方式:
- Entity API 是数据驱动的一组高级对象,具有接口一致,容易使用的特点,但性能略低。
- Primitive API 是面向三维图形开发,更为底层,具有灵活,性能高的特点,但使用复杂。
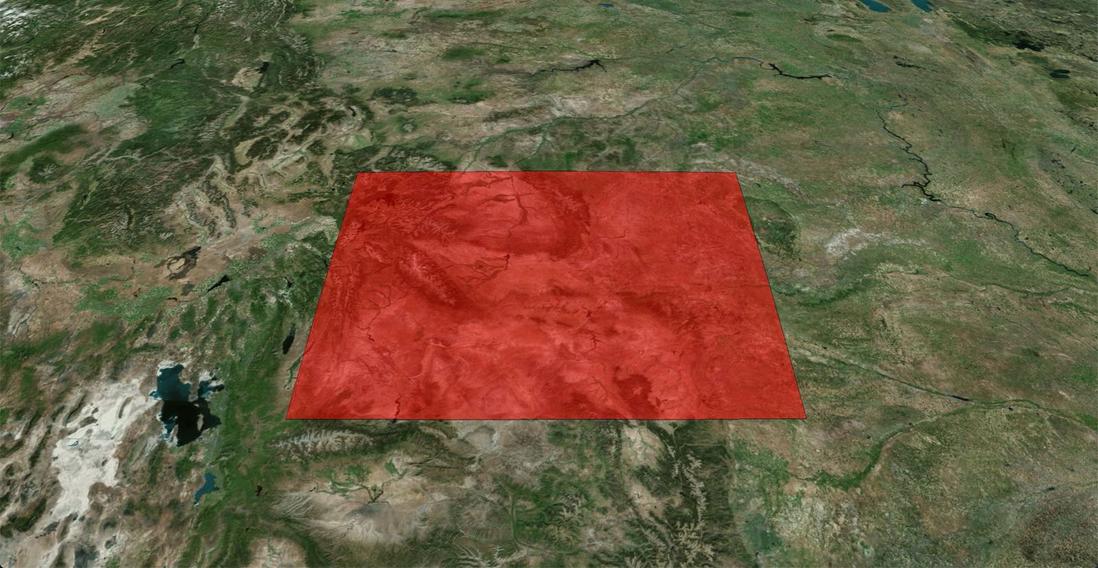
其中,Entity API 的使用通过 viewer.entities.add() 方法添加矢量数据:
export default {
  name: "CesiumViewer",
  mounted() {
    // 初始化
    this.init();
    // 加载实体
    this.loadEntities();
  },
  methods: {
    // 初始化
    init() {...},
    loadEntities() {
        let polygon = this.$viewer.entities.add({
        name: "正方形",
        id: "square",
        polygon: {
          hierarchy: Cesium.Cartesian3.fromDegreesArray([
            -109.080842,
            45.002073,
            -105.91517,
            45.002073,
            -104.058488,
            44.996596,
            -104.053011,
            43.002989,
            -104.053011,
            41.003906,
            -105.728954,
            40.998429,
            -107.919731,
            41.003906,
            -109.04798,
            40.998429,
            -111.047063,
            40.998429,
            -111.047063,
            42.000709,
            -111.047063,
            44.476286,
            -111.05254,
            45.002073,
          ]),
          height: 0,
          material: Cesium.Color.RED.withAlpha(0.5),
          outline: true,
          outlineColor: Cesium.Color.BLACK,
        },
      });

      this.$viewer.zoomTo(polygon);
      // polygon.show = false;
    }
  }
}
效果如下:
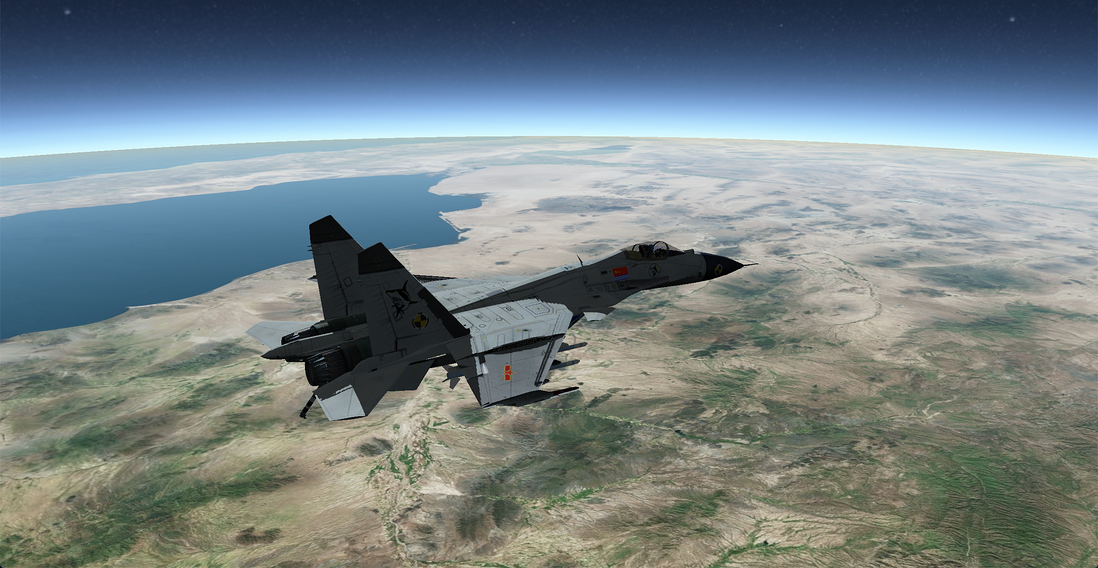
除了绘制实体,还可以通过外部加载的方式进行模型导入。
这里我们在 static 文件夹下放入 J15.glb 文件进行导入:
export default {
  name: "CesiumViewer",
  mounted() {
    // 初始化
    this.init();
    // 添加模型
    this.addEntities();
  },
  methods: {
    // 初始化
    init() {...},
    addEntities() {
        let fighter = this.$viewer.entities.add({
        name: "fighter",
        id: "J15",
        model: {
          uri: "model3D/J15.glb",
          minimumPixelSize: 100,
          maximumScale: 1000,
        },
        position: Cesium.Cartesian3.fromDegrees(-110.345, 30, 70000),
      });
      // this.$viewer.trackedEntity = fighter;
      this.$viewer.zoomTo(fighter, new Cesium.HeadingPitchRange(-1, -0.3, 35));
    }
  }
}
评论
登录后参与技术讨论,分享你的经验与见解。
登录 / 注册暂无评论