前端要树形数据 我三分钟接口扔给他

文章目录

前言
树状结构是我们在日常工作中经常需要返回的数据结构 一个小小的数状结构也能看出一个开发者的思维方式 我个人最开始写这种树状结构真的是代码老长了 别人一看就会知道我是一个菜鸟 慢慢的自己思考怎么去用最少的代码去搭建一个树状结构 也做一些整理 编码思路真的很重要 思路好代码才会简洁健壮准备实体类我们先定义一个实体类 方便演示 第一种方法的算是和构造器相互依赖
Node.class:import lombok.Data;
import java.util.ArrayList;
import java.util.List;
/**
- @author变成派大星
*/
@Data
public class Node {
private Integer  Id;

private String name;

private Integer pid;


private List<Node> treeNode = new ArrayList<>();

public Node(int id, int pid) {
    this.Id = id;
    this.pid = pid;
}

public Node(int id, int pid, String name) {
    this(id, pid);
    this.name = name;
}
}
复制代码思路一我们的树状图一般都是一个动态的结构也就是说我们不能把代码写的太死板
无论树的深度怎么增加我们都不需要更改代码 一般来说 树状结构都有一个核心字段pid第一个节点
都是为 0第二个节点的Pid 是第一个节点的标识我们思路一就是从这边出发先将第一层节点找出来剩下的节点通过Pid 进行分组 生成一个Map pid作为Key Node
作为Value通过循环集合 去Map里面取Key对应的节点Set到自己的子节点下面去除数据中第一层Pid
!= 0 的数据4.1
如下图
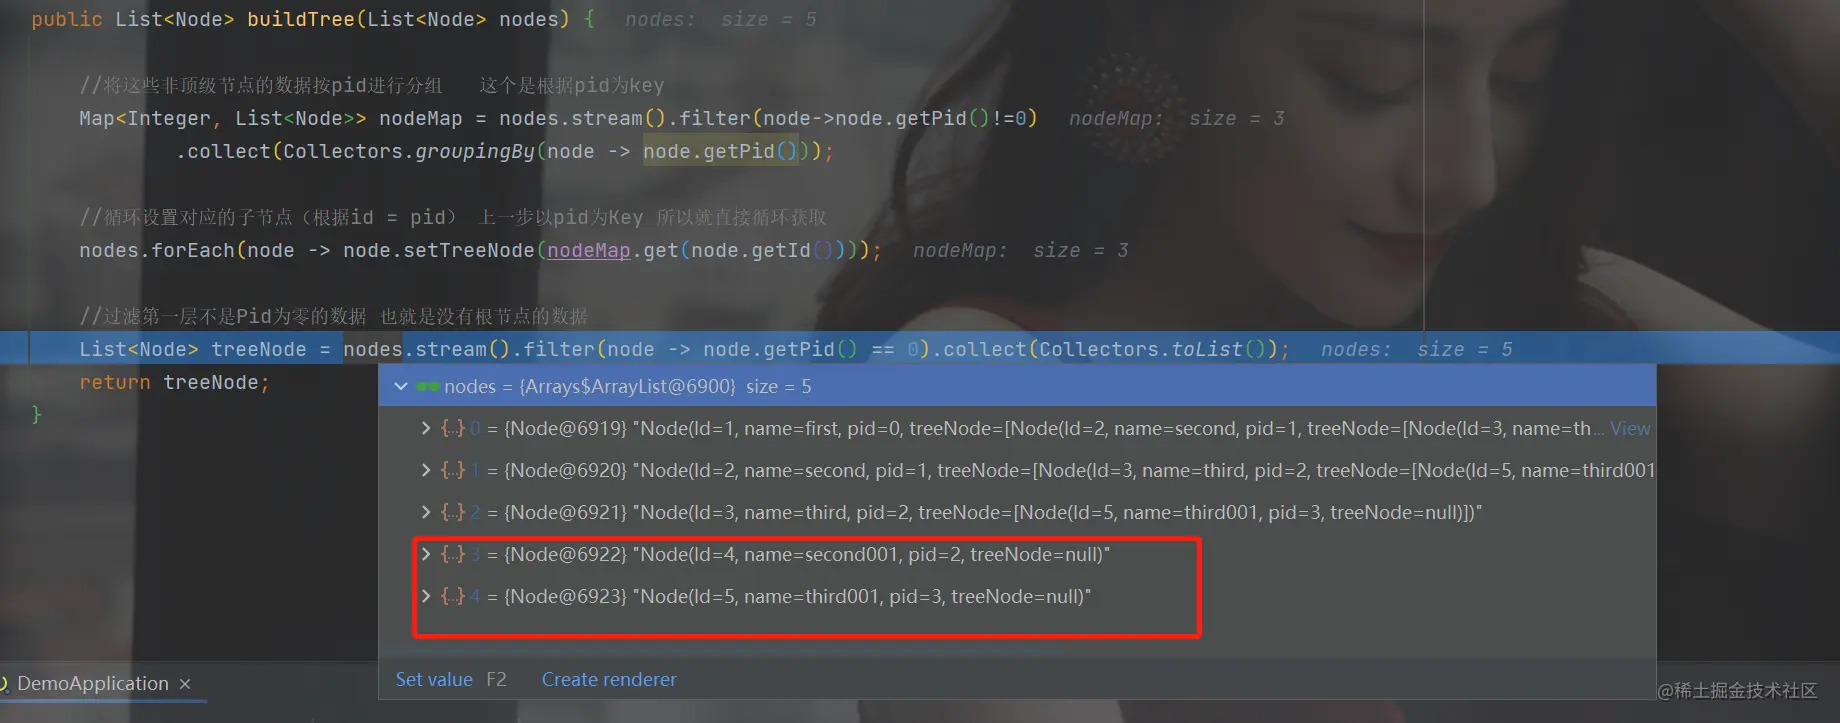
代码演示 这个需要看一下代码逻辑/**
- @author 变成派大星
*/
@Service
@AllArgsConstructor
public class NodeServiceImpl extends ServiceImpl<NodeMapper, Node> implements NodeService {
private NodeMapper nodeMapper;

/**
 * @return 进行树结构的处理操作
 */
@Override
public List<Node> handleTreeVo() {
  Node first = new Node(1, 0, "first");
  Node second = new Node(2, 1, "second");
 Node third = new Node(3, 2, "third");
 Node second001 = new Node(4, 1, "second001");
 Node third001 = new Node(5, 4, "third001");
 // 组装树状数据
List<Node> nodes = Arrays.asList(first,second,third,second001,third001);
 return buildTree(nodes);
}

public List<Node> buildTree(List<Node> nodes) {

    //将这些非顶级节点的数据按pid进行分组   这个是根据pid为key 第一步过滤非Pid=0的节点  第二步进行分组
     Map<Integer, List<Node>> nodeMap = nodes.stream().filter(node->node.getPid()!=0)
    .collect(Collectors.groupingBy(node -> node.getPid()));

    //循环设置对应的子节点(根据id = pid) 上一步以pid为Key 所以就直接循环获取
    nodes.forEach(node -> node.setTreeNode(nodeMap.get(node.getId())));

    //过滤第一层不是Pid为零的数据 也就是没有根节点的数据
    List<Node> treeNode = nodes.stream().filter(node -> node.getPid() == 0).collect(Collectors.toList());
    return treeNode;
}
}
复制代码结果
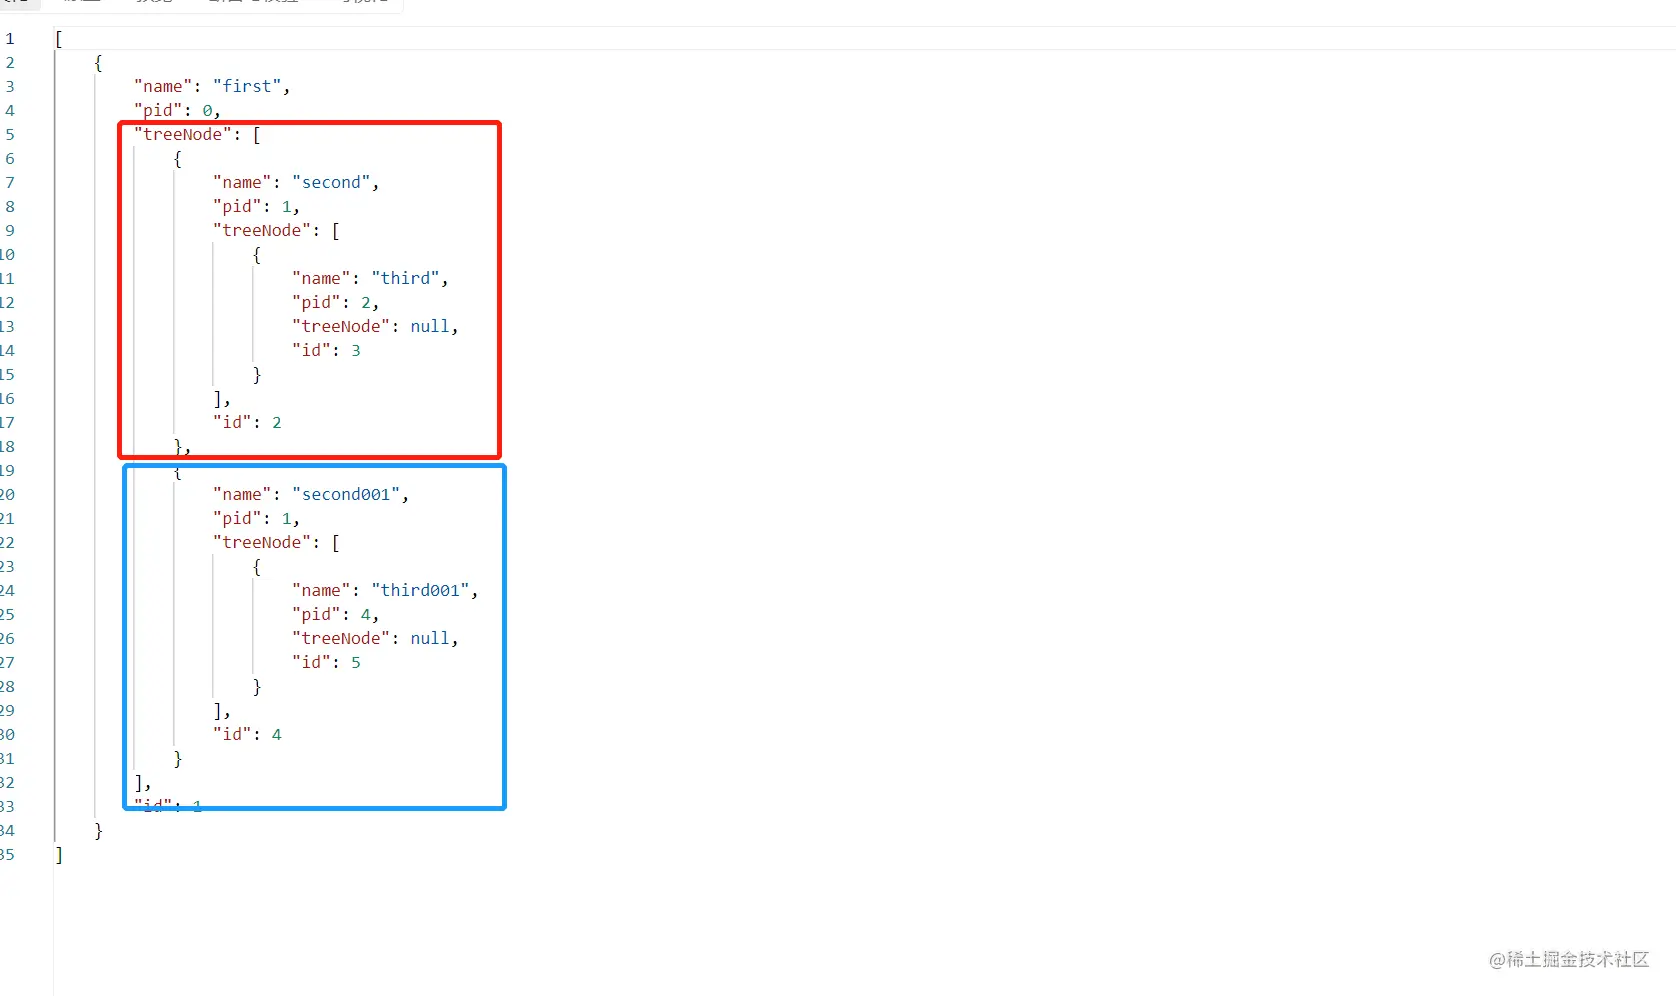
小总结上面这种写法
几行代码就能生成一个树状数据 也算一种思路优点的话就是代码简单简洁要说缺点 可能最后一步有
点不舒服 也是需要改进的地方 而且这个是专门配合的实体类 真正开发中会比这麻烦点
前端也喜欢后端开发给的树状图字段名都是一样的 所有一般都要写一个Vo返回类 这个配合返回类
麻烦程度也会增加思路二因为树状数据比较常用 我们每次都写一个方法肯定比较笨 我们可以利用泛
型区写一个工具类 我先把代码写出来然后再解释 这个是可以直接使用的 是比较通用的import
cn.hutool.core.collection.CollUtil;
import com.baomidou.mybatisplus.core.toolkit.CollectionUtils;
import java.util.ArrayList;
import java.util.List;
import java.util.Map;
import java.util.function.BiConsumer;
import java.util.function.Function;
import java.util.function.Predicate;
import java.util.stream.Collectors;
/**
- @author 变成派大星
*/
public class TreeUtils {
/**
 * @param list             源数据
 * @param setChildListFn   设置递归的方法
 * @param idFn             获取id的方法
 * @param pidFn            获取父id的方法
 * @param getRootCondition 获取根节点的提哦啊见
 * @return 将List 转换成 Tree
 */
public static <M, T> List<M> listToTree(List<M> list,
                                        Function<M, T> idFn,
                                        Function<M, T> pidFn,
                                        BiConsumer<M, List<M>> setChildListFn,
                                        Predicate<M> getRootCondition) {
    if (CollUtil.isEmpty(list)) return null;
    Map<T, List<M>> listMap = list.stream().collect(Collectors.groupingBy(pidFn));
    list.forEach(model -> setChildListFn.accept(model, listMap.get(idFn.apply(model))));
    return list.stream().filter(getRootCondition).collect(Collectors.toList());
}

public static <M> List<M> treeToList(List<M> source,
                                     Function<M, List<M>> getChildListFn,
                                     BiConsumer<M, List<M>> setChildListFn,
                                     Predicate<M> getRootCondition) {
    List<M> target = new ArrayList<>();
    if (CollectionUtils.isNotEmpty(source)) {
        treeToList(source, target, getChildListFn);
        target.forEach(model -> setChildListFn.accept(model, null));
        target.addAll(target.stream().filter(getRootCondition).collect(Collectors.toList()));
    }
    return target;
}

private static <F> void treeToList(List<F> source,
                                   List<F> target,
                                   Function<F, List<F>> getChildListFn) {
    if (CollectionUtils.isNotEmpty(source)) {
        target.addAll(source);
        source.forEach(model -> {
            List<F> childList = getChildListFn.apply(model);
            if (CollectionUtils.isNotEmpty(childList)) {
                treeToList(childList, target, getChildListFn);
            }
        });
    }
}
}
复制代码方法一:listToTree就是将你的数据从list转换成Tree结构public List<Node> handleTree(){
Node first = new Node(1, 0, "first");
Node second = new Node(2, 1, "second");
Node third = new Node(3, 2, "third");
Node second001 = new Node(4, 1, "second001");
Node third001 = new Node(5, 4, "third001");
List<Node> nodes = Arrays.asList(first,second,third,second001,third001);

// 只需要一行数据
return TreeUtils.listToTree(nodes, Node::getId, Node::getPid, Node::setTreeNode, (l) -> l.getPid() == 0);
}
复制代码结果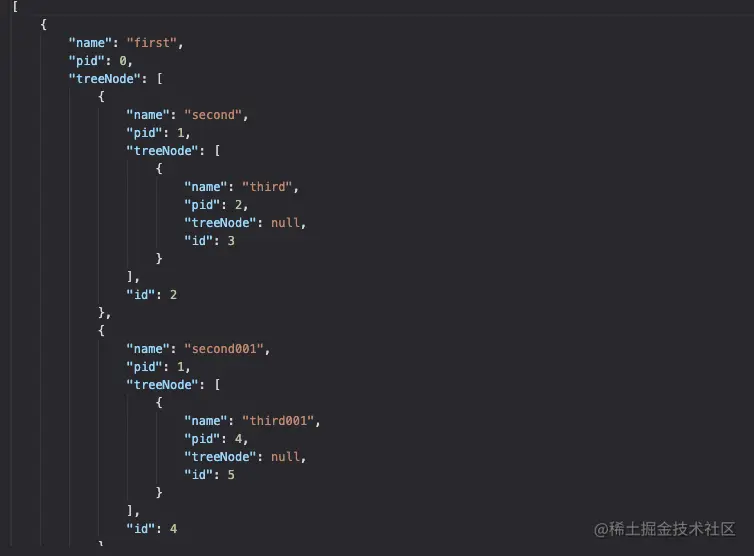
这个其实非常方便 基本上一分钟就能转换了 再也不会被前端催了 也可以自己去改写 按照自己的需求去调整 思路很像 只不过是去优化方法二 Tree 转 Listpublic List<Node> handleTree(){
Node first = new Node(1, 0, "first");
Node second = new Node(2, 1, "second");
Node third = new Node(3, 2, "third");
Node second001 = new Node(4, 1, "second001");
Node third001 = new Node(5, 4, "third001");
List<Node> nodes = Arrays.asList(first,second,third,second001,third001);
List<Node> nodeList = TreeUtils.listToTree(nodes, Node::getId, Node::getPid, Node::setTreeNode, (l) -> l.getPid() == 0);

// 树状结构转换成 List 也就是还原数据
return TreeUtils.treeToList(nodeList, Node::getTreeNode, Node::setTreeNode, (l) -> l.getPid() == 0);
}
复制代码可以去反转树结构 用处的看自己的业务需求 可以看一下思路
总结也许有很多类去实现树结构 只需要很少的代码 但是有些思路还是要学的 也有其他暴力组成 但是基本思路差不多 如果各位大佬有更好的思路 可以提醒一下 祝顺利
评论
登录后参与技术讨论,分享你的经验与见解。
登录 / 注册暂无评论