Android OpenCV环境搭建(Cmake)
文章目录
OpenCV(Open Source Computer Vision Library)
下载OpenCV4Android SDK
在Android平台以来OpenCV进行开发,需要下载OpenCV For Android的SDK,下载地址如下:
https://www.docs.opencv.org/2.4/doc/tutorials/introduction/android_binary_package/O4A_SDK.html#get-the-opencv4android-sdk
下载完成后解压,得到的文件结构如下:
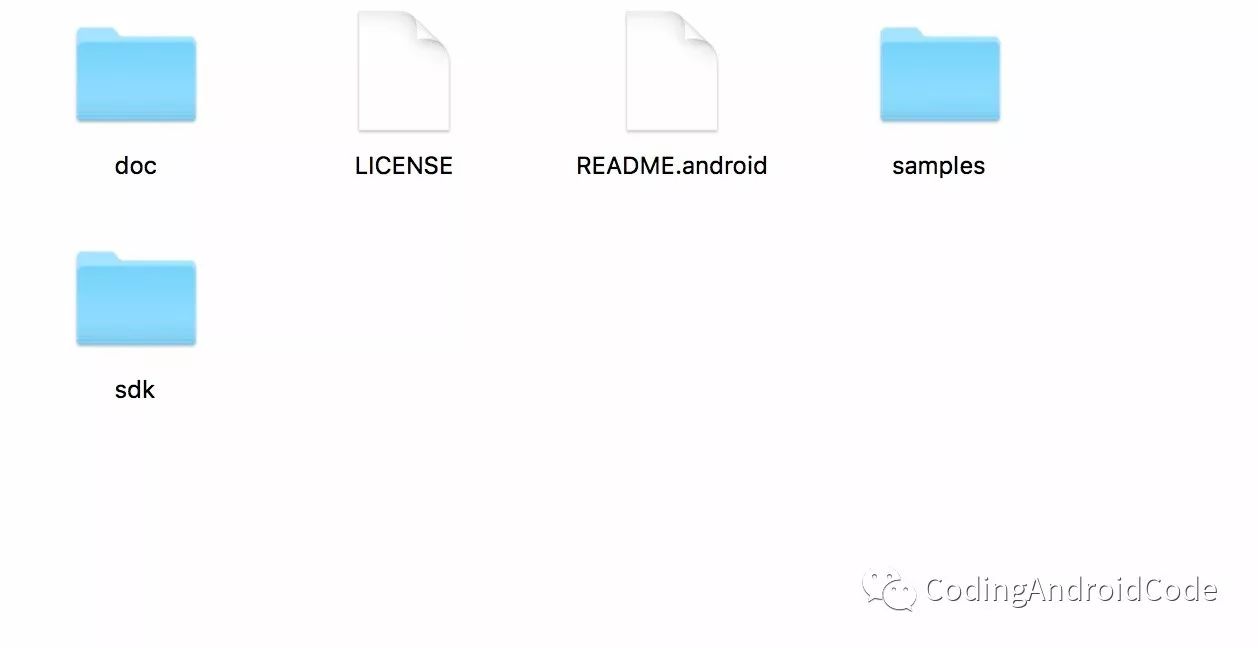
doc文件夹下是OpenCV SDK相关的一些参考文档
samples文件夹下是OpenCV 的一些例子
sdk/java文件夹下是OpenCV的java依赖Module,需要配合OpenCVManager这个apk文件使用
sdk/native文件夹下是OpenCV的一些native头文件或者源文件
引入OpenCV4Android Module
在Android Studio中新建Android项目OpenCV01,随后添加sdk_directory/sdk/java该路径作为OpenCV01的一个Module,步骤截图如下:
首先选择File->New module
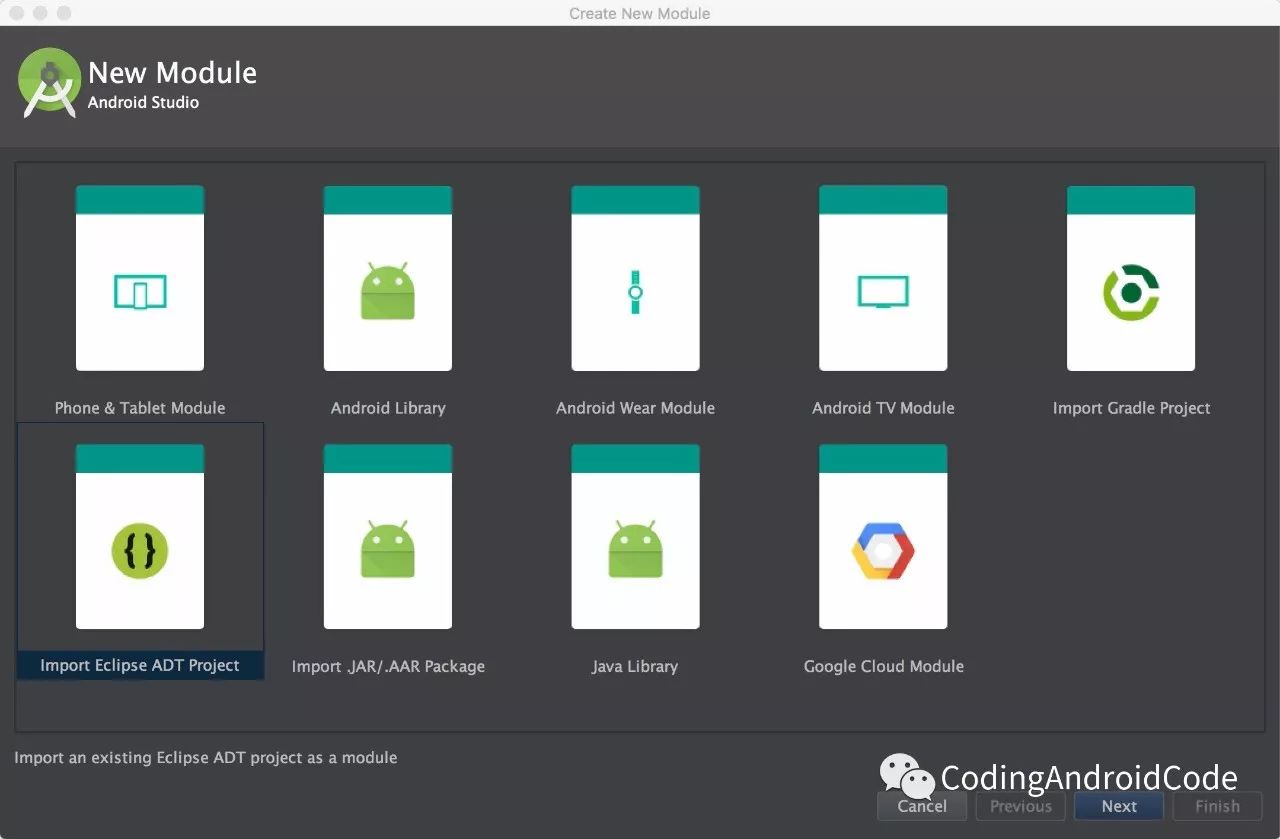
在该页面选择import eclipse ADT project
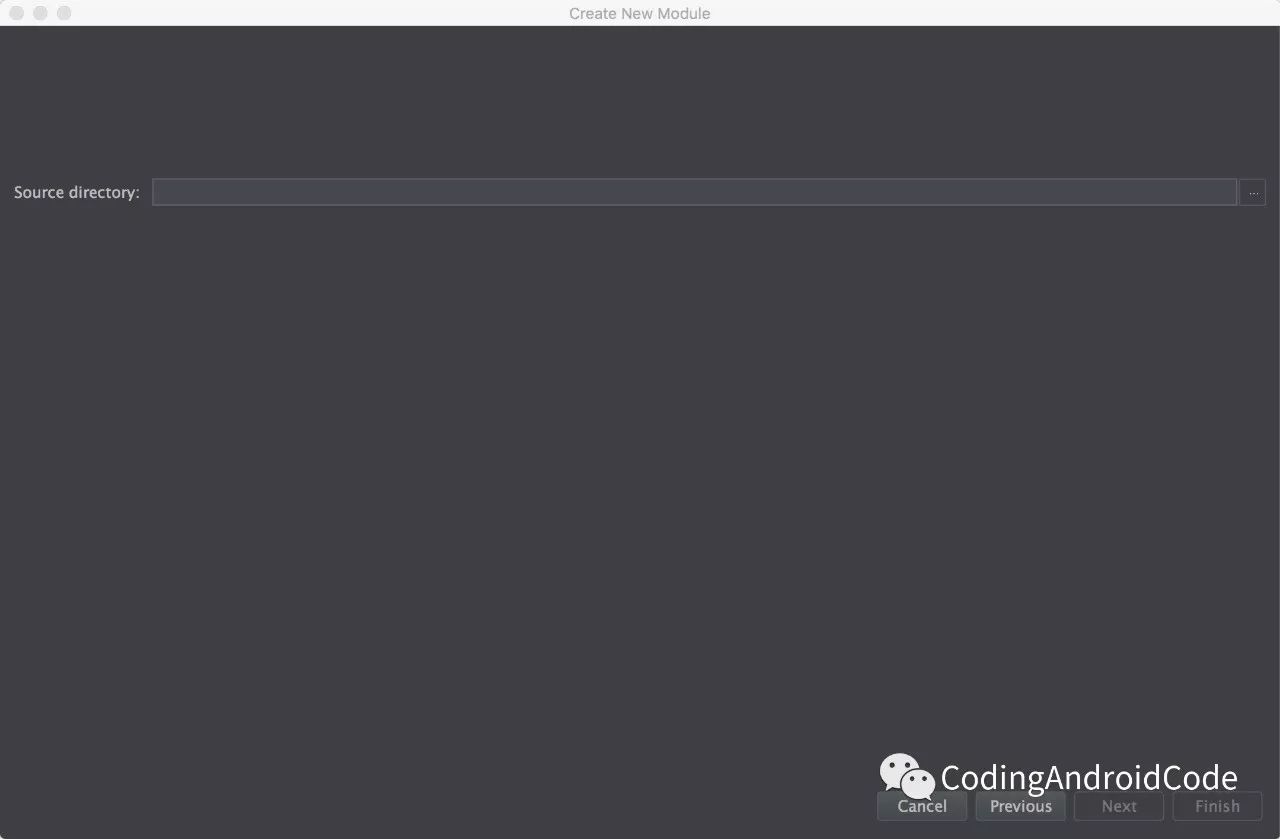
在上面页面选择OpenCV SDK的sdk/java路径,随后点击Finish,等待项目构建完成。
项目构建完成后,将新加入的OpenCV Module添加为当前项目Module的依赖Module,完成绑定关系,如下:
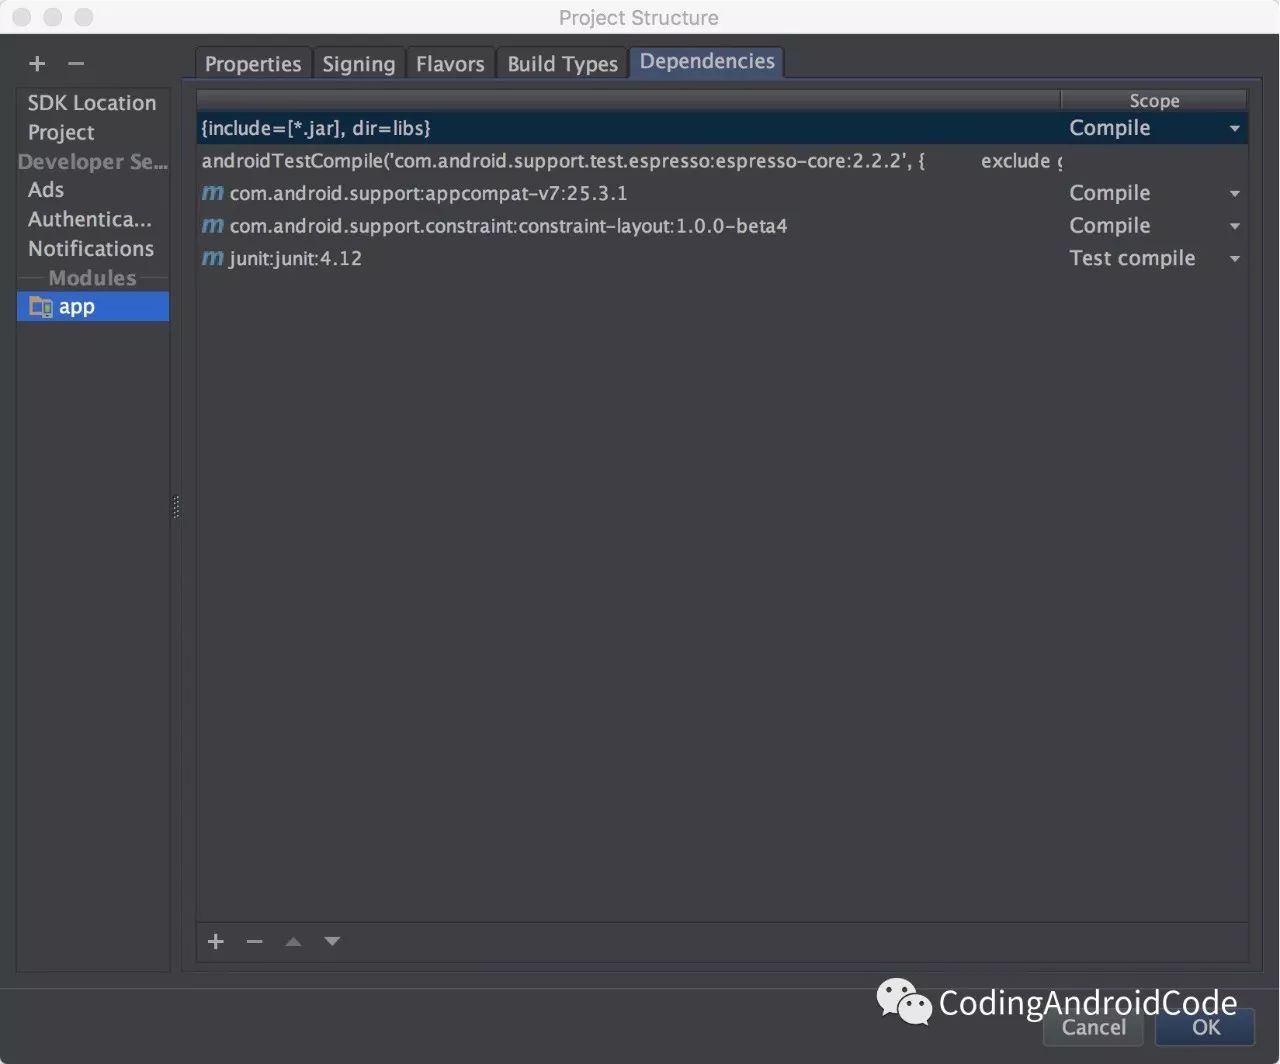
随后点击左下角加号,选择Module dependency
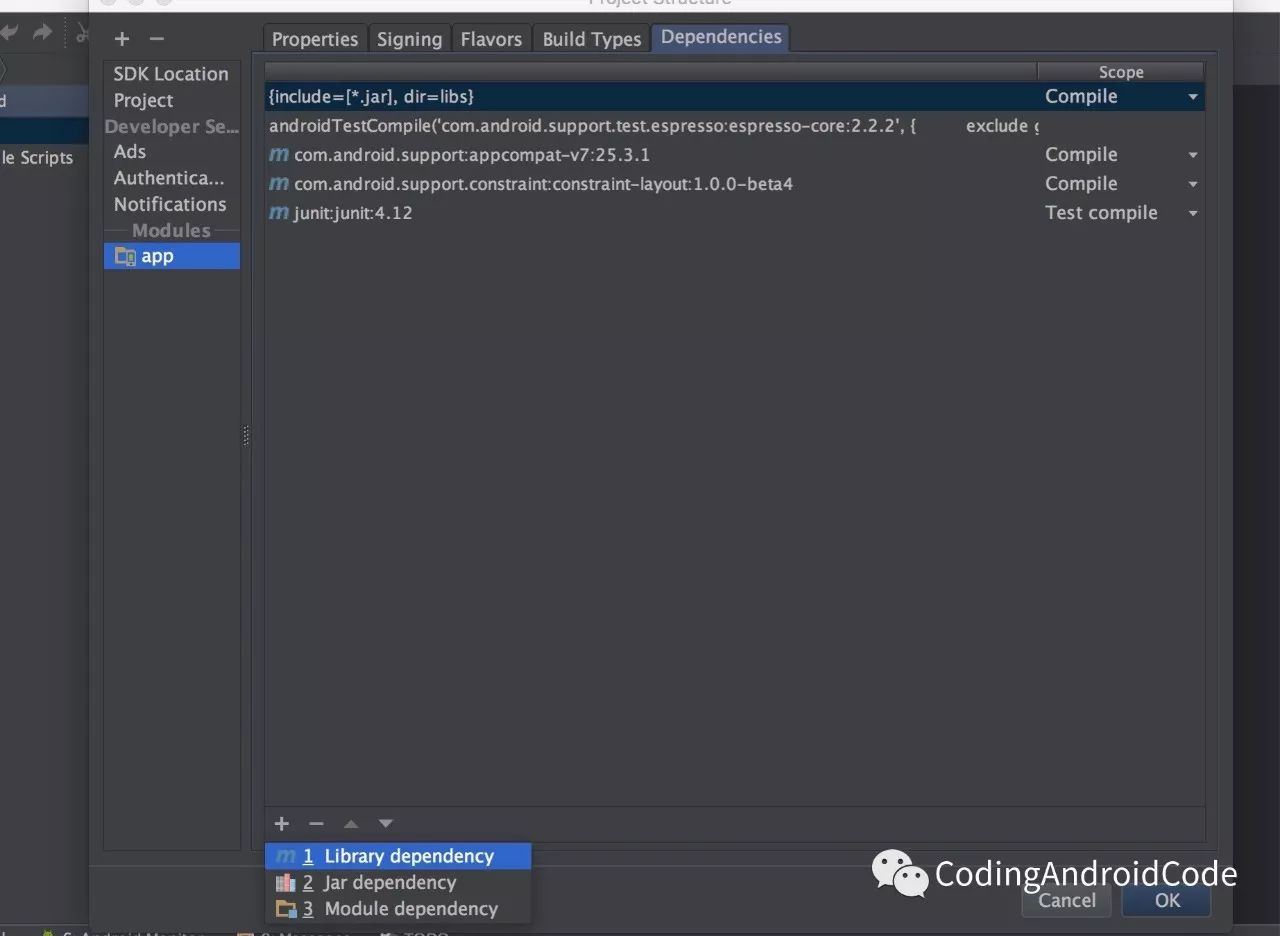

选择openCVLibrary点击确定,等待项目构建完成即可。以上步骤就完成了OpenCV Module的引入过程,如果不需要是用C++做OpenCV相关开发,到这里就可以畅游OpenCV海洋了。
添加OpenCV native支持
由于Android Studio2.2以后,NDK build推荐用cmake构建,所以我们这里来简单介绍下是用cmake构建OpenCV native开发环境的基本过程,除了上面引入OpenCV Module[**注意新建的项目要support c++**]外,我们还需要做如下操作:
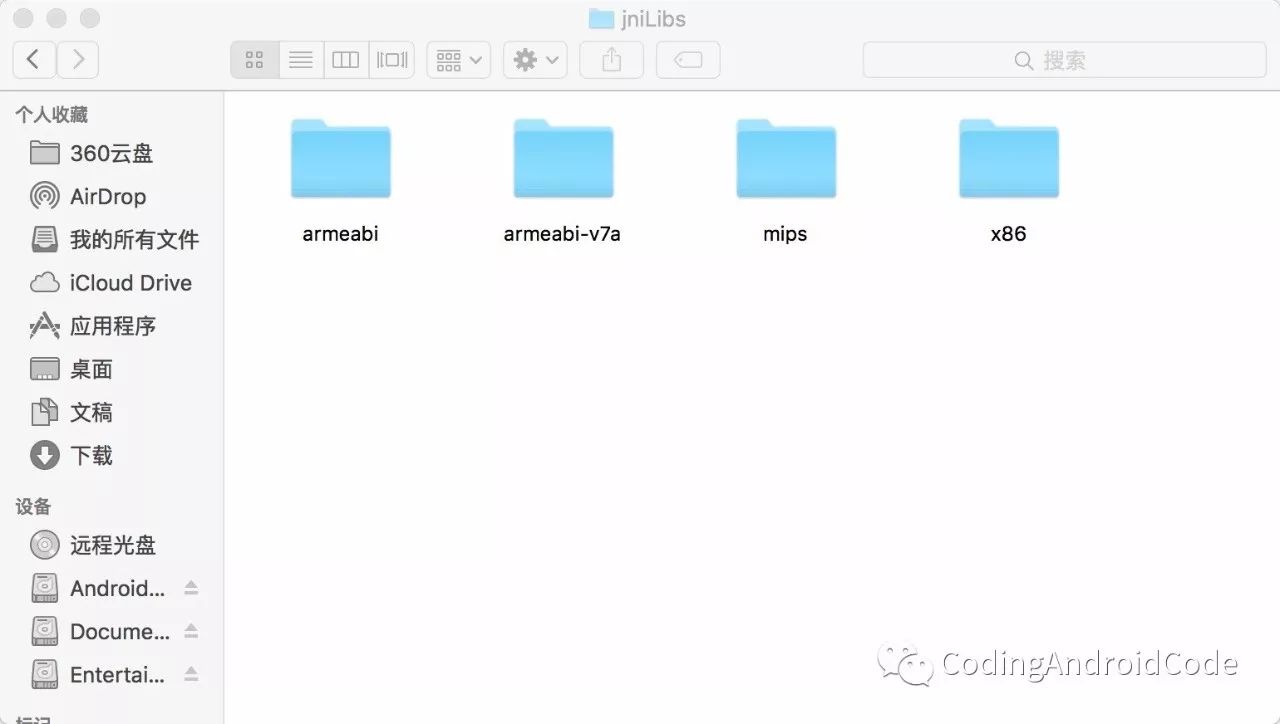
首先在app/src/main目录下创建jniLibs文件夹,并将sdk/native/libs下面的所有文件拷入:
随后修改build.gradle文件,添加如下内容:
sourceSets { main { jniLibs.srcDirs = ['src/main/jniLibs'] }} externalNativeBuild { cmake { cppFlags "-frtti -fexceptions" abiFilters 'x86', 'x86_64', 'armeabi', 'armeabi-v7a', 'arm64-v8a', 'mips', 'mips64' } }
随后修改cmakelists.txt如下:
# For more information about using CMake with Android Studio, read the# documentation: https://d.android.com/studio/projects/add-native-code.html# Sets the minimum version of CMake required to build the native library.cmake_minimum_required(VERSION 3.4.1)include_directories(/Volumes/Android_Code/OpenCVProject/OpenCV-android-sdk/sdk/native/jni/include)add_library( lib_opencv SHARED IMPORTED )set_target_properties(lib_opencv PROPERTIES IMPORTED_LOCATION ${CMAKE_CURRENT_SOURCE_DIR}/src/main/jniLibs/${ANDROID_ABI}/libopencv_java.so)# Creates and names a library, sets it as either STATIC# or SHARED, and provides the relative paths to its source code.# You can define multiple libraries, and CMake builds it for you.# Gradle automatically packages shared libraries with your APK.add_library( # Sets the name of the library. native-lib # Sets the library as a shared library. SHARED # Provides a relative path to your source file(s). # Associated headers in the same location as their source # file are automatically included. src/main/cpp/native-lib.cpp )# Searches for a specified prebuilt library and stores the path as a# variable. Because system libraries are included in the search path by# default, you only need to specify the name of the public NDK library# you want to add. CMake verifies that the library exists before# completing its build.find_library( # Sets the name of the path variable. log-lib # Specifies the name of the NDK library that # you want CMake to locate. log )# Specifies libraries CMake should link to your target library. You# can link multiple libraries, such as libraries you define in the# build script, prebuilt third-party libraries, or system libraries.target_link_libraries( # Specifies the target library. native-lib # OpenCV lib lib_opencv # Links the target library to the log library # included in the NDK. ${log-lib} )
修改后重新rebuild项目就好。
https://github.com/tuozhaobing/CsdnDemoCode/tree/master/OpenCV02
https://github.com/leadrien/opencv\_native\_androidstudio
由于MediaCodec系列第四篇还没准备好,所以先给大家推一篇OpenCV环境搭建的博,望见谅。

本文分享自微信公众号 - 小海编码日记(gh_1f87b8c00ede)。
如有侵权,请联系 support@oschina.cn 删除。
本文参与“OSC源创计划”,欢迎正在阅读的你也加入,一起分享。
评论
登录后参与技术讨论,分享你的经验与见解。
登录 / 注册暂无评论