Asp.net Core 3.1 Web API添加jwt验证(一):添加JwtToken控制API访问权限

文章目录
创建项目
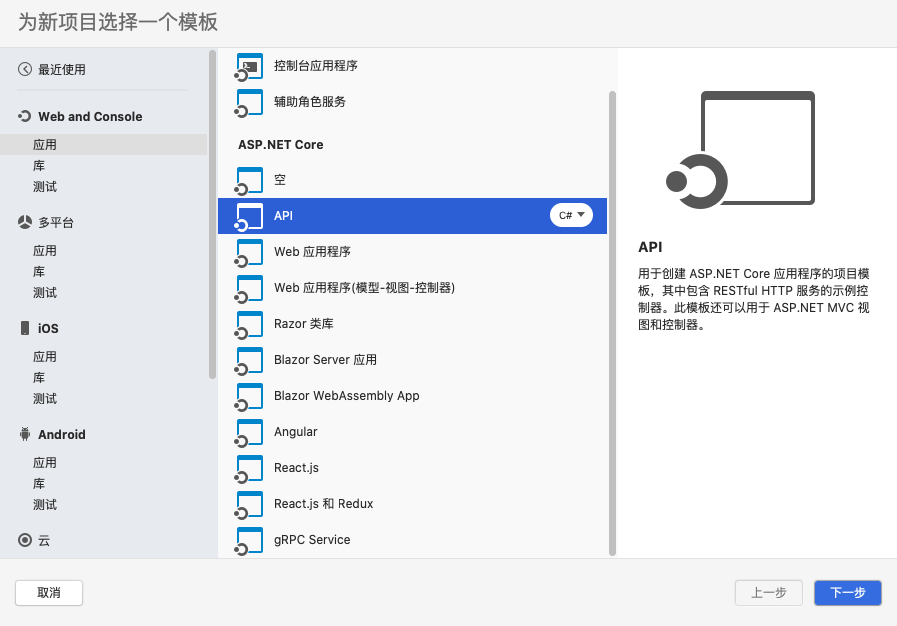
打开vs for mac,新建asp.net web api空项目
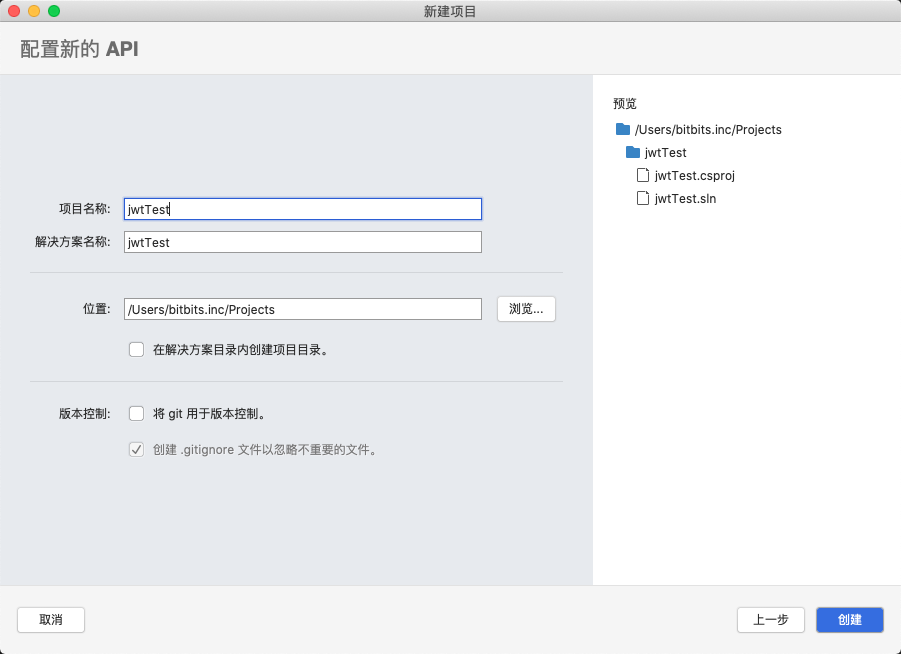
项目名称随便取,选择好存放位置,点创建
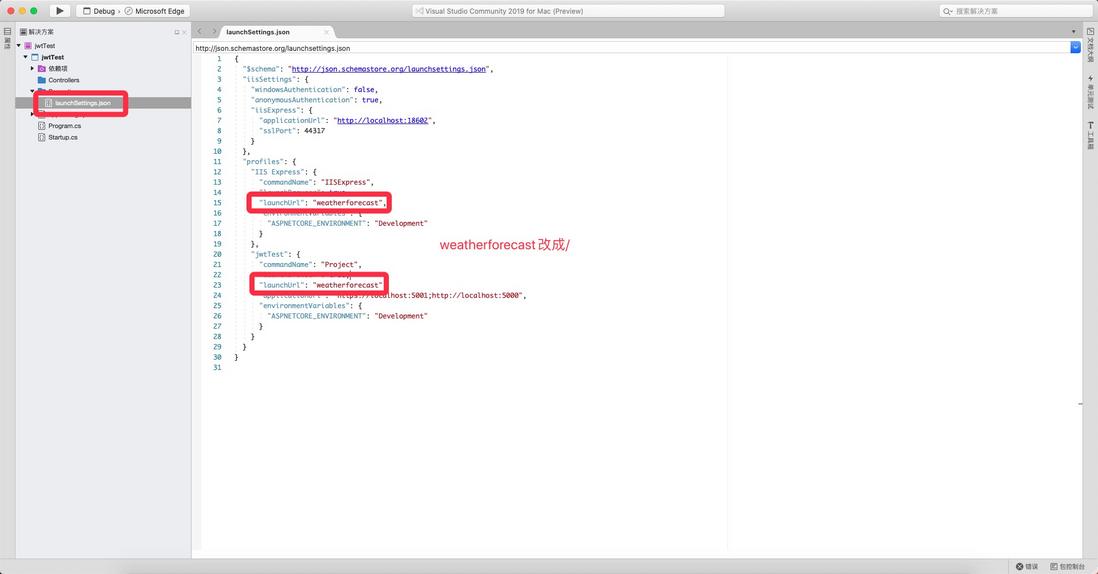
删除WeatherForecastController.cs以及WeatherForecast.cs

打开Properties/launchSettings.json,修改weatherforecast为/
添加依赖
打开Nuget包管理器,添加包 Microsoft.AspNetCore.Authentication.JwtBearer

添加配置
打开appsettings.json,添加token验证相关配置
{
  "Logging": {
    "LogLevel": {
      "Default": "Information",
      "Microsoft": "Warning",
      "Microsoft.Hosting.Lifetime": "Information"
    }
  },
  "AllowedHosts": "*",
  // 添加Authentication节点
  "Authentication": {
    "Issure": "Bitbits.Inc",
    "Audience": "LolipopClient",
    "SecurityKey": "4C6A8A8B-1B9F-12E7-60C4-123BC0BB5D25"
  }
}
注入Service
打开Startup.cs,修改ConfigureServices方法,添加service配置
public void ConfigureServices(IServiceCollection services)
{
    services.AddControllers();
    // 添加下面配置信息
    services.AddAuthentication(options =>
    {
        // 设置默认使用jwt验证方式
        options.DefaultAuthenticateScheme = JwtBearerDefaults.AuthenticationScheme;
        options.DefaultChallengeScheme = JwtBearerDefaults.AuthenticationScheme;
    }).AddJwtBearer(options =>
    {
        IConfigurationSection confSection = Configuration.GetSection("Authentication");
        options.TokenValidationParameters = new TokenValidationParameters()
        {
            // 验证接收者
            ValidateAudience = true,
            // 验证发布者
            ValidateIssuer = true,
            // 验证过期时间
            ValidateLifetime = true,
            // 验证秘钥
            ValidateIssuerSigningKey = true,
            // 读配置Issure
            ValidIssuer = confSection["Issure"],
            // 读配置Audience
            ValidAudience = confSection["Audience"],
            // 设置生成token的秘钥
            IssuerSigningKey = new SymmetricSecurityKey(Encoding.UTF8.GetBytes(confSection["SecurityKey"]))
        };
    });
}
接下来修改Configure方法,添加Authorization、Authentication中间件
public void Configure(IApplicationBuilder app, IWebHostEnvironment env)
{
    if (env.IsDevelopment())
    {
        app.UseDeveloperExceptionPage();
    }
    app.UseHttpsRedirection();
    app.UseRouting();
    // 注意,这里的Authentication必须在Authorization上面
    app.UseAuthentication();
    app.UseAuthorization();
    app.UseEndpoints(endpoints =>
    {
        endpoints.MapControllers();
    });
}
完整的Startup.cs如下:
using System;
using System.Collections.Generic;
using System.Linq;
using System.Text;
using System.Threading.Tasks;
using Microsoft.AspNetCore.Authentication.JwtBearer;
using Microsoft.AspNetCore.Builder;
using Microsoft.AspNetCore.Hosting;
using Microsoft.AspNetCore.HttpsPolicy;
using Microsoft.AspNetCore.Mvc;
using Microsoft.Extensions.Configuration;
using Microsoft.Extensions.DependencyInjection;
using Microsoft.Extensions.Hosting;
using Microsoft.Extensions.Logging;
using Microsoft.IdentityModel.Tokens;

namespace jwtTest
{
    public class Startup
    {
        public Startup(IConfiguration configuration)
        {
            Configuration = configuration;
        }

        public IConfiguration Configuration { get; }

        // This method gets called by the runtime. Use this method to add services to the container.
        public void ConfigureServices(IServiceCollection services)
        {
            services.AddControllers();
            services.AddAuthentication(options =>
            {
                // 设置默认使用jwt验证方式
                options.DefaultAuthenticateScheme = JwtBearerDefaults.AuthenticationScheme;
                options.DefaultChallengeScheme = JwtBearerDefaults.AuthenticationScheme;
            }).AddJwtBearer(options =>
            {
                IConfigurationSection confSection = Configuration.GetSection("Authentication");
                options.TokenValidationParameters = new TokenValidationParameters()
                {
                    // 验证接收者
                    ValidateAudience = true,
                    // 验证发布者
                    ValidateIssuer = true,
                    // 验证过期时间
                    ValidateLifetime = true,
                    // 验证秘钥
                    ValidateIssuerSigningKey = true,
                    // 读配置Issure
                    ValidIssuer = confSection["Issure"],
                    // 读配置Audience
                    ValidAudience = confSection["Audience"],
                    // 设置生成token的秘钥
                    IssuerSigningKey = new SymmetricSecurityKey(Encoding.UTF8.GetBytes(confSection["SecurityKey"]))
                };
            });
        }

        // This method gets called by the runtime. Use this method to configure the HTTP request pipeline.
        public void Configure(IApplicationBuilder app, IWebHostEnvironment env)
        {
            if (env.IsDevelopment())
            {
                app.UseDeveloperExceptionPage();
            }
            app.UseHttpsRedirection();
            app.UseRouting();
            // 注意,这里的Authentication必须在Authorization上面
            app.UseAuthentication();
            app.UseAuthorization();
            app.UseEndpoints(endpoints =>
            {
                endpoints.MapControllers();
            });
        }
    }
}
创建测试数据控制器
右键Controllers文件夹,新建类
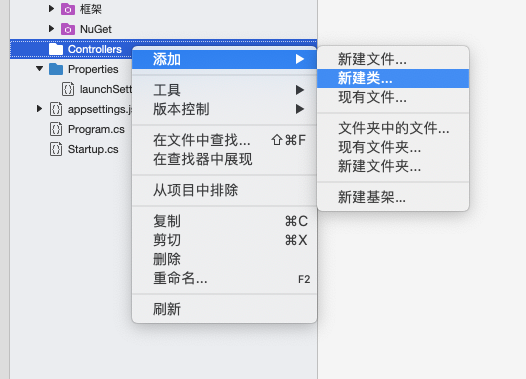
选择ASP.NET Core,Web API控制器类,修改控制器名称后点击新建

打开刚刚新建的控制器类,删除红框选中内容

引入Microsoft.AspNetCore.Authorization,顺便修改写路由模板(图中箭头所指)并在控制器类中标注如下属性

Ps:这里的Authorize属性跟AllowAnonymous属性可以标注在方法或者类上面
完整的ValuesController.cs代码如下:
using System;
using System.Collections.Generic;
using System.Linq;
using System.Threading.Tasks;
// 引入下面这个包
using Microsoft.AspNetCore.Authorization;
using Microsoft.AspNetCore.Mvc;

namespace jwtTest.Controllers
{
    [Route("api/[controller]")]
    // ApiController属性:框架自动注入参数校验、model类型推断等功能
    [ApiController]
    // Authorize属性:给控制器的所有动作加上权限验证,会跳过标注了AllowAnonymous的方法
    [Authorize]
    public class ValuesController : Controller
    {
        [HttpGet("noauth")]
        // AllowAnonymous属性:标注了AllowAnonymous的方法不需要权限验证
        [AllowAnonymous]
        public string Get()
        {
            return "这个方法不需要权限校验";
        }

        [HttpGet("auth")]
        public string Get2()
        {
            return "这个方法需要权限校验";
        }

    }
}
创建颁布JwtToken的控制器
新建AuthController

删除红框所示,并做上属性标注
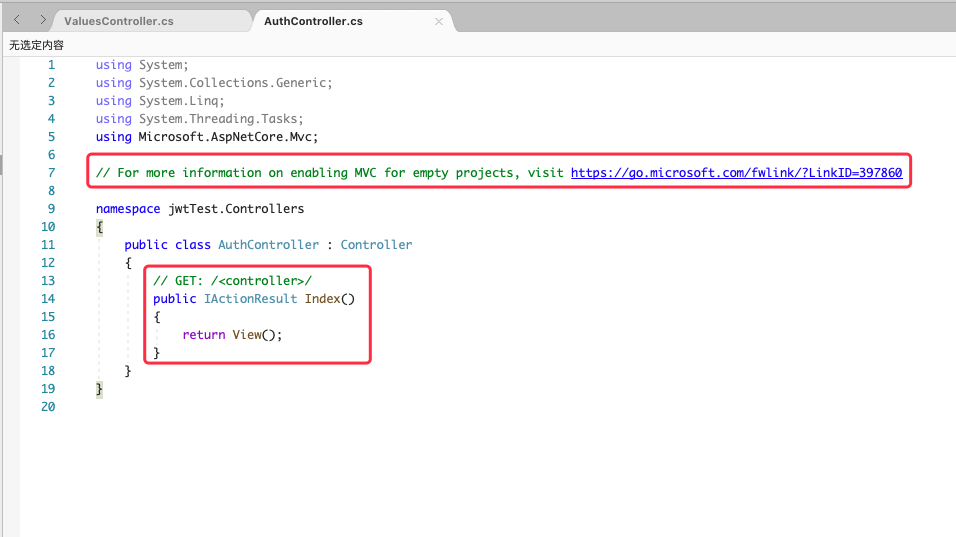
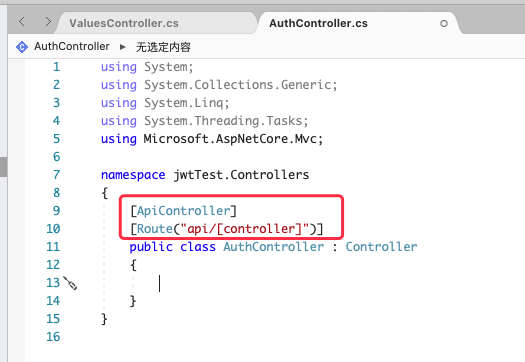
添加AuthController构造函数跟IConfiguration依赖注入,代码如下:
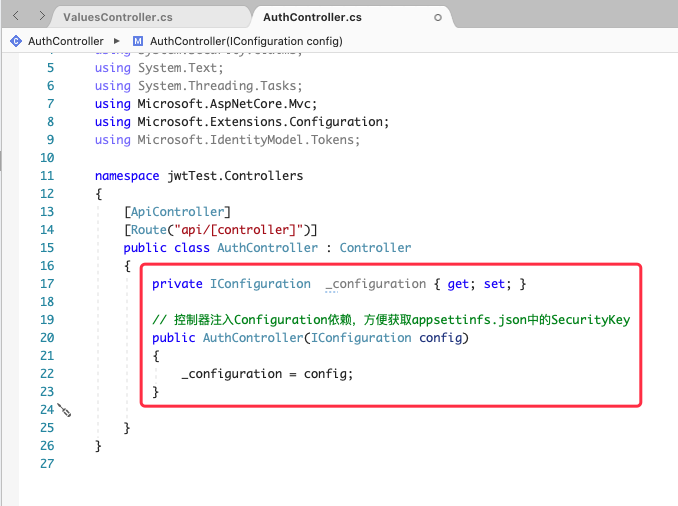
添加Login方法,代码如下:

完整的AuthController.cs代码如下:
using System;
using System.Collections.Generic;
using System.IdentityModel.Tokens.Jwt;
using System.Linq;
using System.Security.Claims;
using System.Text;
using System.Threading.Tasks;
using Microsoft.AspNetCore.Mvc;
using Microsoft.Extensions.Configuration;
using Microsoft.IdentityModel.Tokens;

namespace jwtTest.Controllers
{
    [ApiController]
    [Route("api/[controller]")]
    public class AuthController : Controller
    {
        private IConfiguration  _configuration { get; set; }

        // 控制器注入Configuration依赖,方便获取appsettinfs.json中的SecurityKey
        public AuthController(IConfiguration config)
        {
            _configuration = config;
        }

        [HttpGet("login")]
        public ActionResult Login(string username, string password)
        {
            if (!string.IsNullOrEmpty(username) && !string.IsNullOrEmpty(password))
            {
                // token中的claims用于储存自定义信息,如登录之后的用户id等
                var claims = new[]
                {
                    new Claim("userId", username)
                };
                // 获取SecurityKey
                var key = new SymmetricSecurityKey(Encoding.UTF8.GetBytes(_configuration.GetSection("Authentication")["SecurityKey"]));
                var token = new JwtSecurityToken(
                    issuer: _configuration.GetSection("Authentication")["Issure"],                    // 发布者
                    audience: _configuration.GetSection("Authentication")["Audience"],                // 接收者
                    notBefore: DateTime.Now,                                                          // token签发时间
                    expires: DateTime.Now.AddMinutes(30),                                             // token过期时间
                    claims: claims,                                                                   // 该token内存储的自定义字段信息
                    signingCredentials: new SigningCredentials(key, SecurityAlgorithms.HmacSha256)    // 用于签发token的秘钥算法
                );
                // 返回成功信息,写出token
                return Ok(new { code = 200, message = "登录成功", data = new JwtSecurityTokenHandler().WriteToken(token) });
            }
            // 返回错误请求信息
            return BadRequest(new { code = 400, message = "登录失败,用户名或密码为空" });
        }
    }
}
测试Token颁发功能
打开Postman,创建一个新的页面

在地址栏跟下面的请求表单处添加好相关参数

点击蓝色的Send按钮,底下会显示返回值
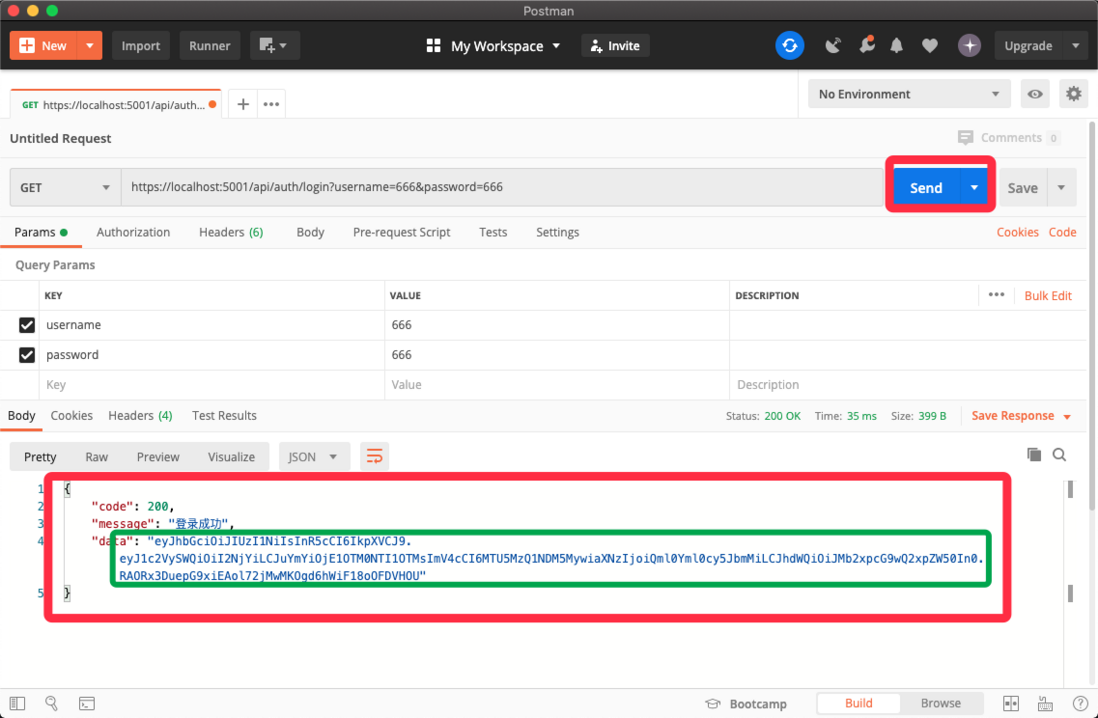
绿色框中显示的就是我们需要的token
测试API权限认证
新建一个Postman测试页面,填写好参数

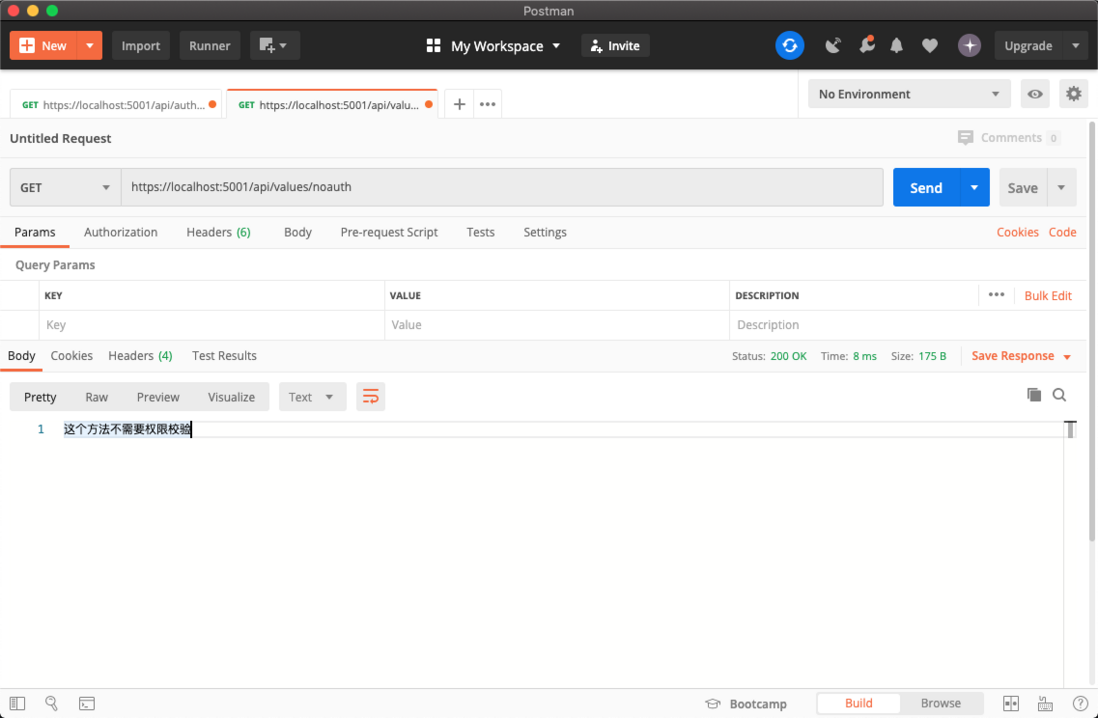
先测试不需要权限认证的请求,结果如下:
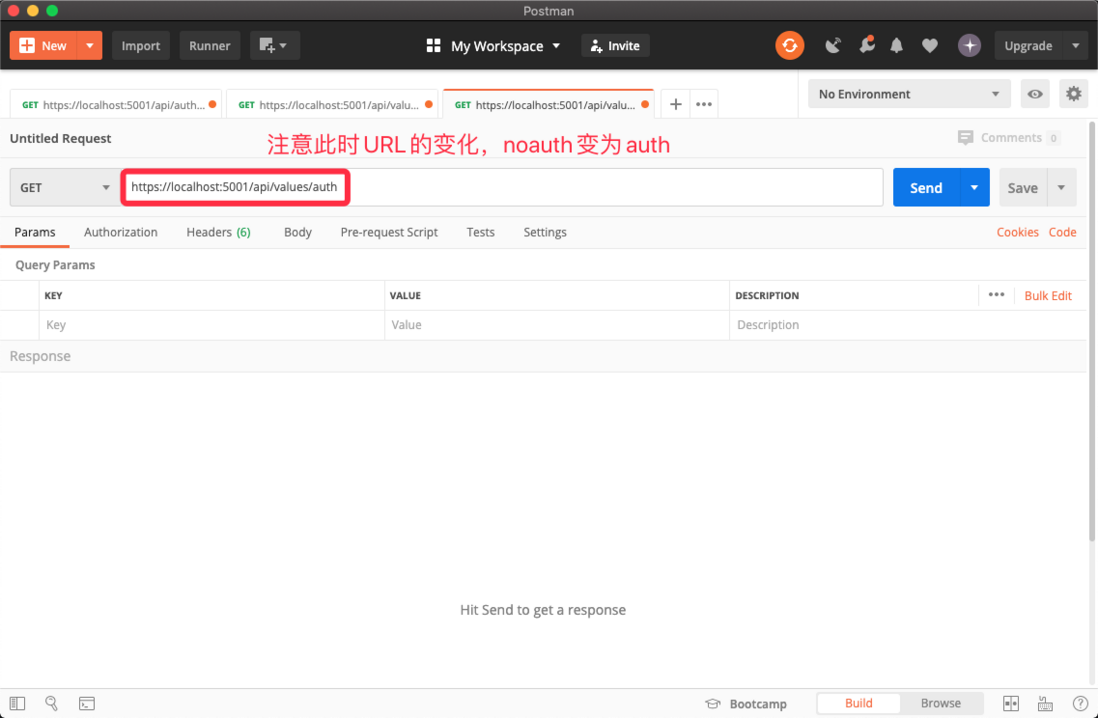
接下来测试需要权限认证的请求,先不添加认证header
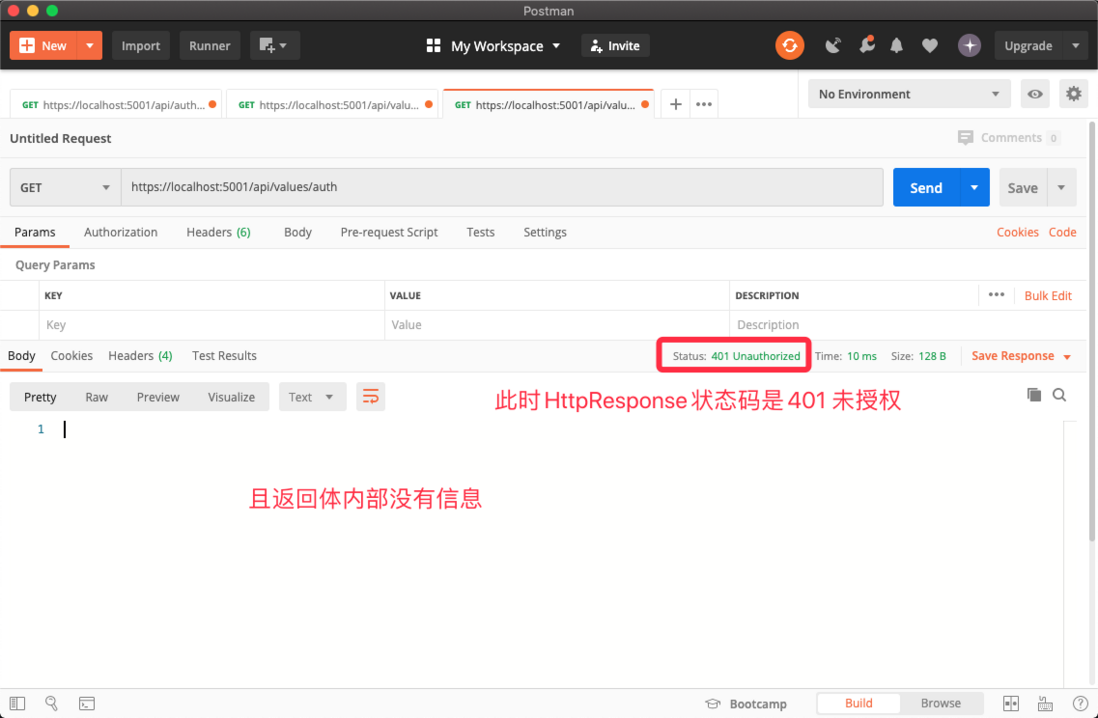
发送之后,获取返回值
接下来添加认证header,并再次发送请求

请求成功,返回了对应的请求体

至此,已经成功添加jwt权限控制
评论
登录后参与技术讨论,分享你的经验与见解。
登录 / 注册暂无评论