Android侧滑菜单(DrawerLayout)的学习

文章目录
侧滑菜单的简单使用;DrawerLayout android提供的侧滑菜单,能够实现 目录推出,就是大家常见的效果,效果图如下;
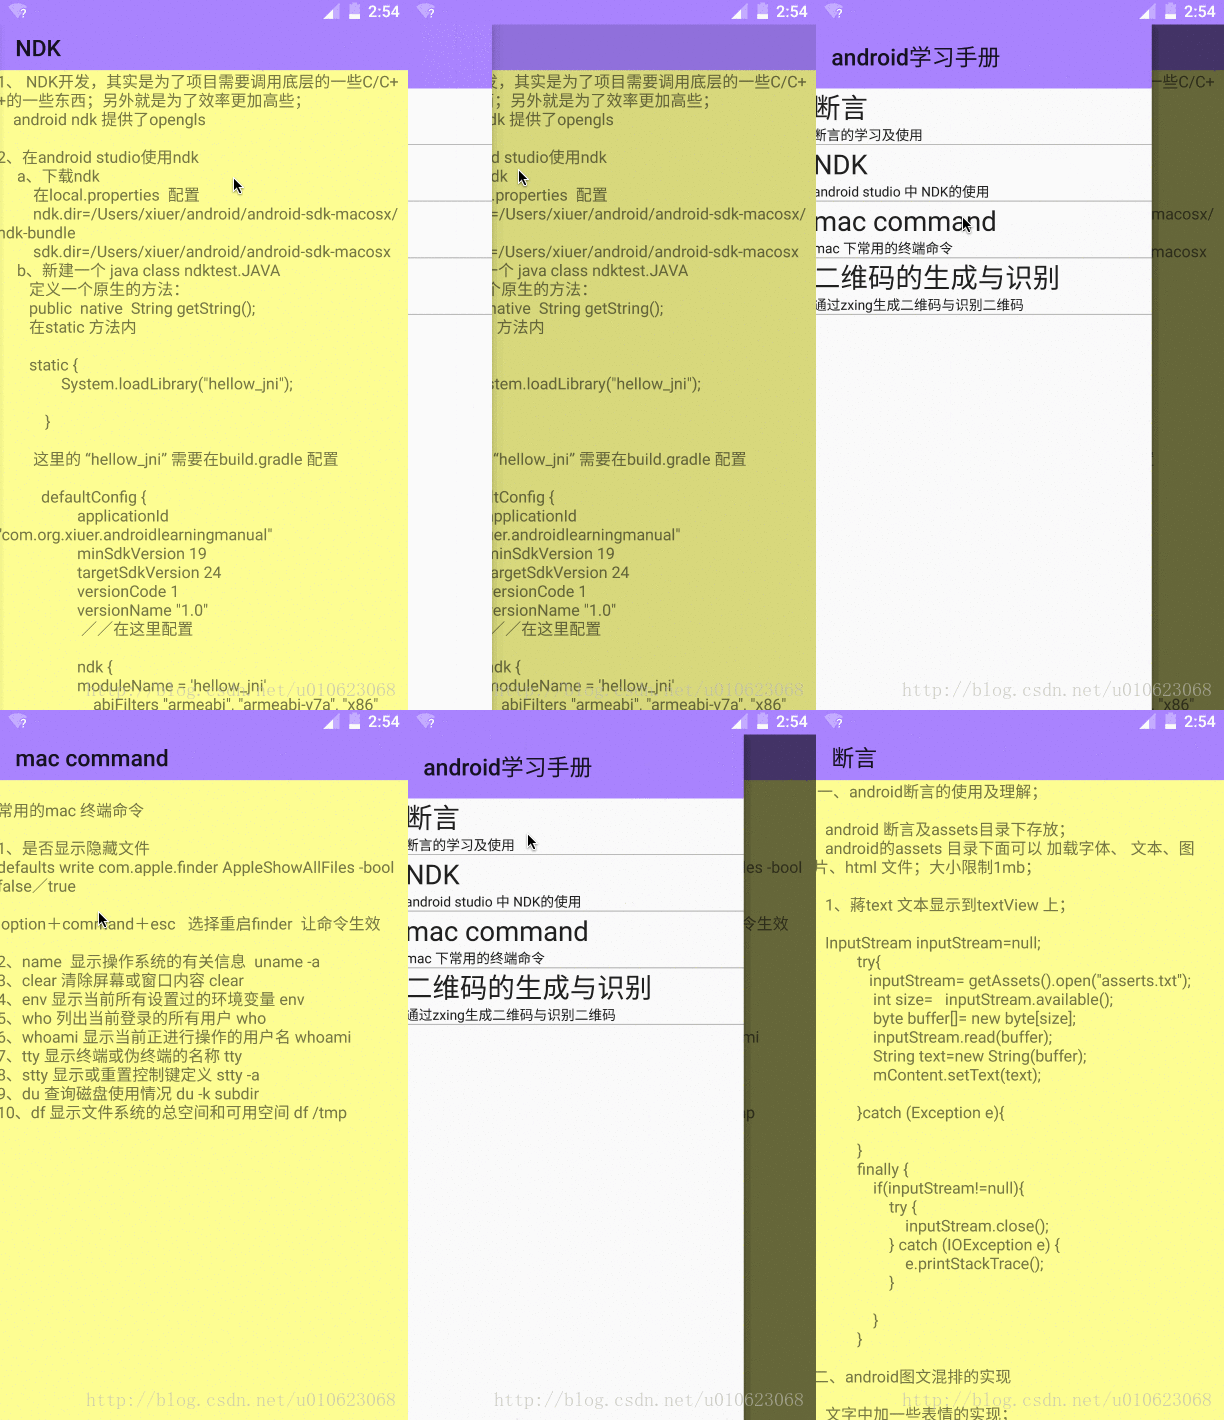
DrawerLayout 的使用非常简单;只要你提供布局就好;
一个左边的布局,一个显示内容的布局;
布局文件 代码如下所示
<android.support.v4.widget.DrawerLayout
xmlns:android="http://schemas.android.com/apk/res/android"
android:id="@+id/drawer_layout"
android:layout_width="match_parent"
android:layout_height="match_parent">

//左边
<include layout="@layout/activity_content"/>
//内容
<include layout="@layout/activity_left_content"/>

</android.support.v4.widget.DrawerLayout>
java 代码 控制; DrawerLayout 已经封装好了手势滑动,如果想要隐藏左边的目录,通过
mDrawerLayout.closeDrawer(mLView);
即可 手动隐藏;
DrawerLayout的使用就是这么简单;接下来我稍微说一下我写的这个例子
1、界面
左边导航布局
<?xml version="1.0" encoding="utf-8"?>
<LinearLayout xmlns:android="http://schemas.android.com/apk/res/android"
    android:orientation="vertical"
    android:layout_width="match_parent"
    android:layout_height="match_parent"
    android:layout_gravity="start"
    android:background="#FBFBFB"
    android:id="@+id/left_view"

    >
    <android.support.v7.widget.Toolbar
        android:layout_width="match_parent"
        android:layout_height="wrap_content"
        android:id="@+id/left_tool"
        android:background="#AA88FF"

        >

    </android.support.v7.widget.Toolbar>

    <android.support.v7.widget.RecyclerView
        android:id="@+id/left_recyclerView"
        android:layout_width="match_parent"
        android:layout_height="match_parent"
        >


    </android.support.v7.widget.RecyclerView>

</LinearLayout>
内容布局
<?xml version="1.0" encoding="utf-8"?>
<LinearLayout xmlns:android="http://schemas.android.com/apk/res/android" android:orientation="vertical" android:layout_width="match_parent" android:layout_height="match_parent" android:background="#FFFF99" >
    <android.support.v7.widget.Toolbar  android:id="@+id/center_content_tool" android:layout_width="match_parent" android:layout_height="40dp" android:background="@color/colorLilac" android:title="断言" >

    </android.support.v7.widget.Toolbar>
    <FrameLayout  android:id="@+id/center_content_frame" android:layout_width="match_parent" android:layout_height="match_parent"></FrameLayout>

</LinearLayout>
2、主要代码
/** * 根据向导加载内容,默认为第一个 * @param position */
     public void  loadCenterContent(int position){
         String title=guides.get(position).getmTitle();
         mCenterTool.setTitle(title);
         String content=readStringFromAssert(guides.get(position).getGuideName());
         Content_Fragment fragment=Content_Fragment.newInstance(title,content);
         getFragmentManager().beginTransaction().replace(R.id.center_content_frame,
                 fragment).commit();

         mDrawerLayout.closeDrawer(mLView);}

protected  void initUIData(){
        mLeftToolbar.setTitle("android学习手册");
        //默认加载第一项
        loadCenterContent(0);

        RecyclerView.LayoutManager manager=new LinearLayoutManager(this);
        mLeftView.setLayoutManager(manager);
        mLeftView.setAdapter(new LeftAdapter(guides, new ItemClickListener() {
            @Override
            public void onItemClick(View view, int position) {
                //当前选个哪个就加载其内容
                loadCenterContent(position);
            }
            @Override
            public void onLongItemClick(View view, int position) {
                Log.i(TAG, "onLongItemClick: ");
            }
        }));


    }

 /** * 初始化目录列表内容 */
    protected  void initList(){
        guides.add(new Guide("断言","断言的学习及使用","asserts.txt"));
        guides.add(new Guide("NDK","android studio 中 NDK的使用","ndk study.txt"));
        guides.add(new Guide("mac command","mac 下常用的终端命令","command"));
        guides.add(new Guide("二维码的生成与识别","通过zxing生成二维码与识别二维码","zxing"));


    }
评论
登录后参与技术讨论,分享你的经验与见解。
登录 / 注册暂无评论