SpringSecurityOAuth2(8) swagger2 集成OAuth2

Easter79
• 阅读 631

GitHub地址

码云地址

swagger是一款优雅的接口api展示工具,在这里我们具体不展开讲解,有兴趣的自行百度。 该篇文章主要讲解的是如何集成OAuth2的验证即在请求中添加token,验证接口是否具有权限。

方式一:在每个请求上加一个Authorization 窗口自己手动输入token:

/**
 * @Description Swagger api 配置
 * @Author wwz
 * @Date 2019/08/05
 */
@Configuration
@EnableSwagger2
public class SwaggerConfig2 {

    @Value("${swagger.is.enable}")
    private boolean SWAGGER_IS_ENABLE; //是否激活开关,在application.yml中配置注入

    @Bean
    public Docket docket() {
        //添加head参数配置start
        ParameterBuilder tokenPar = new ParameterBuilder();
        List<Parameter> pars = new ArrayList<>();
        tokenPar.name("Authorization").description("令牌").modelRef(new ModelRef("string")).parameterType("header").required(false).build();
        pars.add(tokenPar.build());
        return new Docket(DocumentationType.SWAGGER_2)
                .enable(SWAGGER_IS_ENABLE)
                .apiInfo(apiInfo())
                .select()
                .apis(RequestHandlerSelectors.basePackage("com.wwz.frame.controller"))
                .paths(PathSelectors.any())
                .build()
                .globalOperationParameters(pars);//注意这里;
    }

    private ApiInfo apiInfo() {
        return new ApiInfoBuilder()
                // 页面标题
                .title("OAuth2权限管理API文档")
                .contact(new Contact("wwz", "", "wwzwtf@qq.com"))
                .description("OAuth2维护文档")
                .version("1.0")
                .extensions(Collections.emptyList())
                .build();
    }
}

效果截图:
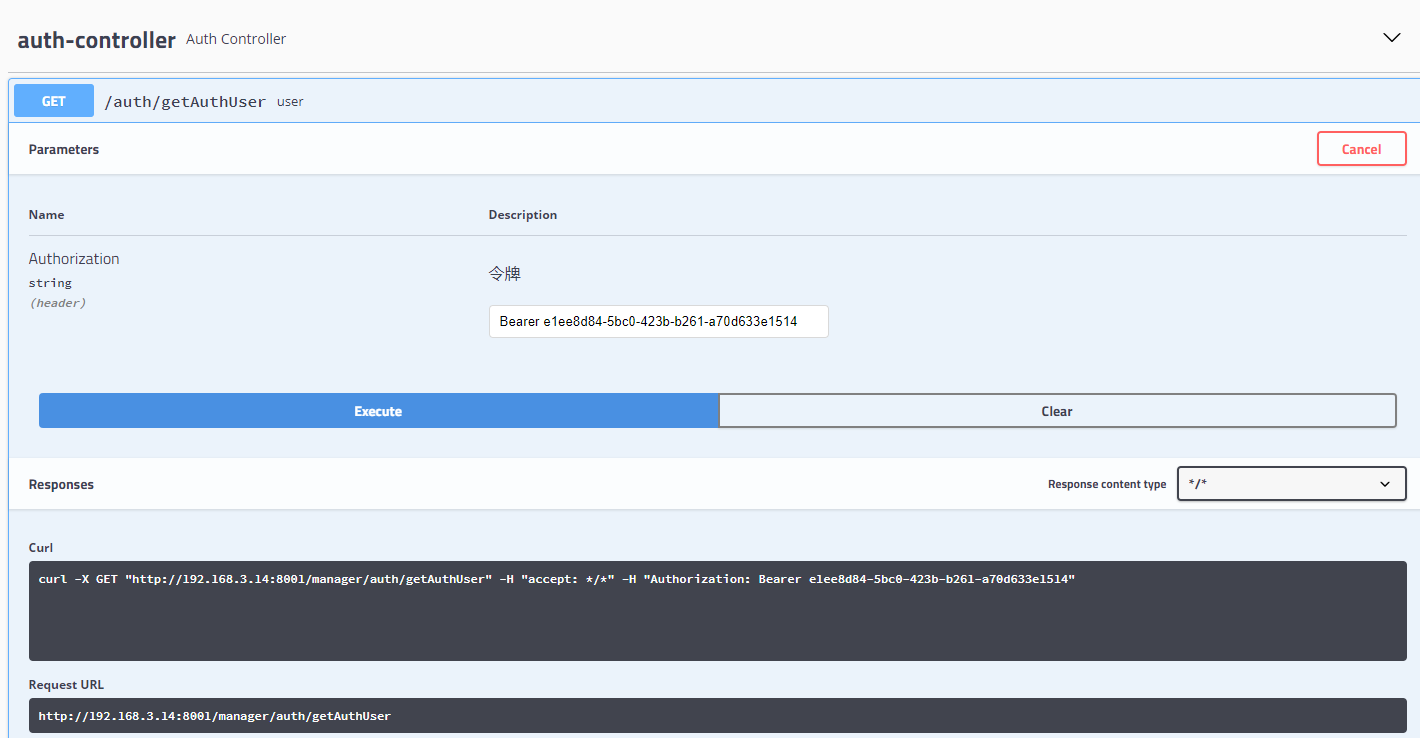
SpringSecurityOAuth2(8) swagger2 集成OAuth2

方式二:配置application.yml文件 设置好token登录的地址,是否启用swagger,新建配置文件

/**
 * @Description Swagger api 配置  模式二:增加登录
 * @Author wwz
 * @Date 2019/08/05
 */
@Configuration
@EnableSwagger2
public class SwaggerConfig {


    @Value("${swagger.is.enable}")
    private boolean SWAGGER_IS_ENABLE; //是否激活开关,在application.yml中配置注入
    @Value("${swagger.auth.server}")
    private String AUTH_SERVER;
    @Value("${swagger.service.name}")
    private String SERVICE_NAME;
    @Bean
    public Docket docket() {
        return new Docket(DocumentationType.SWAGGER_2)
                .enable(SWAGGER_IS_ENABLE)
                .apiInfo(apiInfo())
                .select()
                .apis(RequestHandlerSelectors.basePackage("com.wwz.frame.controller"))
                .paths(PathSelectors.any())
                .build()
//                .pathMapping(SERVICE_NAME)
                .securitySchemes(Collections.singletonList(securityScheme()))
                .securityContexts(Collections.singletonList(securityContext()));
    }

    private ApiInfo apiInfo() {
        return new ApiInfoBuilder()
                // 页面标题
                .title("OAuth2权限管理API文档")
                .contact(new Contact("wwz", "", "wwzwtf@qq.com"))
                .description("OAuth2维护文档")
                .version("1.0")
                .extensions(Collections.emptyList())
                .build();
    }

    /**
     * 这个类决定了你使用哪种认证方式,我这里使用密码模式
     */
    private SecurityScheme securityScheme() {
        GrantType grantType = new ResourceOwnerPasswordCredentialsGrant(AUTH_SERVER);

        return new OAuthBuilder()
                .name("OAuth2")
                .grantTypes(Collections.singletonList(grantType))
                .scopes(Arrays.asList(scopes()))
                .build();
    }

    /**
     * 这里设置 swagger2 认证的安全上下文
     */
    private SecurityContext securityContext() {
        return SecurityContext.builder()
                .securityReferences(Collections.singletonList(new SecurityReference("OAuth2", scopes())))
                .forPaths(PathSelectors.any())
                .build();
    }

    /**
     * 这里是写允许认证的scope
     */
    private AuthorizationScope[] scopes() {
        return new AuthorizationScope[]{
        };
    }
}

在MySecurityResourceServerConfig 放行swagger相关。

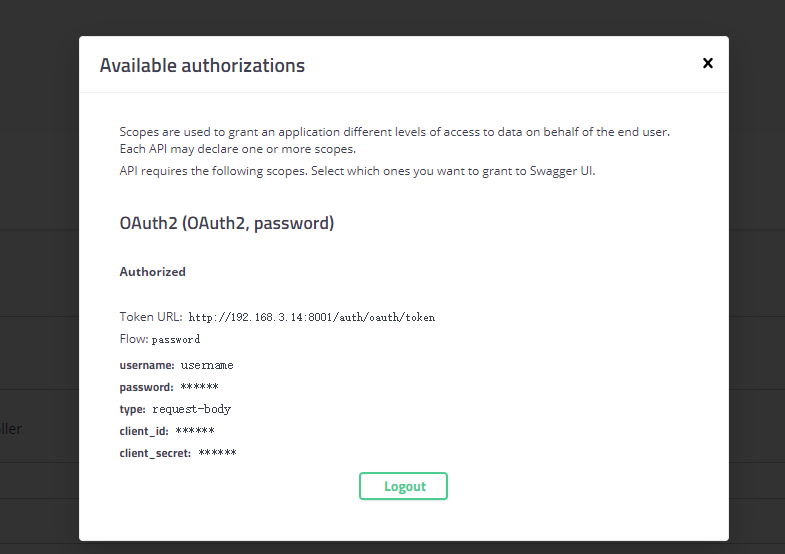
界面截图:
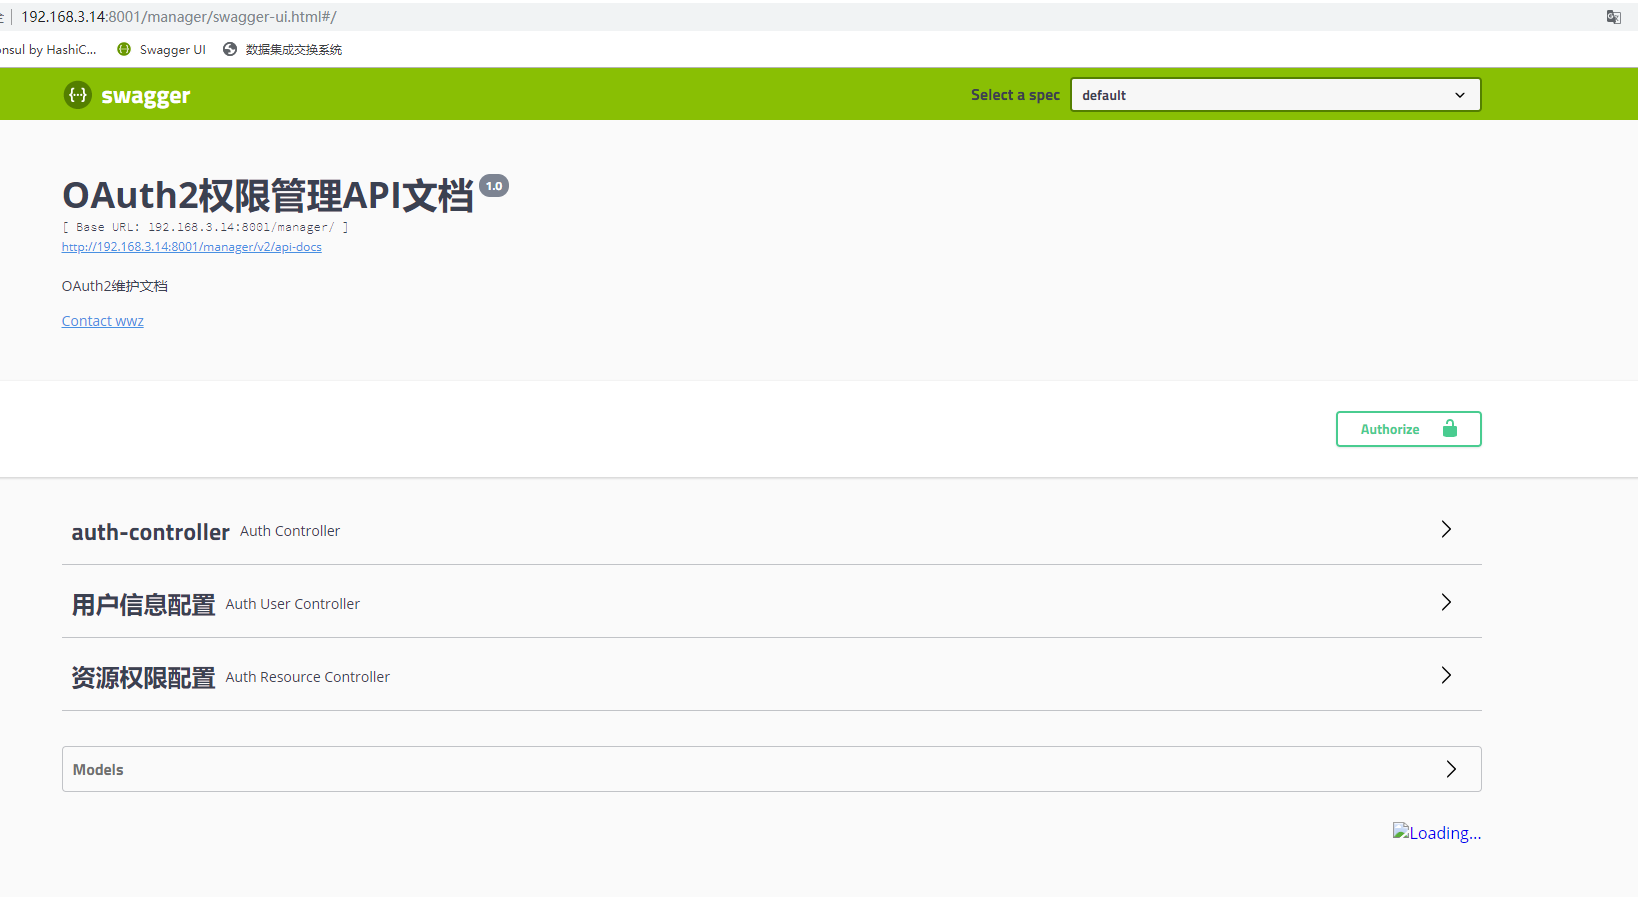
SpringSecurityOAuth2(8) swagger2 集成OAuth2

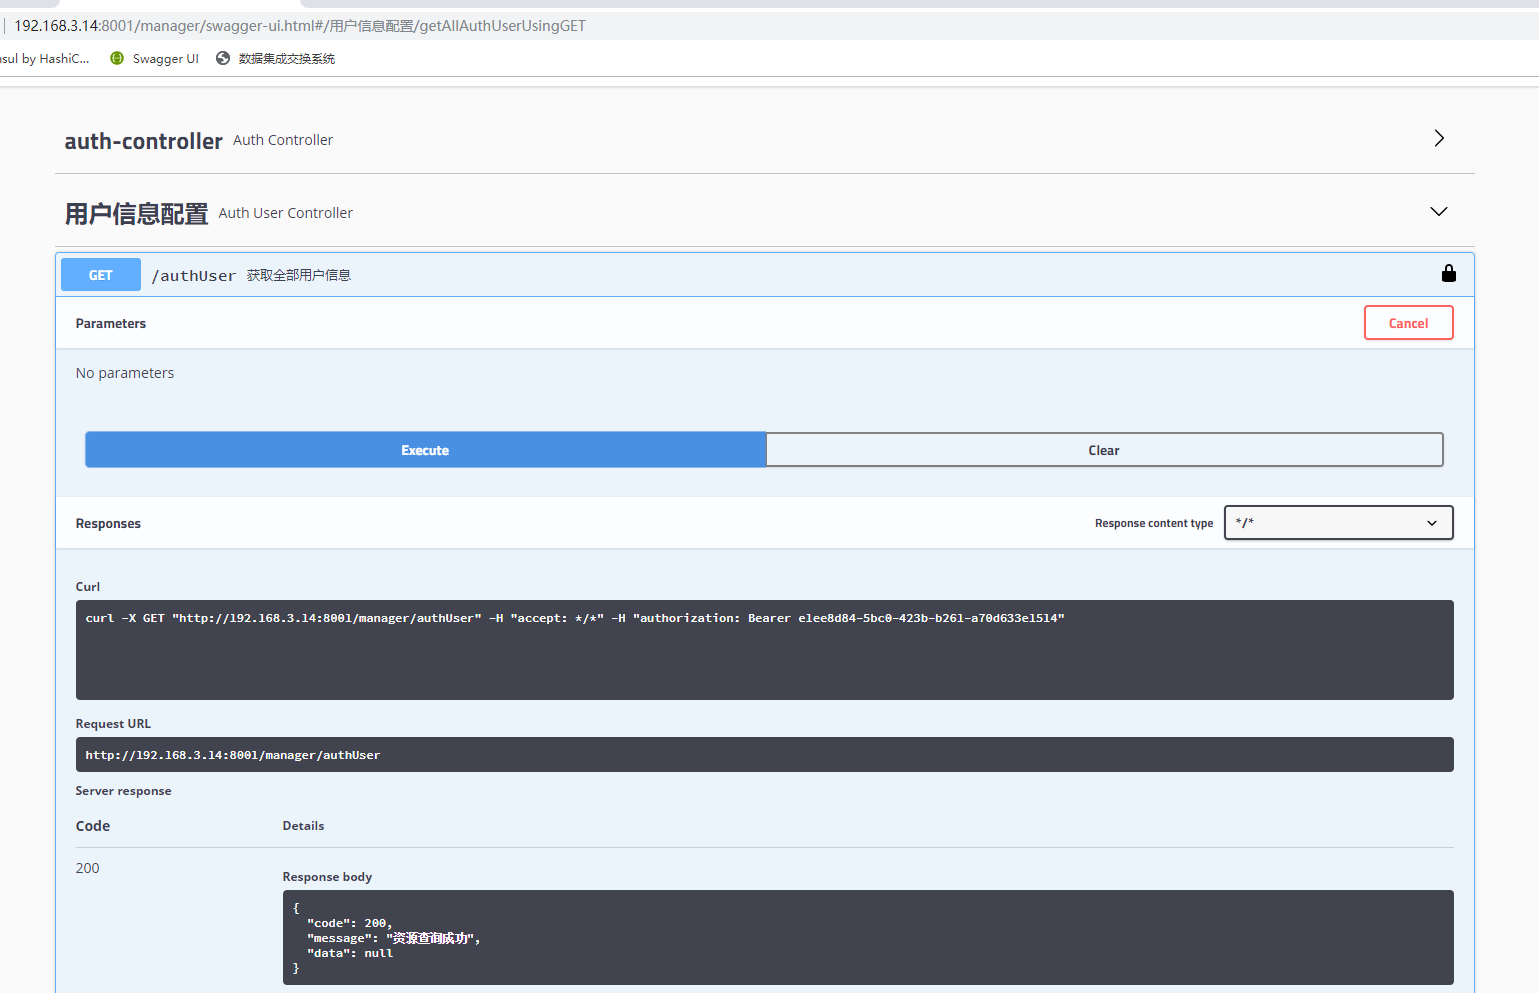
登录截图:

SpringSecurityOAuth2(8) swagger2 集成OAuth2

测试:

SpringSecurityOAuth2(8) swagger2 集成OAuth2

swagger 整合OAuth2完成。

点赞
收藏
评论区
推荐文章
blmius blmius
2年前
MySQL:[Err] 1292 - Incorrect datetime value: ‘0000-00-00 00:00:00‘ for column ‘CREATE_TIME‘ at row 1
文章目录问题用navicat导入数据时,报错:原因这是因为当前的MySQL不支持datetime为0的情况。解决修改sql\mode:sql\mode:SQLMode定义了MySQL应支持的SQL语法、数据校验等,这样可以更容易地在不同的环境中使用MySQL。全局s
Easter79 Easter79
2年前
SpringSecurityOAuth2(9) feign 微服务间调用 token验证
GitHub地址(https://www.oschina.net/action/GoToLink?urlhttps%3A%2F%2Fgithub.com%2Fweizongwu%2FSpringCloudOAuth2SpringSecurityFrame.git"项目地址")码云地址(https://gitee.com/wujishu/
Easter79 Easter79
2年前
SpringSecurityOAuth2(5)自定义登录登出
GitHub地址(https://www.oschina.net/action/GoToLink?urlhttps%3A%2F%2Fgithub.com%2Fweizongwu%2FSpringCloudOAuth2SpringSecurityFrame.git"项目地址")码云地址(https://gitee.com/wujishu/
Easter79 Easter79
2年前
SpringSecurityOAuth2(3)自定义token信息
GitHub地址(https://www.oschina.net/action/GoToLink?urlhttps%3A%2F%2Fgithub.com%2Fweizongwu%2FSpringCloudOAuth2SpringSecurityFrame.git"项目地址")码云地址(https://gitee.com/wujishu/
Easter79 Easter79
2年前
SpringSecurityOAuth2(6) 登录增加验证码功能
GitHub地址(https://www.oschina.net/action/GoToLink?urlhttps%3A%2F%2Fgithub.com%2Fweizongwu%2FSpringCloudOAuth2SpringSecurityFrame.git"项目地址")码云地址(https://gitee.com/wujishu/
Easter79 Easter79
2年前
SpringSecurityOAuth2(4)根据请求URI动态权限判断
GitHub地址(https://www.oschina.net/action/GoToLink?urlhttps%3A%2F%2Fgithub.com%2Fweizongwu%2FSpringCloudOAuth2SpringSecurityFrame.git"项目地址")码云地址(https://gitee.com/wujishu/
Easter79 Easter79
2年前
SpringSecurityOAuth2(4)根据请求URI动态权限判断(补)
GitHub地址(https://www.oschina.net/action/GoToLink?urlhttps%3A%2F%2Fgithub.com%2Fweizongwu%2FSpringCloudOAuth2SpringSecurityFrame.git"项目地址")码云地址(https://gitee.com/wujishu/
Easter79 Easter79
2年前
SpringSecurityOAuth2(7) 账号密码登录、手机验证码登录
GitHub地址(https://www.oschina.net/action/GoToLink?urlhttps%3A%2F%2Fgithub.com%2Fweizongwu%2FSpringCloudOAuth2SpringSecurityFrame.git"项目地址")码云地址(https://gitee.com/wujishu/
Wesley13 Wesley13
2年前
MySQL部分从库上面因为大量的临时表tmp_table造成慢查询
背景描述Time:20190124T00:08:14.70572408:00User@Host:@Id:Schema:sentrymetaLast_errno:0Killed:0Query_time:0.315758Lock_
Python进阶者 Python进阶者
3个月前
Excel中这日期老是出来00:00:00,怎么用Pandas把这个去除
大家好,我是皮皮。一、前言前几天在Python白银交流群【上海新年人】问了一个Pandas数据筛选的问题。问题如下:这日期老是出来00:00:00,怎么把这个去除。二、实现过程后来【论草莓如何成为冻干莓】给了一个思路和代码如下:pd.toexcel之前把这
Easter79
Easter79
Lv1
今生可爱与温柔,每一样都不能少。
文章
2.8k
粉丝
5
获赞
1.2k