一、获取网址,解析网址
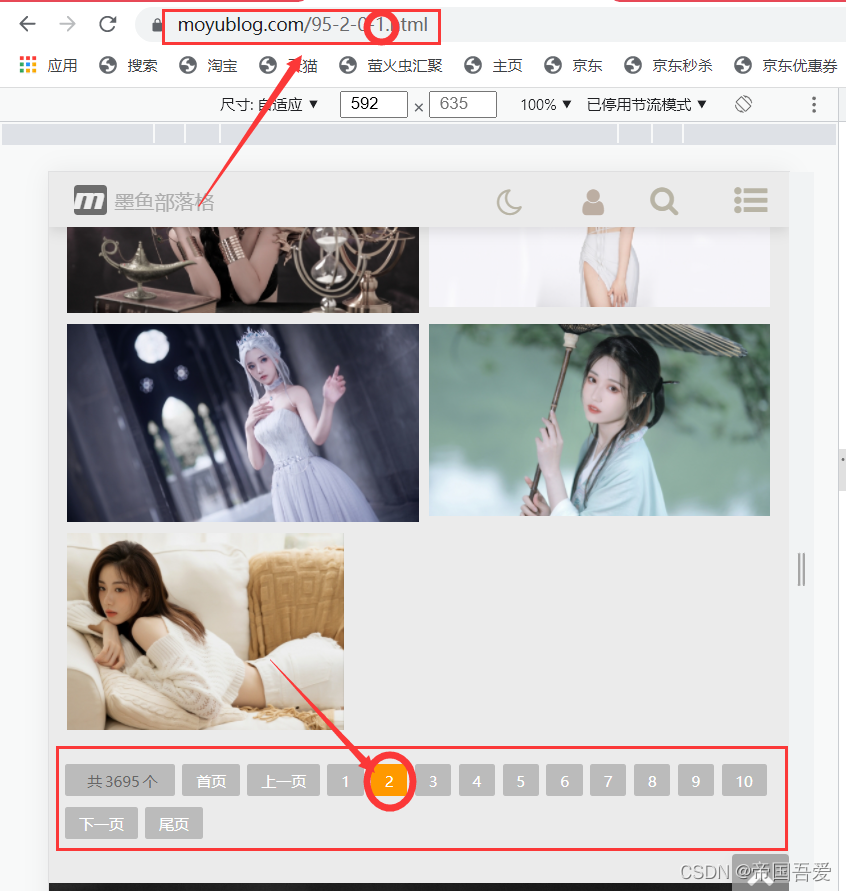
(1)、for循环获取不同页的数据
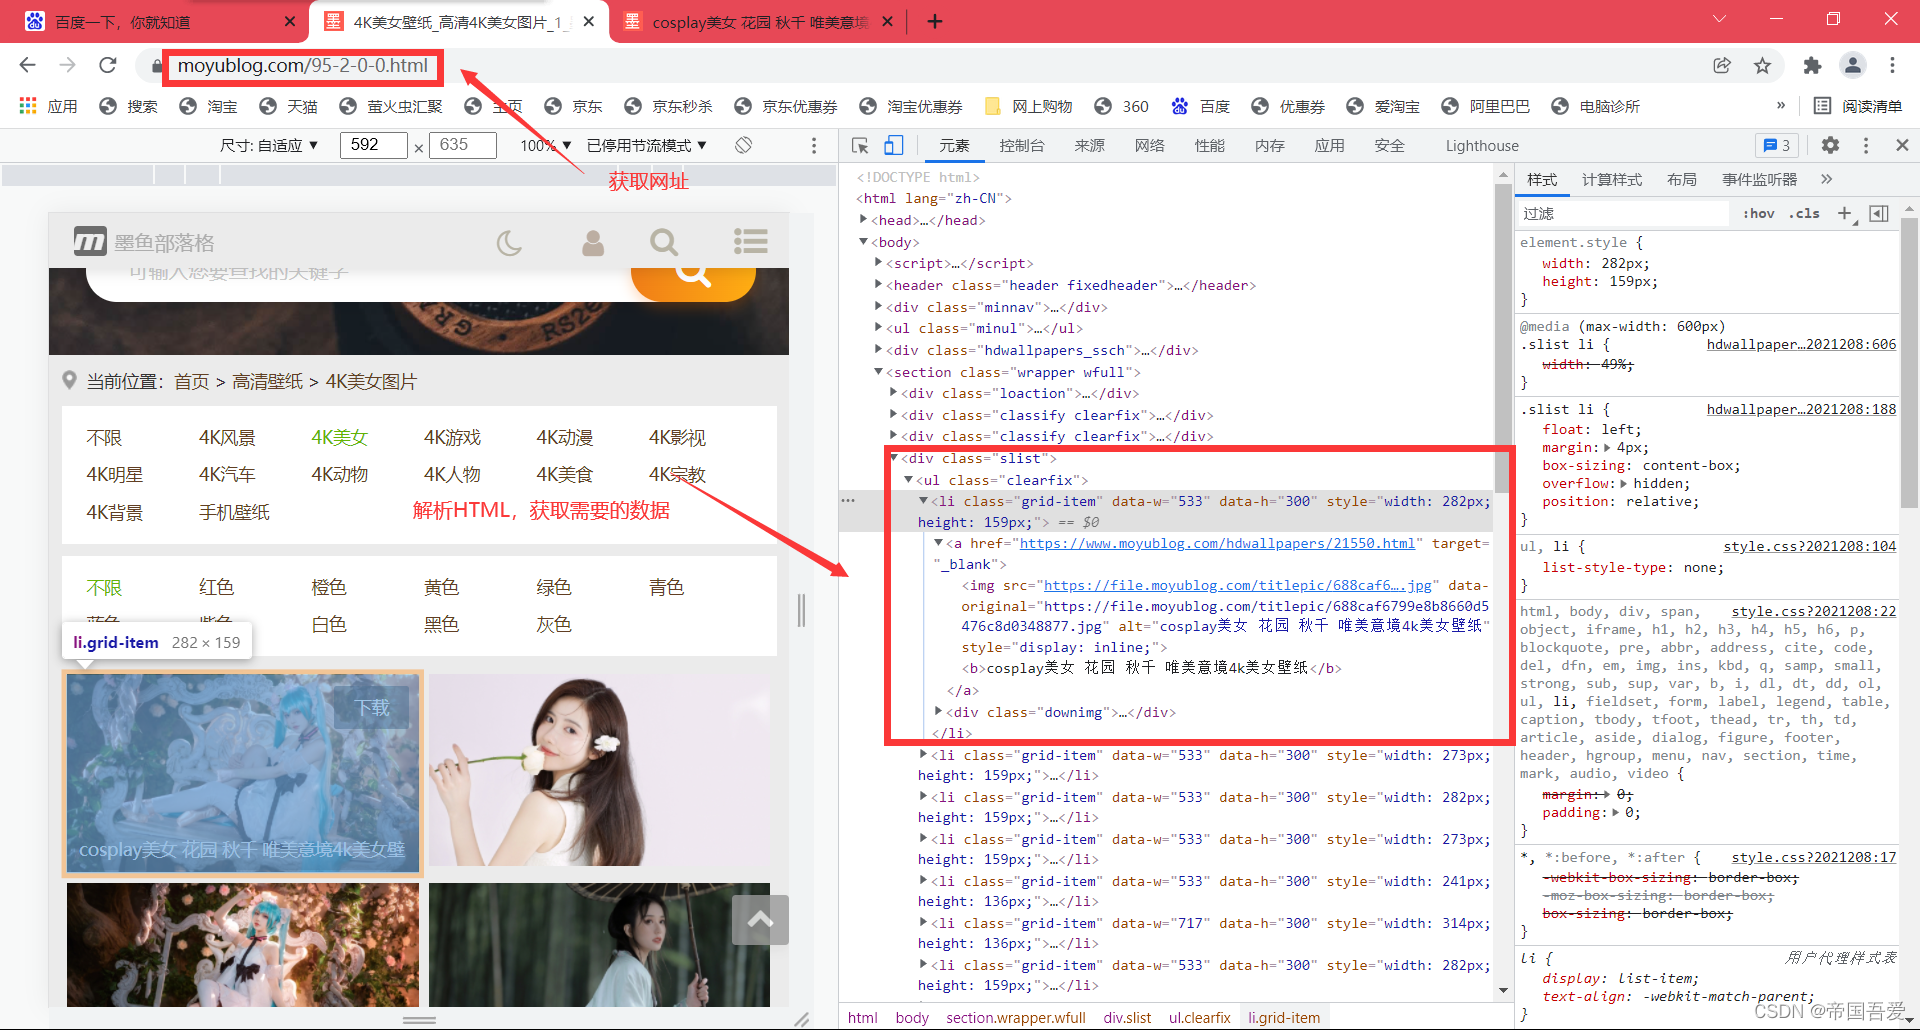
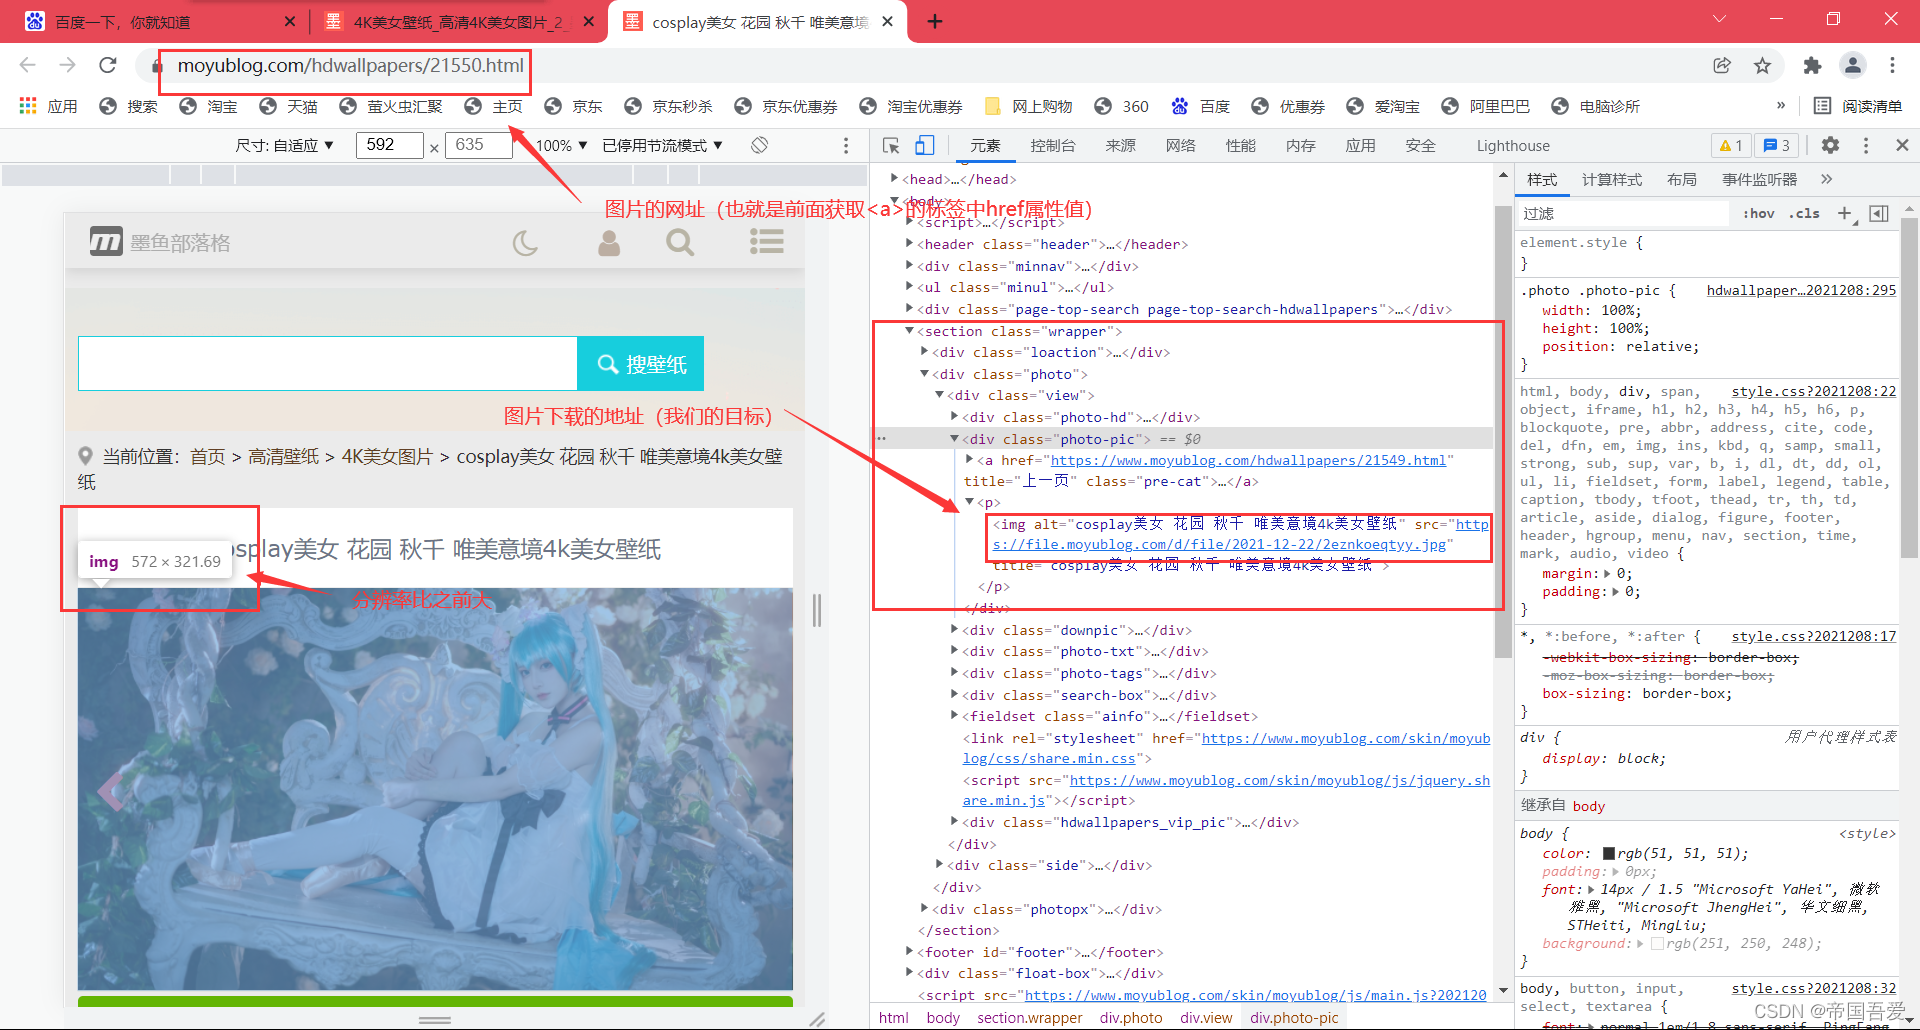
(2)、获取a标签中的网址(原因:外面图片分辨率太小,进入图片对应的网址寻找分辨率大点的图片)
# url-网址 https://www.moyublog.com/95-2-0-0.html
for i in range(1):
    str_value = str(i)
    # 页数
    url = "https://www.moyublog.com/95-2-0-" + str_value + ".html"
    # 浏览器类型-搜狗
    Search_engine = {"User-Agent": "Mozilla/5.0 (compatible; Googlebot/2.1; +http://www.google.com/bot.html)"}
    # 发送请求,获取网址HTML,转为text
    Type_conversion = requests.get(url=url, headers=Search_engine, timeout=None).text
    # 定义BeautifulSoup,解析网址HTML
    bs = BeautifulSoup(Type_conversion, 'html.parser')
    # 获取指定div
    scope_div = bs.find('div', attrs={'class': 'slist'})
    # 获取指定div中的所有a标签
    scope_a = scope_div.findAll('a')
    # print(scope_a)
(3)、进入对应图片的网址,解析对应的数据
# 循环获取指定div中的所有a标签
for int_A in scope_a:
    # 清除不需要的a标签
    if len(int_A) % 2 == 0:
        # 获取定的a标签中的链接
        get_href = int_A.get("href")
        # print(get_href)
        # 新的url-网址
        url_A = get_href
        # 发送请求,获取网址HTML,转为text,发送请求,获取网址HTML,转为text,
        Type_conversion_A = requests.get(url=url_A, headers=Search_engine).text.encode('iso-8859-1').decode(
            'utf-8')
        # 定义新的BeautifulSoup,解析网址HTML
        bs_A = BeautifulSoup(Type_conversion_A, 'html.parser')
        # 定义新的网址中的div标签
        A_div = bs_A.find('div', attrs={'class': 'photo-pic'})
        # 获取新定义div中的所有img标签
        A_img = A_div.findAll('img')
        # print(A_img)
二、图片下载并且保存
(1)、判断并且创建文件夹
folder = "image"
if not os.path.exists(folder):
    print("文件不存在,已创建!")
    os.mkdir(folder)
else:
    print("开始下载图片")
(2)、打开文件夹下载图片并且命名
# 获取img标签中的src属性中的内容
get_a_src = a_img.get("src")
# 获取img标签中的title属性中的内容
get_a_title = a_img.get("title")
# print(get_a_title)
# 定义要下载的内容
download = requests.get(get_a_src)
# 循环打开文件创建jpg
with open("image/" + get_a_title + ".jpg", mode="wb") as f:
    # 开始下载
    f.write(download.content)
    if j > 0:
        # 百分比
        print("第", i - j, "张图片下载中-", format((i - j) / 25, '.2%'))
    else:
        print("第", i, "张图片下载中-", format(i / 25, '.2%'))
# 停顿
time.sleep(0.001)
三、图片转为二进制,保存MySQL数据库中
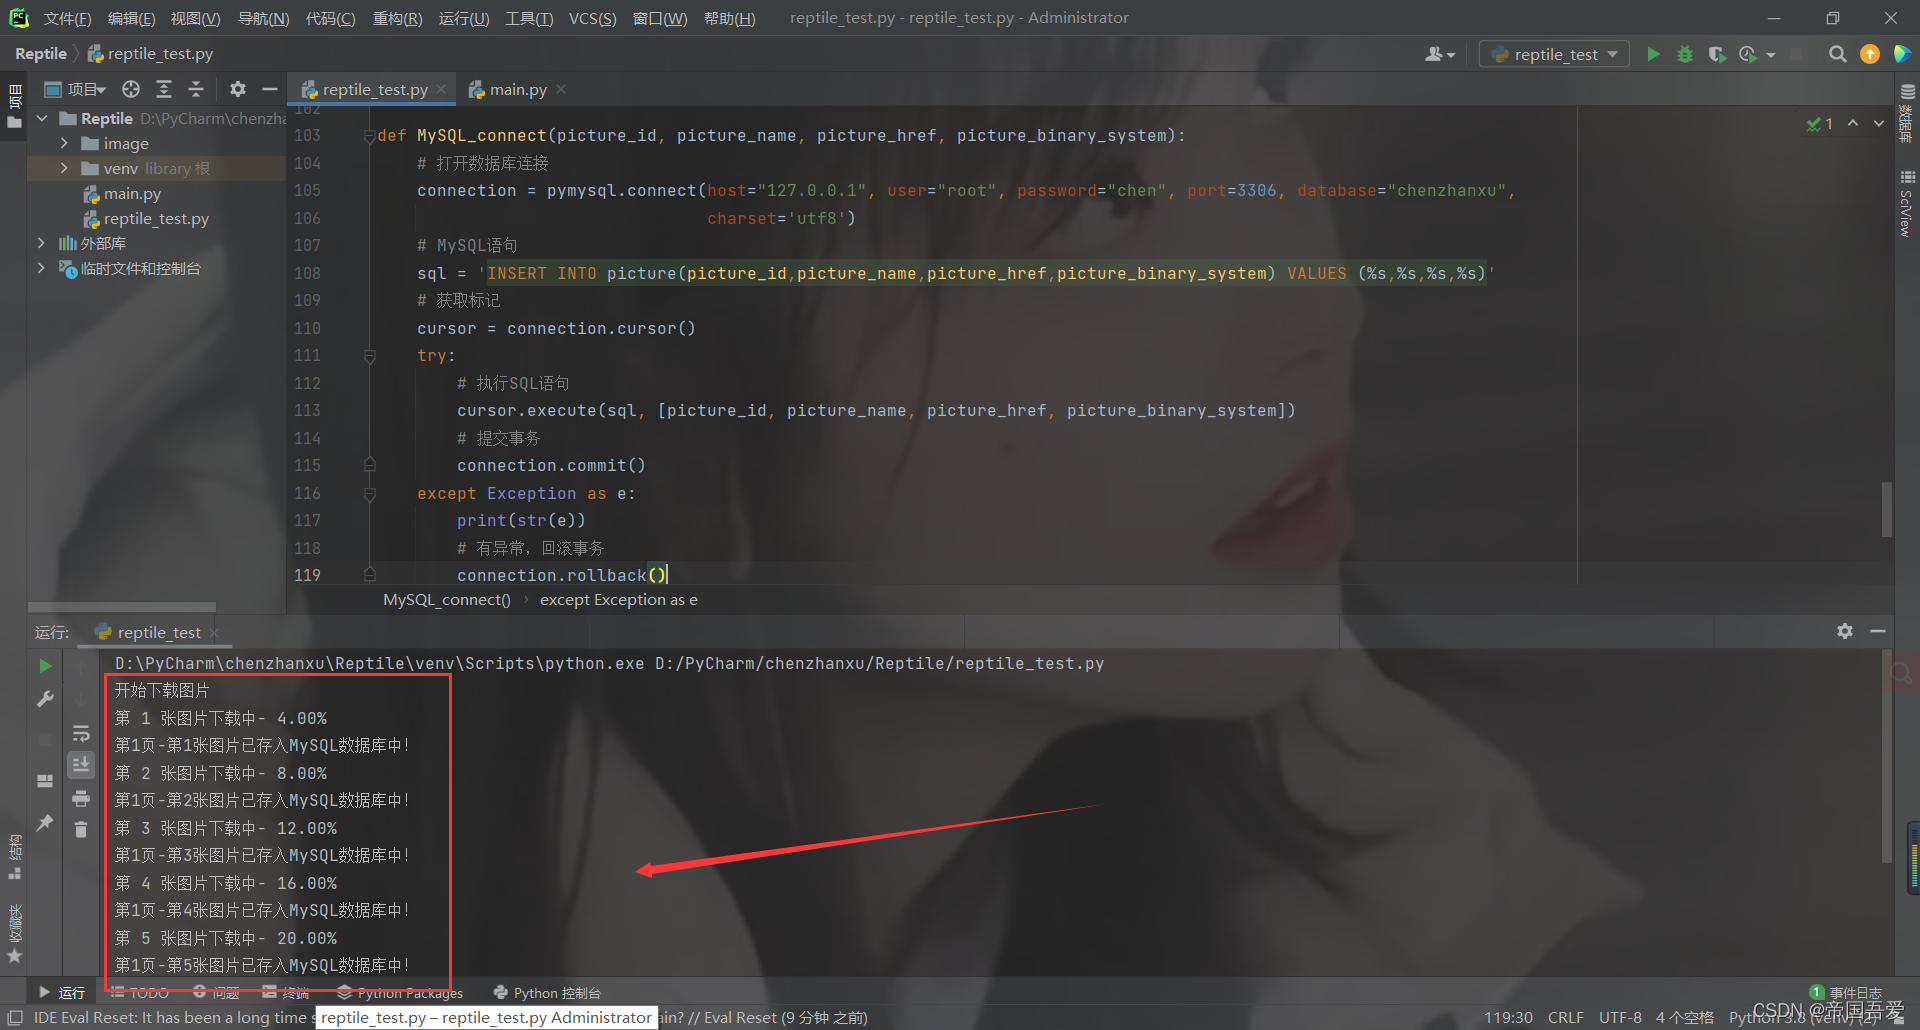
(1)、连接MySQL数据库
def MySQL_connect(picture_id, picture_name, picture_href, picture_binary_system):
    # 打开数据库连接
    connection = pymysql.connect(host="****", user="****", password="****", port=****, database="****",
                                 charset='utf8')
    # MySQL语句
    sql = 'INSERT INTO picture(picture_id,picture_name,picture_href,picture_binary_system) VALUES (%s,%s,%s,%s)'
    # 获取标记
    cursor = connection.cursor()
    try:
        # 执行SQL语句
        cursor.execute(sql, [picture_id, picture_name, picture_href, picture_binary_system])
        # 提交事务
        connection.commit()
    except Exception as e:
        print(str(e))
        # 有异常,回滚事务
        connection.rollback()
    # 释放内存
    cursor.close()
    connection.close()
(2)、循环图片,解析二进制,存储MySQL数据库中
环打开图片
with open("image/" + get_a_title + ".jpg", "rb") as f:
    # 转为二进制格式,并且使用base64进行加密
    base64_data = base64.b64encode(f.read())
    a = str(i)
    b = (j + 1)
    c = str(b)
    # MySQL
    MySQL_connect(c + "-" + a, get_a_src, get_a_title, base64_data)
四、附上完整代码
import os
import time
import requests
import pymysql
import base64
from bs4 import BeautifulSoup


# 判断文件夹是否存在,不存在则创建
def Judge_folder():
    folder = "image"
    if not os.path.exists(folder):
        print("文件不存在,已创建!")
        os.mkdir(folder)
    else:
        print("开始下载图片")


def Url_parsing():
    # url-网址 https://www.moyublog.com/95-2-0-0.html 148
    # range(页数)
    for i in range(1):
        str_value = str(i)
        # 页数
        url = "https://www.moyublog.com/95-2-0-" + str_value + ".html"
        # 浏览器类型-搜狗
        Search_engine = {"User-Agent": "Mozilla/5.0 (compatible; Googlebot/2.1; +http://www.google.com/bot.html)"}
        # 发送请求,获取网址HTML,转为text
        Type_conversion = requests.get(url=url, headers=Search_engine, timeout=None).text
        # 定义BeautifulSoup,解析网址HTML
        bs = BeautifulSoup(Type_conversion, 'html.parser')
        # 获取指定div
        scope_div = bs.find('div', attrs={'class': 'slist'})
        # 获取指定div中的所有a标签
        scope_a = scope_div.findAll('a')
        # print(scope_a)
        j = i
        # 循环获取指定div中的所有a标签
        for int_A in scope_a:
            # 清除不需要的a标签
            if len(int_A) % 2 == 0:
                # 获取定的a标签中的链接
                get_href = int_A.get("href")
                # print(get_href)
                # 新的url-网址
                url_A = get_href
                # 发送请求,获取网址HTML,转为text,发送请求,获取网址HTML,转为text,
                Type_conversion_A = requests.get(url=url_A, headers=Search_engine).text.encode('iso-8859-1').decode(
                    'utf-8')
                # 定义新的BeautifulSoup,解析网址HTML
                bs_A = BeautifulSoup(Type_conversion_A, 'html.parser')
                # 定义新的网址中的div标签
                A_div = bs_A.find('div', attrs={'class': 'photo-pic'})
                # 获取新定义div中的所有img标签
                A_img = A_div.findAll('img')
                # print(A_img)title
                # 循环获取div中的所有img标签
                for a_img in A_img:
                    # 百分比
                    i += 1
                    # 获取img标签中的src属性中的内容
                    get_a_src = a_img.get("src")
                    # 获取img标签中的title属性中的内容
                    get_a_title = a_img.get("title")
                    # print(get_a_title)
                    # 定义要下载的内容
                    download = requests.get(get_a_src)
                    # 循环打开文件创建jpg
                    with open("image/" + get_a_title + ".jpg", mode="wb") as f:
                        # 开始下载
                        f.write(download.content)
                        if j > 0:
                            # 百分比
                            print("第", i - j, "张图片下载中-", format((i - j) / 25, '.2%'))
                        else:
                            print("第", i, "张图片下载中-", format(i / 25, '.2%'))
                        # binary.close()
                    # 循环打开图片
                    with open("image/" + get_a_title + ".jpg", "rb") as f:
                        # 转为二进制格式,并且使用base64进行加密
                        base64_data = base64.b64encode(f.read())
                        a = str(i)
                        b = (j + 1)
                        c = str(b)
                        # MySQL
                        MySQL_connect(c + "-" + a, get_a_src, get_a_title, base64_data)
                        print("第" + c + "页-第" + a + "张图片已存入MySQL数据库中!")
                    # 停顿
                    time.sleep(0.001)

        print("第", j + 1, "页,下载完成!")


def Exception_error():
    Judge_folder()
    try:
        Url_parsing()
    except KeyboardInterrupt:
        print('\n程序已终止. . . . .')
    print('结束!')


def MySQL_connect(picture_id, picture_name, picture_href, picture_binary_system):
    # 打开数据库连接
    connection = pymysql.connect(host="****", user="****", password="****", port=****, database="****",
                                 charset='utf8')
    # MySQL语句
    sql = 'INSERT INTO picture(picture_id,picture_name,picture_href,picture_binary_system) VALUES (%s,%s,%s,%s)'
    # 获取标记
    cursor = connection.cursor()
    try:
        # 执行SQL语句
        cursor.execute(sql, [picture_id, picture_name, picture_href, picture_binary_system])
        # 提交事务
        connection.commit()
    except Exception as e:
        print(str(e))
        # 有异常,回滚事务
        connection.rollback()
    # 释放内存
    cursor.close()
    connection.close()


if __name__ == '__main__':
    Exception_error()