Element Transfer组件默认支持单个list的穿梭
现业务需要支持两个list,效果如下
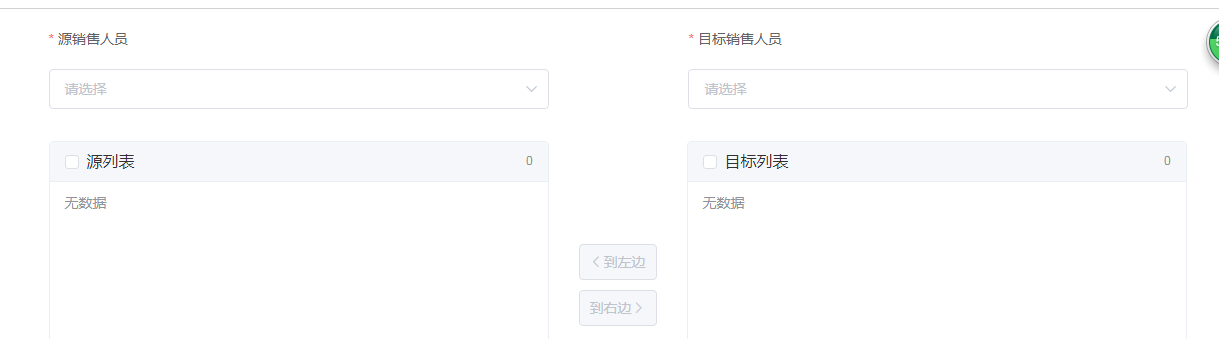
实现思路:
1、有选中才可穿梭
2、已穿梭源数据减少、目标增加(双向)
边界条件:
存储旧List((用于已穿梭后切换下拉框重置list等)
切下拉框时重置另一个list为旧list
左边下拉框选项同右边时 清空右边下拉的选项
代码
<template>
  <div class="page custom-MS custom-MS-ED">
    <el-button class="right-top" type="primary" @click="updateBdCompany('qryForm')">保存</el-button>
    <v-pageSection title="企业分配">
      <el-row>
        <el-form :inline="true" :model="qryInput" :rules="newRules" ref="qryForm" label-position="top">
          <el-col :span="8" :offset="2">
            <el-form-item label="源销售人员" prop="sourceAccount">
              <el-select v-model="qryInput.sourceAccount" filterable placeholder="请选择" clearable @change="handleSourceChange">
                <el-option v-for="item in bdList" :key="item.account" :label="item.name" :value="item.account">
                  <span style="float: left">{{ item.name }}</span>
                  <span style="float: right; color: #8492a6; font-size: 13px">{{ item.account }}</span>
                </el-option>
              </el-select>
            </el-form-item>
          </el-col>
          <el-col :span="8" :offset="4">
            <el-form-item label="目标销售人员" prop="targetAccount">
              <el-select v-model="qryInput.targetAccount" filterable placeholder="请选择" clearable @change="handleTargetChange">
                <el-option v-for="item in otherBdList" :key="item.account" :label="item.name" :value="item.account">
                  <span style="float: left">{{ item.name }}</span>
                  <span style="float: right; color: #8492a6; font-size: 13px">{{ item.account }}</span>
                </el-option>
              </el-select>
            </el-form-item>
          </el-col>
        </el-form>
      </el-row>
      <el-row>
        <el-col :span="8" :offset="2">
          <el-table border height="450"
            ref="multipleSourceTable"
            :data="sourceCL"
            tooltip-effect="dark"
            style="width: 100%"
            @selection-change="handleSourceSelectionChange">       <!-- 使用Element表格的单选多选功能 -->
            <el-table-column
              type="selection"
              width="55">
            </el-table-column>
            <el-table-column label="操作">
              <template slot-scope="scope">{{scope.row.shortName}} -- {{scope.row.poi}}</template>
            </el-table-column>
          </el-table>
        </el-col>
        <el-col :span="2" :offset="1">
          <div style="height: 260px">
            <el-button type="primary" style="margin-top: 150px" :disabled="multipleSourceSelection.length == 0" @click="addToTarget">到右边<i class="el-icon-arrow-right el-icon--right"></i></el-button>
          </div>
          <div>
            <el-button type="primary" icon="el-icon-arrow-left" :disabled="multipleTargetSelection.length == 0" @click="addToSource">到左边</el-button>
          </div>
        </el-col>
        <el-col :span="8" :offset="1">
          <el-table border height="450"
            ref="multipleTargetTable"
            :data="targetCL"
            tooltip-effect="dark"
            style="width: 100%"
            @selection-change="handleTargetSelectionChange">
            <el-table-column
              type="selection"
              width="55">
            </el-table-column>
            <el-table-column label="操作">
              <template slot-scope="scope">{{scope.row.shortName}}-{{scope.row.poi}}</template>
            </el-table-column>
          </el-table>
        </el-col>
      </el-row>
    </v-pageSection>
  </div>
</template>
<script>  //发ajax请求的服务
  import CMService from '@/services/companyManagement-service'
  export default {
    data() {
      return {
        qryInput: {
          sourceAccount: ''
        },
        updateParams: {},
        companyIds: [],
        bdList: [],
        sourceCL: [],
        targetCL: [],
        oldSourceCL: [],
        oldTargetCL: [],
        multipleSourceSelection: [],
        multipleTargetSelection: [],     //Element 数据校验
        newRules: {
          sourceAccount: {
            required: true,
            message: '请选择源销售人员'
          },
          targetAccount: {
            required: true,
            message: '请选择目标销售人员'
          }
        },
      }
    },
    methods: {
      qry() {
        let vm = this
        CMService.qryUnderlingUser(this.qryInput, function(response) {
          vm.bdList = response.data.bdList
        })
      },
      // 封装的方法 start
      // 是否穿梭过
      isTransfer(curList, oldList) {
        if(curList.length != oldList.length){
          return true
        }else{
          return curList.every(function(item){
            return oldList.includes(item)
          })
        }
      },
      // 删除已选
      deleteSelected(curList, multipleSelection) {
        let resultList = []
        curList.forEach(function(itemC, indexC){
          let resultFlag =  multipleSelection.every(function(itemM, indexM){
            return itemM.id != itemC.id
          })
          if(resultFlag) resultList.push(itemC)
        })
        return resultList
      },
      // 获取id组成的数组
      getIdList(curList) {
        let idList = []
        curList.forEach(function(item, index){
          idList.push(item.id)
        })
        return idList
      },
      // 封装的方法 end

      qrySourceCL(account) {
        if(!account){
          this.sourceCL = []
          return
        }
        let vm = this
        if(this.isTransfer){
          this.targetCL = this.oldTargetCL
        }
        CMService.getBdCompanyList({account: account}, function(response) {
          debugger
          vm.sourceCL = response.data.companyList
          vm.oldSourceCL = vm._.clone(response.data.companyList)

        })
      },
      qryTargetCL(account) {
        if(!account){
          this.targetCL = []
          return
        }
        let vm = this
        if(this.isTransfer){
          this.sourceCL = this.oldSourceCL
        }
        CMService.getBdCompanyList({account: account}, function(response) {
          vm.targetCL = response.data.companyList
          vm.oldTargetCL = vm._.clone(response.data.companyList)
        })
      },
      addToTarget() {
        if(!this.qryInput.targetAccount){
          this.$alert('请先选择目标销售人员')
          return
        }
        this.sourceCL = this.deleteSelected(this.sourceCL, this.multipleSourceSelection)
        this.targetCL = this.targetCL.concat(this.multipleSourceSelection)
      },
      addToSource() {
        if(!this.qryInput.sourceAccount){
          this.$alert('请先选择目标销售人员')
          return
        }
        this.targetCL = this.deleteSelected(this.targetCL, this.multipleTargetSelection)
        this.sourceCL = this.sourceCL.concat(this.multipleTargetSelection)
      },
      updateBdCompany(formName) {
        let vm = this
        this.$refs[formName].validate((valid) => {
          if (valid) {
            this.updateParams.companyIds = this.getIdList(this.targetCL)
            CMService.updateBdCompany(this.updateParams, function(response) {
              vm.$alert('修改成功').then(() => {
                vm.dialogModifyFormVisible = false
                vm.qry()
              })
            })
          } else {
            console.log('error submit!!')
            return false
          }
        })
      },
      handleSourceChange(account) {
        this.qrySourceCL(account)
      },
      handleTargetChange(account) {
        this.qryTargetCL(account)
        this.updateParams.account = account
      },
      toggleSelection(rows) {
        if (rows) {
          rows.forEach(row => {
            this.$refs.multipleTable.toggleRowSelection(row);
          });
        } else {
          this.$refs.multipleTable.clearSelection();
        }
      },
      handleSourceSelectionChange(val) {
        this.multipleSourceSelection = val;
      },
      handleTargetSelectionChange(val) {
        this.multipleTargetSelection = val;
      }
    },
    mounted() {
      this.qry()
    },
    computed: {    //目标销售人员由源销售人员过滤得到
      otherBdList: function(){
        let vm = this
        return this.bdList.filter(function(item, index){
          return item.account !== vm.qryInput.sourceAccount
        })
      }
    },
  }
</script>