tftp 烧写镜像名字规定与对应命令
由于 uboot 的一键式 tftp 下载命令的限制(即只能使用固定的文件名) ,所以,为了使用一键式菜单,
作出如下规定:
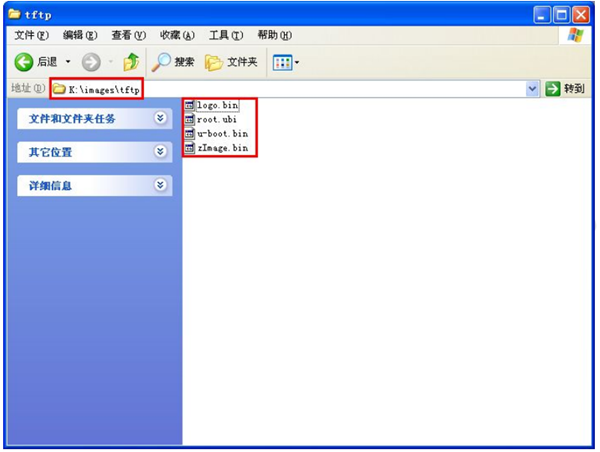
uboot 镜像必须命名为:u-boot.bin—命令“1”
Linux 内核镜像必须命名为:zImage.bin—命令“3”
文件系统镜像必须命名为:root.ubi—命令“5”
logo 镜像必须命名为:logo.bin—命令“4”
Ø 将改好名字的镜像放到刚刚设置好的“OutPut(“K:imagestftp”) ”目录下:
说明:一定要放到设置 tftp 代理软件“Output”页所指定的输出文件的路径下,因为该软件发送文件时会。
u-boot 的 tftp 下载常见设置
##### EmbedSky BIOS for SKY210/TQ210 #####
This Board: SDRAM is 1024MB; LCD display size is: 800X480
Hit any key to stop autoboot: 0
##### Boot for TQ210 Main Menu #####
##### EmbedSky USB download mode #####
[1] Download u-boot or STEPLDR.nb1 or other bootloader to Nand Flash
[2] Download Eboot (eboot.nb0) to Nand Flash
[3] Download Linux Kernel (zImage.bin) to Nand Flash
[4] Download LOGO Picture (logo.bin) to Nand Flash
[5] Download UBIFS image (root.ubi) to Nand Flash
[6] Download YAFFS image (root.bin) to Nand Flash
[7] Download Program to SDRAM and Run it
[8] Boot the system
[9] Format the Nand Flash
[0] Set the boot parameters
[a] Download User Program
[n] Enter TFTP download mode menu
[r] Reboot u-boot
[t] Test Linux Image (zImage)
Enter your selection: n ;进入 TFTP 下载模式(网络下载)
##### Boot for TQ210 Main Menu #####
##### EmbedSky TFTP download mode #####
[1] Download u-boot.bin to Nand Flash
[2] Download Eboot (eboot.nb0) to Nand Flash
[3] Download Linux Kernel (zImage.bin) to Nand Flash
[4] Download LOGO Picture (logo.bin) to Nand Flash
[5] Download UBIFS image (root.ubi) to Nand Flash
[6] Download YAFFS image (root.bin) to Nand Flash
[7] Download Program to SDRAM and Run it
[8] Boot the system
[9] Format the Nand Flash
[0] Set the boot parameters
[a] Download User Program
[n] Set TFTP parameters(PC IP,TQ210 IP,Mask IP...)
[p] Test network (TQ210 Ping PC's IP)
[r] Reboot u-boot
[s] Download STEPLDR.nb1 to Nand Flash
[t] Test Linux Image (zImage)
[q] Return main Menu
Enter your selection:
在 TFTP 下载界面使用命令 n 设置 TFTP 下载时的 IP 等信息(请使用您所在的实际网络的 IP 地址等
信息) 。
说明 1:请连接网线从 TQ210 到您的 PC 或局域网中,同时拔掉 USB 下载电缆。
说明 2:下面使用的 IP 地址请根据您实际使用的网络的 IP 网段进行设置。
Enter your selection: n
Enter the TFTP Server(PC) IP address:(xxx.xxx.xxx.xxx)
192.168.1.8 ;输入 PC 端的 IP 地址(可以是 Windows 的,也可以是 Linux 的) ,必须保证一点,该 IP
地址对应的 PC 的环境是您用于 TFTP 烧写的 TFTP 服务器所在的 PC 环境,有您想要烧写的镜像文件。
Enter the T210 IP address:(xxx.xxx.xxx.xxx)
192.168.1.6 ;输入 TQ210 的 IP 地址
Enter the Mask IP address:(xxx.xxx.xxx.xxx)
255.255.255.0 ;输入子网掩码
Save TFTP IP parameters?(y/n)
y ;保存刚刚设置的参数,n 就是不保存, 不保存就没有一下信息, 只显示提示信息 “Not Save it!!!”
Saving Environment to NAND...
Erasing Nand...
Erasing at 0xe0000 -- 100% complete.
Writing to Nand... done
完成网络设置后,使用命令 p 可以测试 TQ210 和 PC 间的网络是否接通:
Enter your selection: p
TQ210 ping PC IP:ping 192.168.1.8
dm9000 i/o: 0x88000000, id: 0x90000a46
DM9000: running in 16 bit mode
MAC: 00:40:5c:26:0a:5b
operating at 100M full duplex mode
host 192.168.1.8 is alive 成功 ping 通
或者
Enter your selection: p
TQ210 ping PC IP:ping 192.168.1.8
dm9000 i/o: 0x88000000, id: 0x90000a46
DM9000: running in 16 bit mode
MAC: 00:40:5c:26:0a:5b
could not establish link
ping failed; host 192.168.1.8 is not alive ;没有 ping 通宿主机
如果遇到 ping 不通或者其它的问题,可以参考本节最后《tftp 烧写常见错误分析》小节。
烧写 u-boot 镜像到 Nand Flash
##### Boot for TQ210 Main Menu #####
##### EmbedSky TFTP download mode #####
[1] Download u-boot.bin to Nand Flash
[2] Download Eboot (eboot.nb0) to Nand Flash
[3] Download Linux Kernel (zImage.bin) to Nand Flash
[4] Download LOGO Picture (logo.bin) to Nand Flash
[5] Download UBIFS image (root.ubi) to Nand Flash
[6] Download YAFFS image (root.bin) to Nand Flash
[7] Download Program to SDRAM and Run it
[8] Boot the system
[9] Format the Nand Flash
[0] Set the boot parameters
[a] Download User Program
[n] Set TFTP parameters(PC IP,TQ210 IP,Mask IP...)
[p] Test network (TQ210 Ping PC's IP)
[r] Reboot u-boot
[s] Download STEPLDR.nb1 to Nand Flash
[t] Test Linux Image (zImage)
[q] Return main Menu
Enter your selection: 1
dm9000 i/o: 0x88000000, id: 0x90000a46
DM9000: running in 16 bit mode
MAC: 00:40:5c:26:0a:5b
operating at 100M full duplex mode
TFTP from server 192.168.1.240; our IP address is 192.168.1.244
Filename 'u-boot.bin'.
Load address: 0xc0008000
Loading: ###########################
done
Bytes transferred = 393216 (0x60000)
NAND erase: device 0 offset 0x0, size 0x100000
Erasing at 0xe0000 -- 100% complete.
OK
NAND write: device 0 offset 0x0, size 0x60000
Main area read (3 blocks):
Checksum is calculated.
Main area write (3 blocks):
393216 bytes written: OK
上面蓝色色部分的“T ################” :
² T 表示超时(此时正在完成 TFTP 握手协议,如果是发送中出现 T,此时可能是因为您所使用的网络不稳定引起的,特别是 PC 端出现掉线、断网的情况) ;
² ###表示正在发送数据;
青色部分表示 uboot 正在擦除 Nand Flash 的要烧写的分区;
粉红色部分表示 uboot 写入数据到对应的分区。
下面列出 TFTP 服务器的信息截图: (将 IP 改为 8 进行烧写)
说明:下图中的镜像容量仅供参考,请以光盘或您编译出来的实际镜像为准。

烧写 Linux/Android 内核镜像到 Nand Flash
### Boot for TQ210 Main Menu #####
##### EmbedSky TFTP download mode #####
[1] Download u-boot.bin to Nand Flash
[2] Download Eboot (eboot.nb0) to Nand Flash
[3] Download Linux Kernel (zImage.bin) to Nand Flash
[4] Download LOGO Picture (logo.bin) to Nand Flash
[5] Download UBIFS image (root.ubi) to Nand Flash
[6] Download YAFFS image (root.bin) to Nand Flash
[7] Download Program to SDRAM and Run it
[8] Boot the system
[9] Format the Nand Flash
[0] Set the boot parameters
[a] Download User Program
[n] Set TFTP parameters(PC IP,TQ210 IP,Mask IP...)
[p] Test network (TQ210 Ping PC's IP)
[r] Reboot u-boot
[s] Download STEPLDR.nb1 to Nand Flash
[t] Test Linux Image (zImage)
[q] Return main Menu
Enter your selection: 3
dm9000 i/o: 0x88000000, id: 0x90000a46
DM9000: running in 16 bit mode
MAC: 00:40:5c:26:0a:5b
operating at 100M full duplex mode
TFTP from server 192.168.1.240; our IP address is 192.168.1.244
Filename 'zImage.bin'.
Load address: 0xc0008000
Loading: #################################################################
#################################################################
#################################################################
#################################################################
#########
done
Bytes transferred = 3940008 (0x3c1ea8)
NAND erase: device 0 offset 0x500000, size 0x500000
Erasing at 0x9e0000 -- 100% complete.
OK
NAND write: device 0 offset 0x500000, size 0x3c1ea8
Writing data at 0x8c1800 -- 100% complete.
3940008 bytes written: OK
TFTP 服务器的信息如下:
说明:下图中的镜像容量仅供参考,请以光盘或您编译出来的实际镜像为准。

烧写 yaffs 文件系统到 Nand Flash
这里烧写烧写 yaffs 与 ubi 方法是完全一样的,只是烧写 yaffs 使用的是命令 6,烧写 ubi 使用的是命令
5,下面将以 yaffs 来做为示例。
##### Boot for TQ210 Main Menu #####
##### EmbedSky TFTP download mode #####
[1] Download u-boot.bin to Nand Flash
[2] Download Eboot (eboot.nb0) to Nand Flash
[3] Download Linux Kernel (zImage.bin) to Nand Flash
[4] Download LOGO Picture (logo.bin) to Nand Flash
[5] Download UBIFS image (root.ubi) to Nand Flash
[6] Download YAFFS image (root.bin) to Nand Flash
[7] Download Program to SDRAM and Run it
[8] Boot the system
[9] Format the Nand Flash
[0] Set the boot parameters
[a] Download User Program
[n] Set TFTP parameters(PC IP,TQ210 IP,Mask IP...)
[p] Test network (TQ210 Ping PC's IP)
[r] Reboot u-boot
[s] Download STEPLDR.nb1 to Nand Flash
[t] Test Linux Image (zImage)
[q] Return main Menu
Enter your selection: 6
dm9000 i/o: 0x88000000, id: 0x90000a46
DM9000: running in 16 bit mode
MAC: 00:40:5c:26:0a:5b
operating at 100M full duplex mode
TFTP from server 192.168.1.240; our IP address is 192.168.1.244
Filename 'root.bin'.
Load address: 0x40008000
Loading: #################################################################
#################################################################
#################################################################
#################################################################
#################################################################
#########(这里省略了绝大部分的“###”)
done
Bytes transferred = 146313024 (0x8b88f40)
NAND erase: device 0 offset 0xa00000, size 0xf600000
Skipping bad block at 0x03800000 (这里表示有坏块,系统会自动绕过这些坏块,不影响正常使用)
Skipping bad block at 0x04100000
Skipping bad block at 0x06460000
Skipping bad block at 0x07b60000
Skipping bad block at 0x0c700000
Skipping bad block at 0x0d320000
Skipping bad block at 0x0e080000
Erasing at 0xffe0000 -- 100% complete
OK
NAND write: device 0 offset 0xa00000, size 0x8b88f40
(同样以下表示有坏块,系统会自动绕过这些坏块)
Bad block at 0x3800000 in erase block from 0x3800000 will be skipped
Bad block at 0x4100000 in erase block from 0x4100000 will be skipped
Bad block at 0x6460000 in erase block from 0x6460000 will be skipped
Bad block at 0x7b60000 in erase block from 0x7b60000 will be skipped
Writing data at 0x91ce000 -- 100% complete.
146313024 bytes written: OK
TFTP 服务器的信息如下:
说明:下图中的镜像容量仅供参考,请以光盘或您编译出来的实际镜像为准。

烧写 logo 镜像到 Nand Flash 中
##### Boot for TQ210 Main Menu #####
##### EmbedSky TFTP download mode #####
[1] Download u-boot.bin to Nand Flash
[2] Download Eboot (eboot.nb0) to Nand Flash
[3] Download Linux Kernel (zImage.bin) to Nand Flash
[4] Download LOGO Picture (logo.bin) to Nand Flash
[5] Download UBIFS image (root.ubi) to Nand Flash
[6] Download YAFFS image (root.bin) to Nand Flash
[7] Download Program to SDRAM and Run it
[8] Boot the system
[9] Format the Nand Flash
[0] Set the boot parameters
[a] Download User Program
[n] Set TFTP parameters(PC IP,TQ210 IP,Mask IP...)
[p] Test network (TQ210 Ping PC's IP)
[r] Reboot u-boot
[s] Download STEPLDR.nb1 to Nand Flash
[t] Test Linux Image (zImage)
[q] Return main Menu
Enter your selection: 4
dm9000 i/o: 0x88000000, id: 0x90000a46
DM9000: running in 16 bit mode
MAC: 00:40:5c:26:0a:5b
operating at 100M full duplex mode
TFTP from server 192.168.1.240; our IP address is 192.168.1.244
Filename 'logo.bin'.
Load address: 0xc0008000
Loading: ############################
done
Bytes transferred = 409600 (0x64000)
NAND erase: device 0 offset 0x200000, size 0x300000
Erasing at 0x4e0000 -- 100% complete.
OK
NAND write: device 0 offset 0x200000, size 0x64000
Writing data at 0x263800 -- 100% complete.
409600 bytes written: OK
TFTP 服务器的信息如下:
说明:下图中的镜像容量仅供参考,请以光盘或您编译出来的实际镜像为准。

到这里基本镜像 tftp 烧写介绍完了。
tftp 烧写常见错误分析
A、File not found 错误
Enter your selection: 1
MAC: 10:23:45:67:89:ab
Using DM9000A device
TFTP from server 192.168.1.30; our IP address is 192.168.1.98
Filename 'u-boot.bin'.
Load address: 0xc0000000
Loading: T
TFTP error: 'File not found' (1)
Starting again
这个错误是由于 tftp 服务软件 OutPut 指定的目录下没有“u-boot.bin”这个文件。
解决方法,将您需要烧写的 uboot 镜像改名为“u-boot.bin”放到您设置 tftp 软件的 OutPut 项指定的目录下。烧写其他镜像时碰到这个错误,也是到 tftp 软件的 OutPut 指定的目录下查看是否有该名称命名的镜像文件。在这里就不重复介绍了。
B、一直出现 T T T T T T T 信息
Enter your selection: 1
MAC: 10:23:45:67:89:ab
Using DM9000A device
TFTP from server 192.168.1.8; our IP address is 192.168.1.6
Filename 'u-boot.bin'.
Load address: 0xc0000000
Loading: T T T T T T T
这种现象一般有两个原因:
1、网络不通;
2、指定 IP 的宿主机的 tftp 服务器没启动;
3、网络不稳定(特别是使用无线网络的情况,很容易出现网络不稳定的) 。解决方法:用 P 命令检查网络是否联通,检查宿主机的 tftp 是否开通,确认所使用的网络是否稳定。
供货情况:
天嵌科技提供专业嵌入式板卡和行业解决方案。如有需要,可以联系天嵌科技的销售人员。
销售电话:020-38219416 38373101
技术支持:020-38219416转807 820