1环境要求
组件
版本要求
OS
CentOS* 7.4, Ubuntu 14.04/16.04 LTS
Node
8.11.* (推荐8.11.1)
MongoDB
2.4.9
Boost
1.65.1
- 安装部署测试环境在Ubuntu 18.04,操作系统和MongoDB兼容,满足要求;
- Node和Boost需单独安装指定的版本;
2安装Node
2.1 安装过程
node版本使用推荐8.11.1,相关命令如下:
# 下载
# wget https://nodejs.org/download/release/v8.11.1/node-v8.11.1-linux-x64.tar.gz
# 解压
# tar -zxvf node-v8.11.1-linux-x64.tar.gz
# 移动到/opt目录
# mv node-v8.11.1-linux-x64 /opt/
# 设置软连接
# ln -s /opt/node-v8.11.1-linux-x64/bin/node /usr/local/bin/node
# ln -s /opt/node-v8.11.1-linux-x64/lib/node_modules/npm/bin/npm-cli.js /usr/local/bin/npm
2.2 验证安装
使用下面的命令查看NodeJS和NPM的版本,若正确安装的话都可以看到相关的版本号信息。
# sudo node -v
# sudo npm -v
3、安装Boost
boost版本需要使用1.65.1版本,不然会提示找不到依赖库,编译安装时间较长。
相关命令如下:
# 安装依赖组件
# apt-get install p7zip p7zip-full clang gcc
# 下载
# wget https://dl.bintray.com/boostorg/release/1.65.1/source/boost_1_65_1.7z
# 解压
# 7z x boost_1_65_1.7z
# 切换目录
# cd boost_1_65_1/
# 设置参数
# ./bootstrap.sh --with-toolset=clang
# 编译安装(编译安装时间较长,请耐心等待)
# ./b2 install
# 将库添加到系统环境变量(重要)
# ldconfig /usr/local/lib
4、安装Intel CS WebRTC
4.1 下载
下载Intel_CS_WebRTC.v4.2.zip:
# wget http://registrationcenter-download.intel.com/akdlm/irc_nas/15414/Intel_CS_WebRTC.v4.2.zip
4.2 解压
# tar -zxvf Intel_CS_WebRTC.v4.2.zip
解压后,Intel_CS_WebRTC.v4.2目录包含如下文件
CS_WebRTC_Client_SDK_Android.v4.2.zip
CS_WebRTC_Client_SDK_iOS.v4.2.zip
CS_WebRTC_Client_SDK_JavaScript.v4.2.zip
CS_WebRTC_Client_SDK_Windows.v4.2.zip
CS_WebRTC_Conference_Server_MCU.v4.2.CentOS.tgz
CS_WebRTC_Conference_Server_MCU.v4.2.Ubuntu.tgz
CS_WebRTC_Conference_Server_Peer.v4.2.tgz
License.pdf
ReleaseNotes.pdf
本文在Ubuntu上安装MCU,因此使用Ubuntu 版本MCU,解压ubuntu安装包:
# cd Intel_CS_WebRTC.v4.2
# tar -zxvf CS_WebRTC_Conference_Server_MCU.v4.2.Ubuntu.tgz
解压后,会生成一个Release-v4.2的目录,即我们要安装的intel cs server。
4.3 安装部署
4.3.1 安装依赖
相关命令如下:
# cd Release-v4.2/
# 需要外网,下载可能会很慢
# bin/init-all.sh --deps
过程中会有安装选择,相关的问题及选择可以参考下面的说明,最后一步一定要选no,即不更新RabbitMQ或MongoDB账号
......
# 这一步一定要选择yes,即继续安装
Do you want to continue? [Y/n] y
......
......
# 这一步选择no,即不创建MongoDB账号
Create MongoDB Account? [Yes/no]no
......
......
# 这一步选择no,即不禁用RabbitMQ账号并创建新账号
Diable Default RabbitMQ Account and Create a New One? [Yes/no]no
......
......
# 这一步很重要,一定要选择no,即不更新Mongodb或RabbitMQ账号信息
# 若选择yes的话可能导致更新后连接不上Mongodb或RabbitMQ
Update RabbitMQ/MongoDB Account? [No/yes]no
......
安装过程中会提示生成两组key,在比较靠前的位置
......
# 管理员账号
superServiceId: 5ce4c00b7b0da14e1377914f
superServiceKey: 8ACp9tpz6nWebF4x4HECxP0UvXLJChzEJPqNmW7rRrJyRPKOw+LGiUVQbF4ed/0v6yHAUL6CmrgKMxWAU4PIvjGY2HUfvlbcwkC4iN6niE4ApllW3stRaT6jQPqAmPVAAK5/74A39MR9VoyIR6B01GWvBcPv79BZTyNdWek/f3w=

# 普通账号
sampleServiceId: 5ce4c00b7b0da14e13779150
sampleServiceKey: 5bc8AIklK8fsdRLBJmfecF6PMwx/k7IVKz7nd8a2CHLsEh8MM3nSBL9aMURBs/HSJXFV7vJg9lDcyYrlxBFJOJmnaq5R5cK+AJT8djgyvdc1dePTpMdWSb54H+cv9IKkNgTqvQW+H4eSoA1uq9hNhpMYriwYCqw/ARXC2+pAk7I=
......
4.3.2 修改配置(虚拟机安装需配置)
修改下面的相关文件的IP地址
./video_agent/agent.toml
./recording_agent/agent.toml
./sip_agent/agent.toml
./streaming_agent/agent.toml
./analytics_agent/agent.toml
./webrtc_agent/agent.toml
./audio_agent/agent.toml
./portal/portal.toml
将配置文件中ip_address修改为相应的ip地,如:172.16.85.136。
......
ip_address = "172.16.85.136"
......
此外,./webrtc_agent/agent.toml文件中还需配置如下:
# vim webrtc_agent/agent.toml
# network_interfaces = []
修改为:
network_interfaces = [{name = "eth0", replaced_ip_address = "172.16.85.136"}]
4.3.3 启动/停止服务
1、启动服务
# 启动服务
# ./bin/start-all.sh

# ./bin/start-all.sh
starting management-api, stdout -> /home/starnight/Intel_CS_WebRTC.v4.2/Release-v4.2/logs/management-api.stdout
starting cluster-manager, stdout -> /home/starnight/Intel_CS_WebRTC.v4.2/Release-v4.2/logs/cluster-manager.stdout
2019-06-03 17:52:09.004  - INFO: AmqpClient - Connecting to rabbitMQ server OK, options: { host: 'localhost', port: 5672 }
2019-06-03 17:52:09.037  - INFO: Main - Cluster manager up! id: 455428103
2019-06-03 17:52:09.038  - INFO: ClusterManager - Run as candidate.
2019-06-03 17:52:09.246  - INFO: ClusterManager - Run as master.
2019-06-03 17:52:09.252  - INFO: ClusterManager - Cluster manager is in service as master!
starting recording-agent, stdout -> /home/starnight/Intel_CS_WebRTC.v4.2/Release-v4.2/logs/recording-agent.stdout
2019-06-03 17:52:10.256  - INFO: AmqpClient - Connecting to rabbitMQ server OK, options: { host: 'localhost', port: 5672 }
2019-06-03 17:52:10.270  - INFO: WorkingAgent - recording agent join cluster ok.
2019-06-03 17:52:10.287  - INFO: ClusterWorker - Join cluster owt-cluster OK.
2019-06-03 17:52:10.298  - INFO: WorkingAgent - as rpc server ok.
2019-06-03 17:52:10.299  - INFO: WorkingAgent - as monitoring target ok.
starting webrtc-agent, stdout -> /home/starnight/Intel_CS_WebRTC.v4.2/Release-v4.2/logs/webrtc-agent.stdout
2019-06-03 17:52:11.325  - INFO: AmqpClient - Connecting to rabbitMQ server OK, options: { host: 'localhost', port: 5672 }
2019-06-03 17:52:11.338  - INFO: WorkingAgent - webrtc agent join cluster ok.
2019-06-03 17:52:11.353  - INFO: ClusterWorker - Join cluster owt-cluster OK.
2019-06-03 17:52:11.380  - INFO: WorkingAgent - as rpc server ok.
2019-06-03 17:52:11.381  - INFO: WorkingAgent - as monitoring target ok.
starting conference-agent, stdout -> /home/starnight/Intel_CS_WebRTC.v4.2/Release-v4.2/logs/conference-agent.stdout
2019-06-03 17:52:12.303  - INFO: AmqpClient - Connecting to rabbitMQ server OK, options: { host: 'localhost', port: 5672 }
2019-06-03 17:52:12.339  - INFO: WorkingAgent - conference agent join cluster ok.
2019-06-03 17:52:12.364  - INFO: ClusterWorker - Join cluster owt-cluster OK.
2019-06-03 17:52:12.371  - INFO: WorkingAgent - as rpc server ok.
2019-06-03 17:52:12.373  - INFO: WorkingAgent - as monitoring target ok.
starting analytics-agent, stdout -> /home/starnight/Intel_CS_WebRTC.v4.2/Release-v4.2/logs/analytics-agent.stdout
2019-06-03 17:52:14.025  - INFO: AmqpClient - Connecting to rabbitMQ server OK, options: { host: 'localhost', port: 5672 }
2019-06-03 17:52:14.028  - DEBUG: WorkingAgent - Initializing RPC facilities, purpose: analytics
2019-06-03 17:52:14.075  - INFO: WorkingAgent - analytics agent join cluster ok.
2019-06-03 17:52:14.128  - INFO: ClusterWorker - Join cluster owt-cluster OK.
starting sip-agent, stdout -> /home/starnight/Intel_CS_WebRTC.v4.2/Release-v4.2/logs/sip-agent.stdout
2019-06-03 17:52:15.073  - INFO: AmqpClient - Connecting to rabbitMQ server OK, options: { host: 'localhost', port: 5672 }
2019-06-03 17:52:15.104  - INFO: WorkingAgent - sip agent join cluster ok.
2019-06-03 17:52:15.126  - INFO: ClusterWorker - Join cluster owt-cluster OK.
2019-06-03 17:52:15.136  - INFO: WorkingAgent - as rpc server ok.
2019-06-03 17:52:15.137  - INFO: WorkingAgent - as monitoring target ok.
starting streaming-agent, stdout -> /home/starnight/Intel_CS_WebRTC.v4.2/Release-v4.2/logs/streaming-agent.stdout
2019-06-03 17:52:15.904  - INFO: AmqpClient - Connecting to rabbitMQ server OK, options: { host: 'localhost', port: 5672 }
2019-06-03 17:52:15.917  - INFO: WorkingAgent - streaming agent join cluster ok.
2019-06-03 17:52:15.945  - INFO: ClusterWorker - Join cluster owt-cluster OK.
2019-06-03 17:52:15.959  - INFO: WorkingAgent - as rpc server ok.
2019-06-03 17:52:15.960  - INFO: WorkingAgent - as monitoring target ok.
starting audio-agent, stdout -> /home/starnight/Intel_CS_WebRTC.v4.2/Release-v4.2/logs/audio-agent.stdout
2019-06-03 17:52:17.077  - INFO: AmqpClient - Connecting to rabbitMQ server OK, options: { host: 'localhost', port: 5672 }
2019-06-03 17:52:17.109  - INFO: WorkingAgent - audio agent join cluster ok.
2019-06-03 17:52:17.134  - INFO: ClusterWorker - Join cluster owt-cluster OK.
2019-06-03 17:52:17.149  - INFO: WorkingAgent - as rpc server ok.
2019-06-03 17:52:17.155  - INFO: WorkingAgent - as monitoring target ok.
starting video-agent, stdout -> /home/starnight/Intel_CS_WebRTC.v4.2/Release-v4.2/logs/video-agent.stdout
2019-06-03 17:52:18.936  - INFO: AmqpClient - Connecting to rabbitMQ server OK, options: { host: 'localhost', port: 5672 }
2019-06-03 17:52:19.005  - INFO: WorkingAgent - video agent join cluster ok.
2019-06-03 17:52:19.021  - INFO: ClusterWorker - Join cluster owt-cluster OK.
2019-06-03 17:52:19.036  - INFO: WorkingAgent - as rpc server ok.
2019-06-03 17:52:19.037  - INFO: WorkingAgent - as monitoring target ok.
starting management-console, stdout -> /home/starnight/Intel_CS_WebRTC.v4.2/Release-v4.2/logs/management-console.stdout
Start management-console HTTPS server
starting sip-portal, stdout -> /home/starnight/Intel_CS_WebRTC.v4.2/Release-v4.2/logs/sip-portal.stdout
2019-06-03 17:52:20.985  - INFO: AmqpClient - Connecting to rabbitMQ server OK, options: { host: 'localhost', port: 5672 }
2019-06-03 17:52:21.002  - INFO: SipPortal - sip-portal up!
2019-06-03 17:52:21.007  - INFO: SipPortal - initSipRooms ok
starting portal, stdout -> /home/starnight/Intel_CS_WebRTC.v4.2/Release-v4.2/logs/portal.stdout
2019-06-03 17:52:21.828  - INFO: AmqpClient - Connecting to rabbitMQ server OK, options: { host: 'localhost', port: 5672 }
2019-06-03 17:52:21.836  - INFO: Main - portal initializing as rpc client ok
2019-06-03 17:52:21.864  - INFO: Main - portal join cluster ok, with rpcID: portal-d7749f06a941b7dac50b@172.16.85.136
2019-06-03 17:52:21.865  - INFO: ClusterWorker - Join cluster owt-cluster OK.
2019-06-03 17:52:21.869  - INFO: Main - portal initializing as rpc server ok
2019-06-03 17:52:21.872  - INFO: Main - portal-d7749f06a941b7dac50b@172.16.85.136 as monitor ready
2019-06-03 17:52:22.481  - INFO: Main - start socket.io server ok.
starting app, stdout -> /home/starnight/Intel_CS_WebRTC.v4.2/Release-v4.2/logs/app.stdout
1 rooms in this service.
sampleRoom Id: 5ce4c0685dccf74eb12d1892
最后没有提示1 rooms xxx 也没得关系。
2、停止服务
# ./bin/stop-all.sh
stopping management-api.
stopping cluster-manager.
stopping recording-agent.
stopping webrtc-agent.
stopping conference-agent.
stopping analytics-agent.
stopping sip-agent.
stopping streaming-agent.
stopping audio-agent.
stopping video-agent.
stopping management-console.
stopping sip-portal.
stopping portal.
stopping app.
4.3.4 测试运行
4.3.4.1控制台界面
浏览器访问https://172.16.85.136:3300/console/ ,会提示输入账号的id和key。
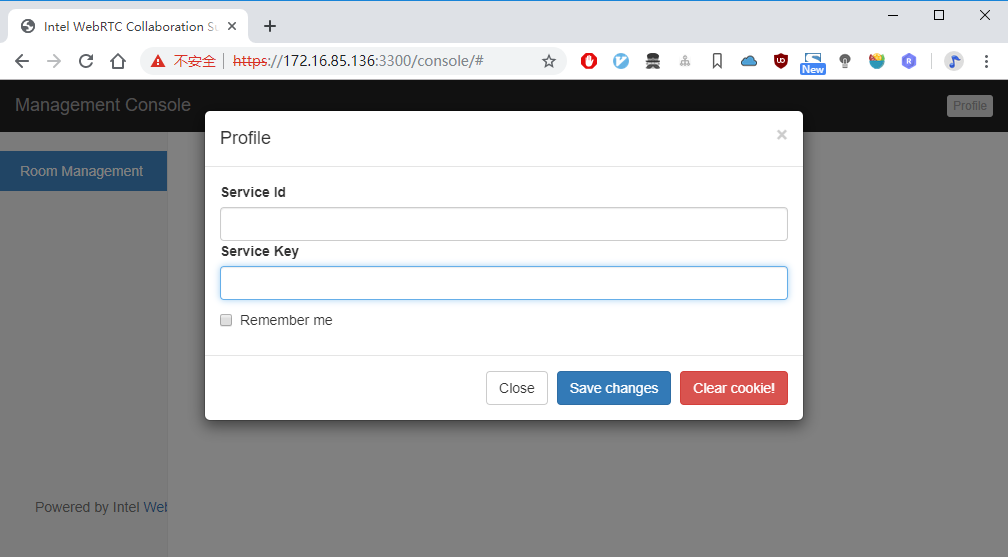
输入管理员id、key,进入管理员界面:

输入普通账户id、key,进入普通账号界面:

4.3.4.2 访问
浏览器访问 https://172.16.85.136:3004/

5、安装问题
可能在安装过程中还是会碰上一些问题,或是由于环境原因,或是有一些遗漏的地方。
所以只能给点提示:要善用谷歌浏览器F12、Firefox F12和安装目录下logs日志文件,相信凭您的智慧是可以解决这些问题的。
6、参考资料
- Intel® Collaboration Suite for WebRTC (Intel® CS for WebRTC):
https://software.intel.com/en-us/articles/intel-collaboration-suite-for-webrtc
- 如何使用Intel CS for WebRTC 快速搭建实时音视频通讯系统
https://blog.csdn.net/wutong_login/article/details/81128620
- OWT Server 快速入门
https://blog.piasy.com/2019/04/14/OWT-Server-Quick-Start/index.html
- Boost install on Ubuntu