【建立一个新的模块,使用springboot+nacos,搭建完启动服务发现报了两个问题:
1.No active profile set, falling back to default profiles: default
2.Process finished with exit code 1
查了许多文章,都反应是 pom文件中maven依赖冲突或者其他导致。 】
【解决:将所有的依赖删掉,只留下了必须的4个】
<parent>
        <groupId>org.springframework.boot</groupId>
        <artifactId>spring-boot-starter-parent</artifactId>
        <version>2.0.7.RELEASE</version>
        <relativePath/> <!-- lookup parent from repository -->
    </parent>
    <properties>
    </properties>
    <artifactId>hello-gw</artifactId>
    <!-- 声明式依赖,并不实际依赖,用于管理版本号 -->
    <dependencyManagement>
        <dependencies>
            <dependency>
                <groupId>org.springframework.cloud</groupId>
                <artifactId>spring-cloud-dependencies</artifactId>
                <version>Finchley.SR1</version>
                <type>pom</type>
                <scope>import</scope>
            </dependency>
            <dependency>
                <groupId>org.springframework.cloud</groupId>
                <artifactId>spring-cloud-alibaba-dependencies</artifactId>
                <version>0.2.2.RELEASE</version>
                <type>pom</type>
                <scope>import</scope>
            </dependency>
        </dependencies>
    </dependencyManagement>

    <dependencies>
        <dependency>
            <groupId>org.springframework.boot</groupId>
            <artifactId>spring-boot-starter</artifactId>
        </dependency>
        <dependency>
            <groupId>org.springframework.boot</groupId>
            <artifactId>spring-boot-starter-web</artifactId>
        </dependency>
        <!--服务发现-->
        <dependency>
            <groupId>org.springframework.cloud</groupId>
            <artifactId>spring-cloud-starter-alibaba-nacos-discovery</artifactId>
        </dependency>
        <!-- 配置中心 -->
        <dependency>
            <groupId>org.springframework.cloud</groupId>
            <artifactId>spring-cloud-starter-alibaba-nacos-config</artifactId>
        </dependency>
    </dependencies>
【整合过程 :
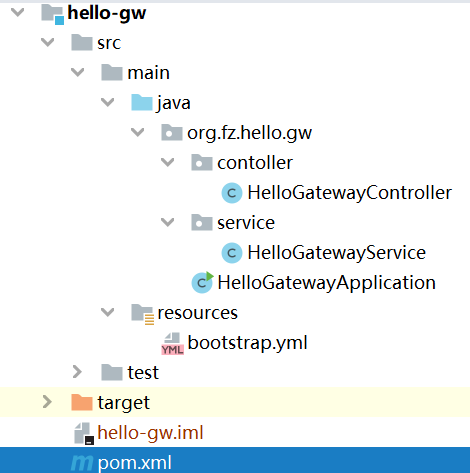
1.新建模块,pom依赖导入,见上 ↑
2.新建服务启动类:
@SpringBootApplication
@EnableDiscoveryClient
public class HelloGatewayApplication {
    public static void main(String[] args) {
        try {
            SpringApplication.run(HelloGatewayApplication.class, args);
        }catch (Exception e){
            e.printStackTrace();
        }
    }
}
注解不要丢。
3.配置文件-bootstrap.yml:
spring:
  application:
    name: hello-gw
  cloud:
    nacos:
      config:
        server-addr: 192.168.1.36:8848
        file-extension: yaml
        prefix: ${spring.application.name}
        refresh:
          enabled: true
      discovery:
        server-addr: 192.168.1.36:8848
server:
  port: 8849
  servlet:
    context-path: /hello-boot
4.controller 验证:
@ConfigurationProperties(prefix="hello") // 与配置中心中的配置路径对应
@RestController
@Data
public class HelloGatewayController {

    @Autowired
    private HelloGatewayService helloGatewayService;

    private String helloNacosV;//变量配置在配置中心

    @GetMapping("/requestResult")
    public Object requestResult(){
        System.out.println("enter ...helloNacosV:"+helloNacosV);
        Object result = helloGatewayService.putDiscoveryNacosV(helloNacosV);
        return result;
    }
}

//service代码:
@Service
public class HelloGatewayService {
    public Object putDiscoveryNacosV(String helloNacosV) {
        Map result = new HashMap();
        result.put("discoveryNacosValue",helloNacosV);
        return  result ;
    }
}
5.配置中心配置:
server:
  port: 8849
  servlet:
    context-path: /hello-nacos
spring:
  cloud:
    nacos:
      discovery:
        server-addr: 127.0.0.1:8848
        loadbalancer:
          retry:
            enabled: true
hello:
    helloNacosV: 123
】
【验证:
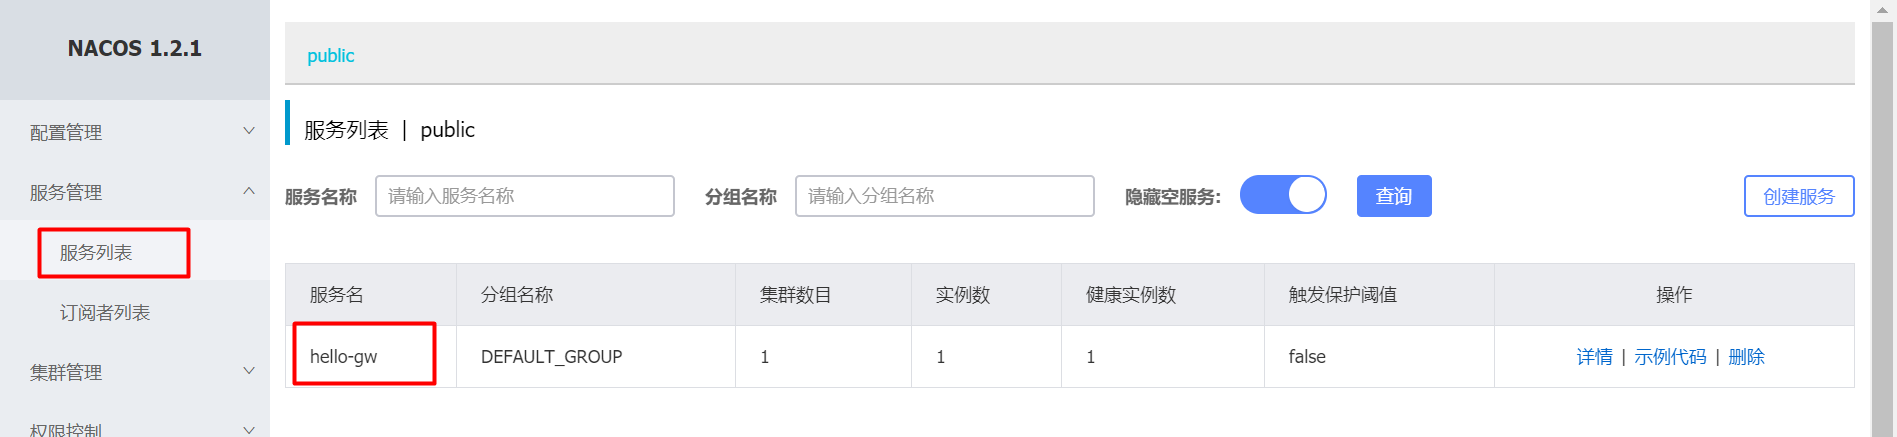
1.启动服务: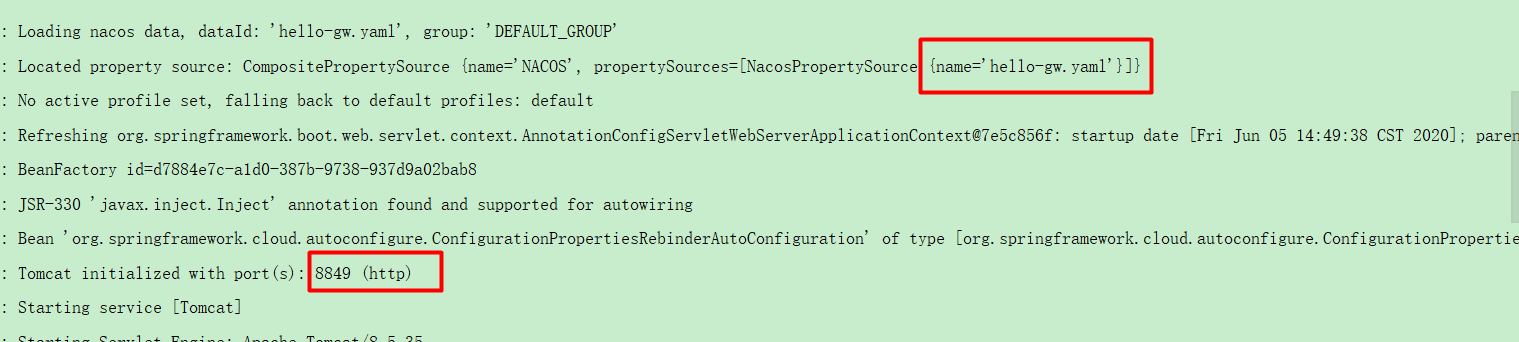
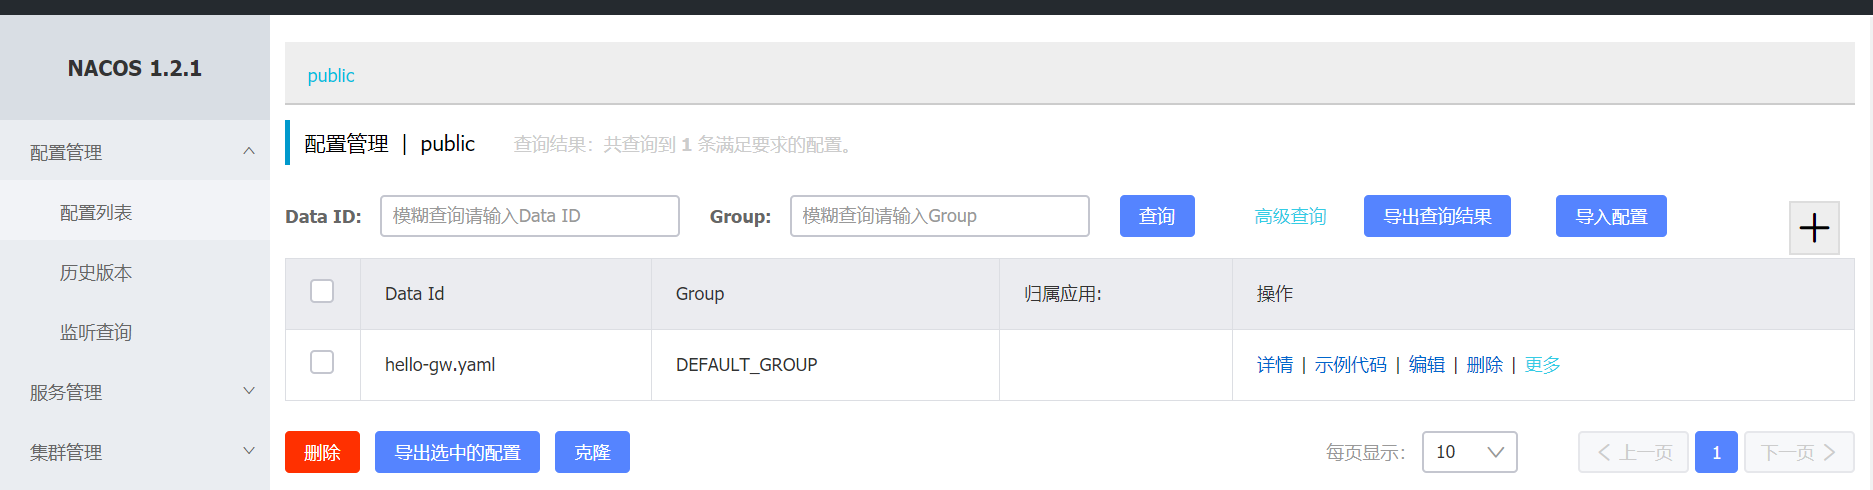
找到bootstrap.yml中配置的hello-gw.yaml找到配置的服务端口 8849,可见 整合过程第5步中的port。

服务启动,项目路径是 整合过程第5步中的context-path:hello-nacos
2.访问路径: http://localhost:8849/hello-nacos/requestResult
返回: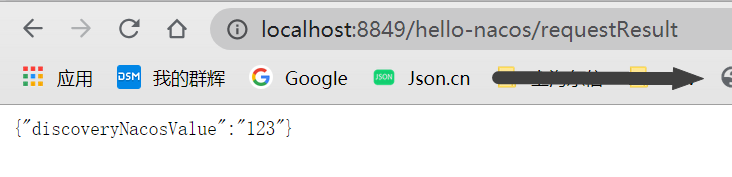 】
】
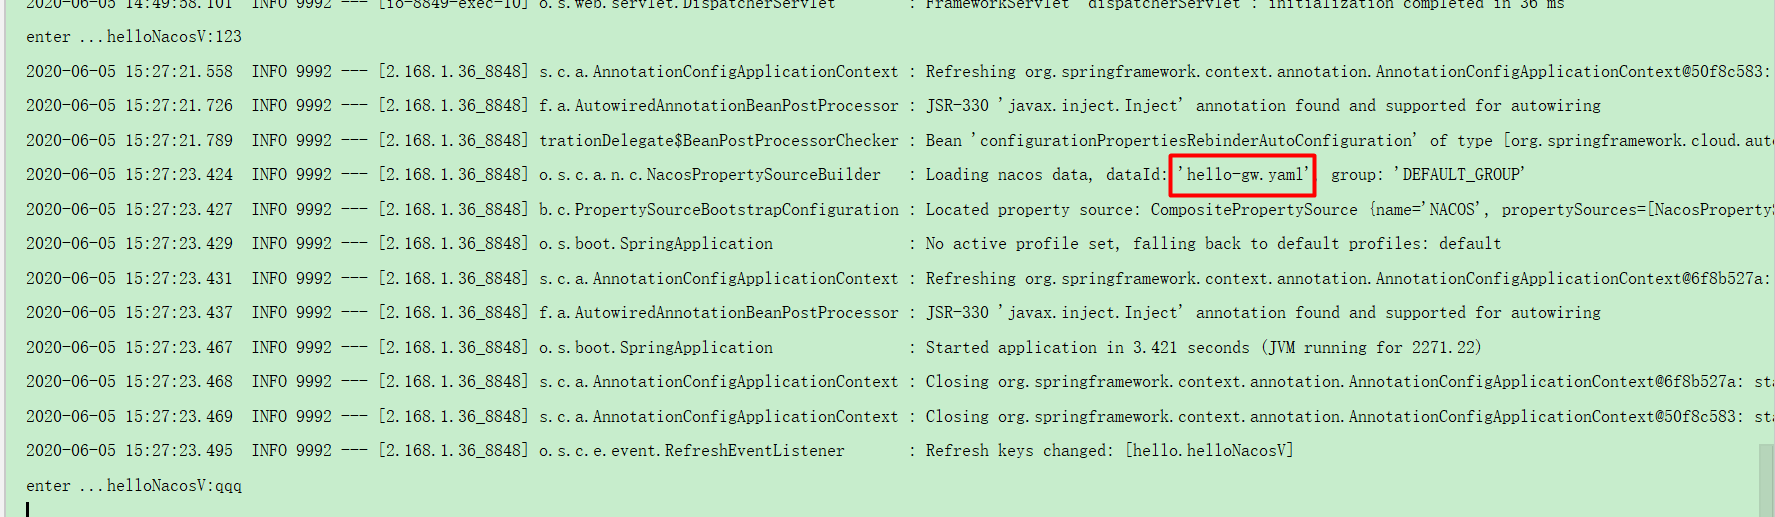
配置中心体现:修改 123,改为qqq,不用重启服务,访问路径,返回:
查看日志可以发现,每次请求,都会重新加载配置中心的对应配置。
【题外话:项目配置yml和配置中心yaml中都配置了 context-path,最后 还是以配置中心的为准。
去掉配置中心的maven依赖,则以本地为准。】
补充两张结果图: