
如果我们系统中想要拥有自动配置的功能,可以自己编写一个starter (启动器),想想就觉得很酷,因为这意味着我们不仅有自己定义的自动配的功能,而且具有更通用的耦合度更低的配置。
以一个简单功能为例:浏览器发送 sayHello 请求,服务器接受请求并处理,响应 Hello 。
首先我们看下工程结构:
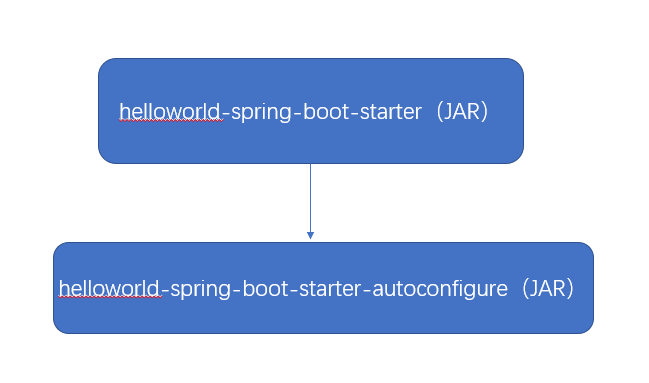
helloworld-spring-boot-starter-autoconfigure(以下简称autoconfigure):该模块用来实现 Helloworld 的自动配置功能,它的打包方式为 jar;
helloworld-spring-boot-starter(以下简称starter):该模块的打包方式是 jar,依赖 autoconfigure 模块,它不写任何代码,只做自动配置包的自动引入,如果要使用 helloworld 自动配置功能,只要在 pom 文件中引入 starter 模块即可:
<dependency><groupId>com.seagetech.spring.boot</groupId><artifactId>helloworld-spring-boot-starter</artifactId><version>0.0.1-SNAPSHOT</version></dependency>
1 项目工程的创建
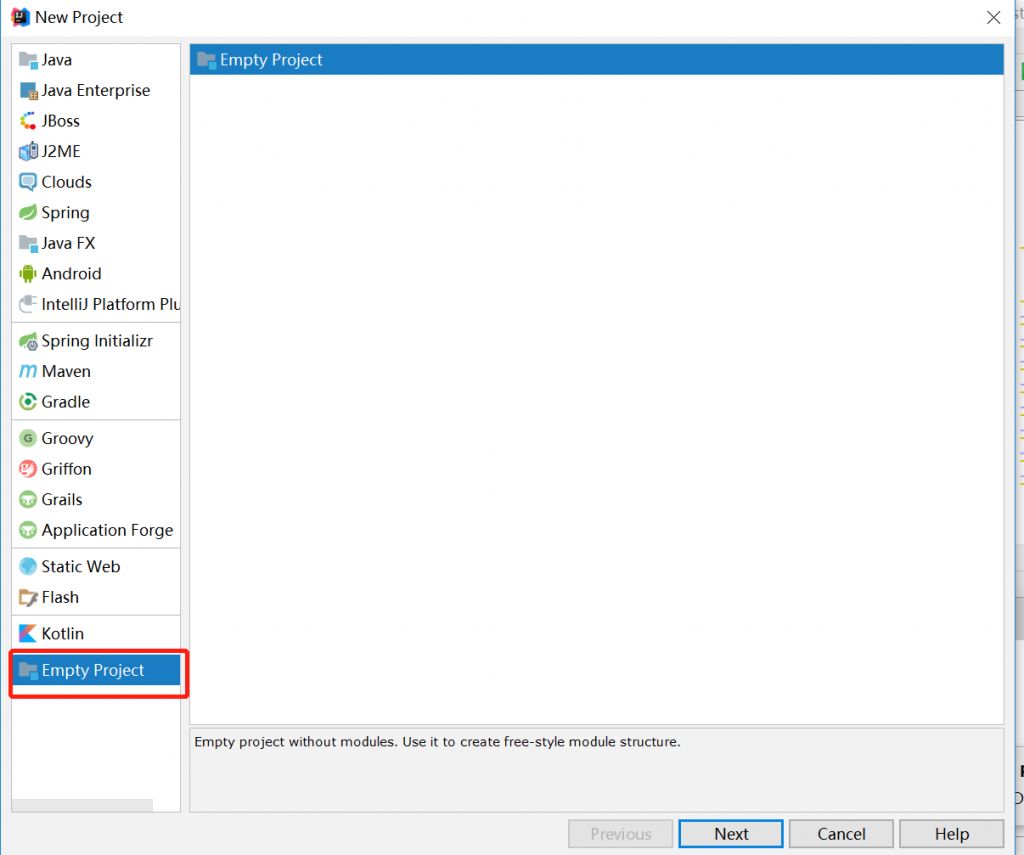
1.1 创建Empty Project
- 新建一个空的项目,如下图,点击Next
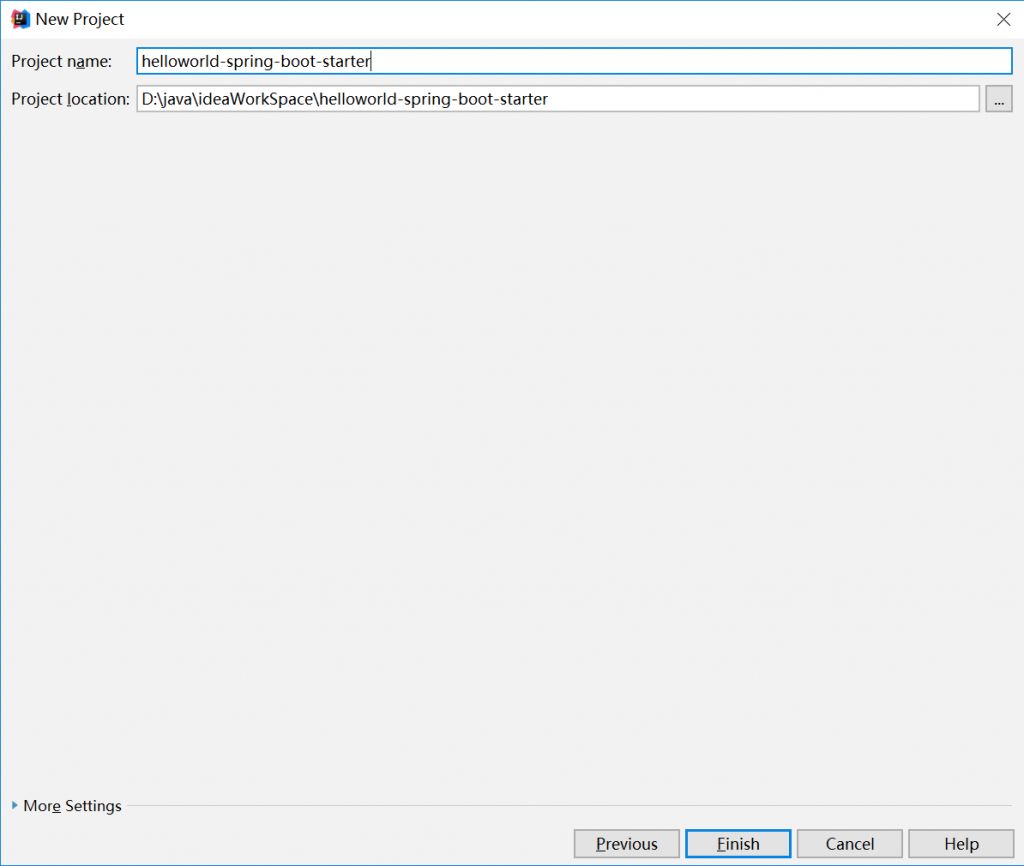
- 输入项目名称以及选择项目存放路径,点击Finish
1.2 创建starter模块
- 在1.1节中新建的空项目基础上新建一个Module

- 选择Maven,点击Next
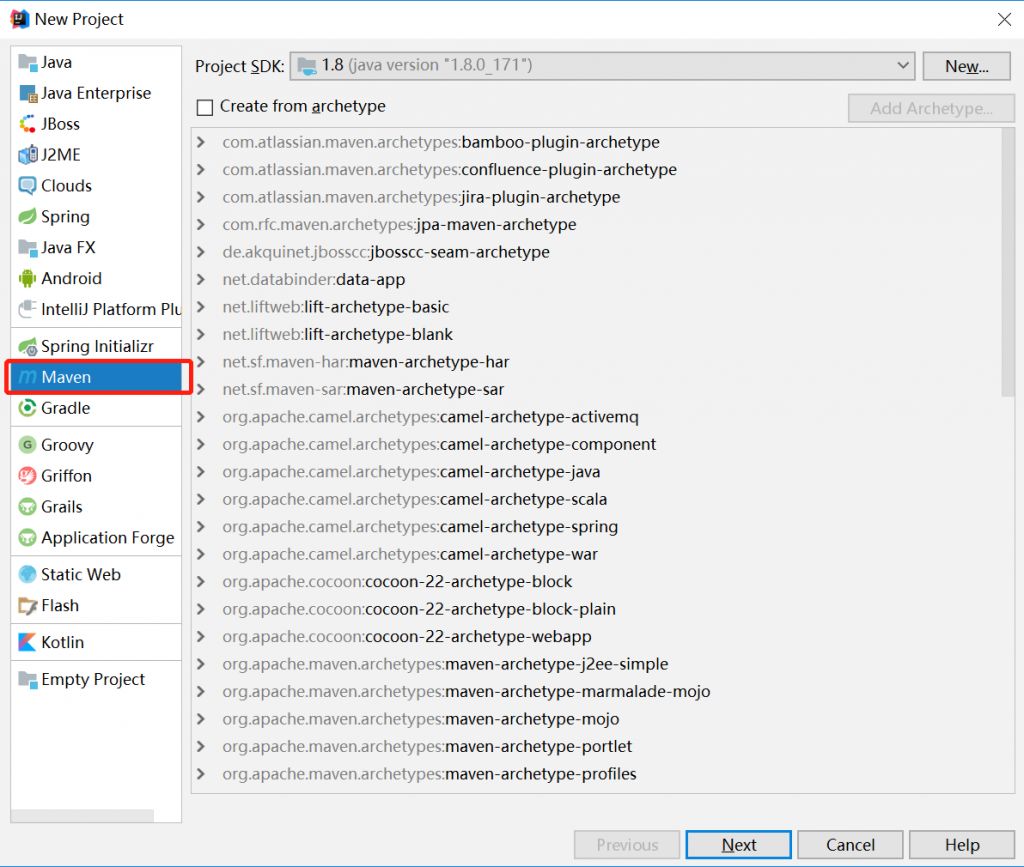
- 输入GroupId、ArtifactId 和 Version 信息,点击Finish
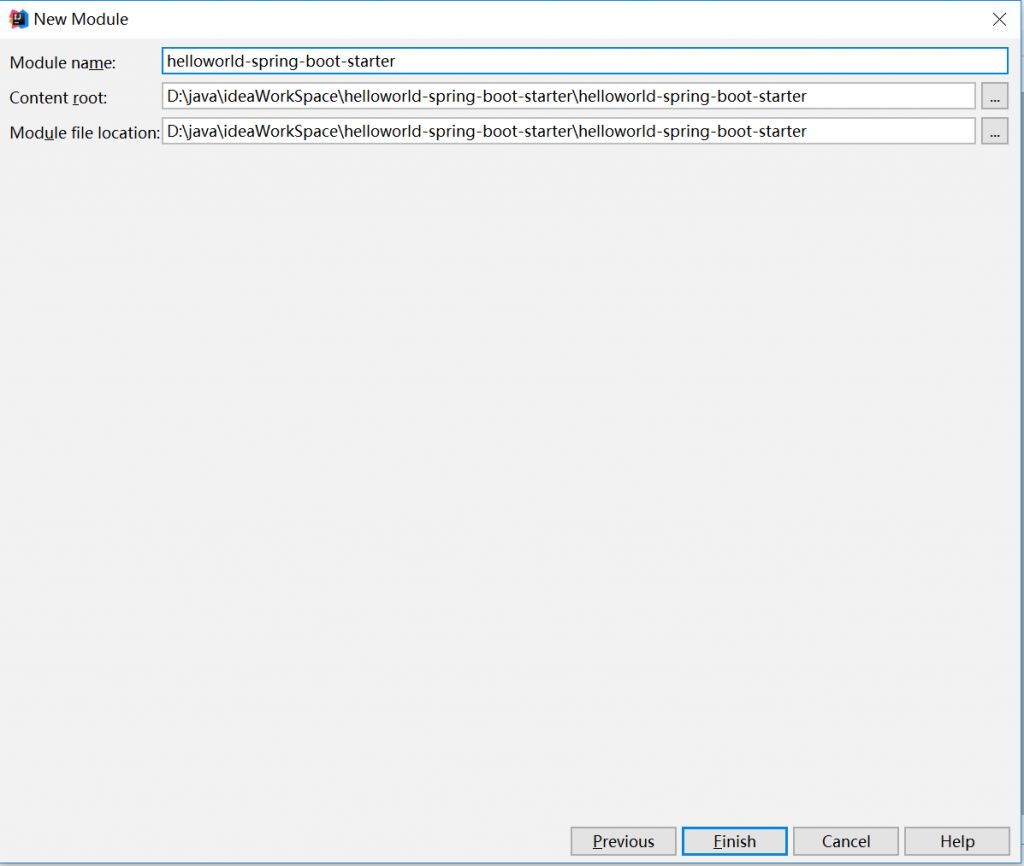
4) 由于这个模块只做自动配置包的引入,所有删除 src 下的包,最终项目结构如下:
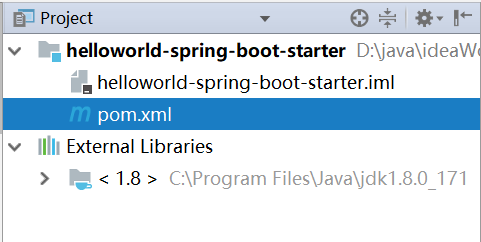
pom.xml 文件:
<?xml version="1.0" encoding="UTF-8"?><project xmlns="http://maven.apache.org/POM/4.0.0"xmlns:xsi="http://www.w3.org/2001/XMLSchema-instance"xsi:schemaLocation="http://maven.apache.org/POM/4.0.0 http://maven.apache.org/xsd/maven-4.0.0.xsd"><modelVersion>4.0.0</modelVersion><groupId>com.seagetech.spring.boot</groupId><artifactId>helloworld-spring-boot-starter</artifactId><version>1.0-SNAPSHOT</version></project>
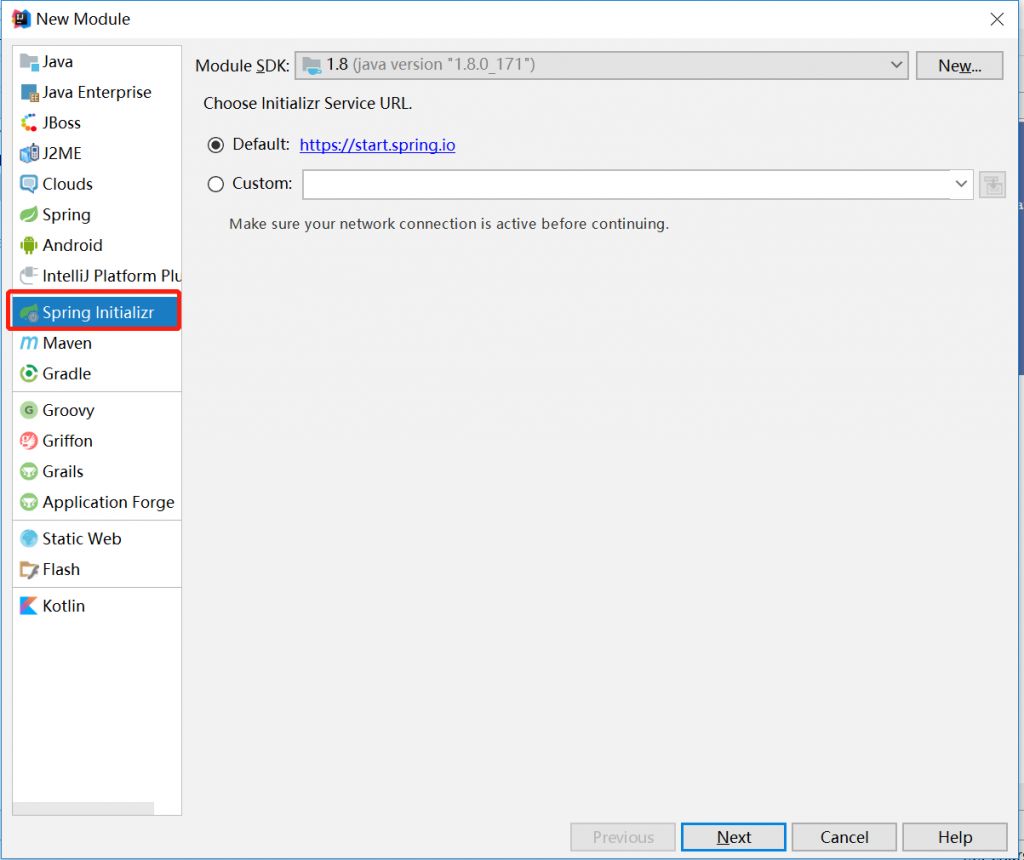
1.3 创建 autoconfigure 模块
- 按1.2节第1步,新建一个 Module,并选择 Spring Initializr,点击Next
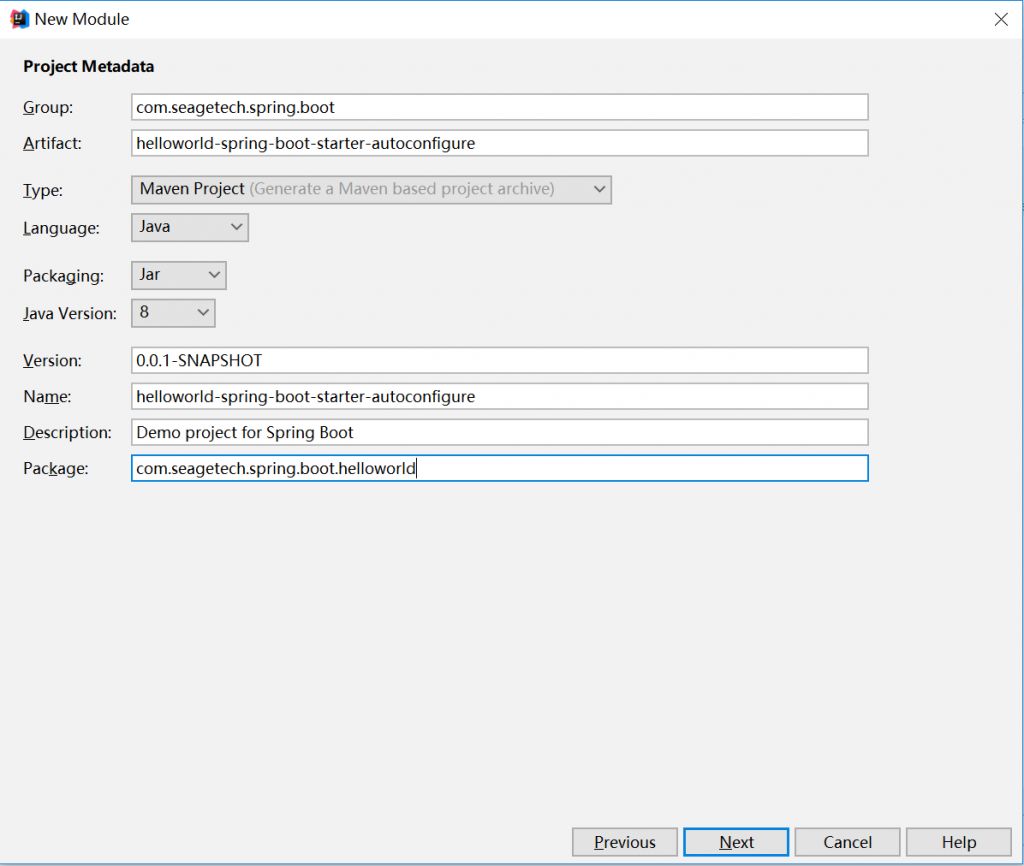
2) 输入项目相关信息,如下图所示:
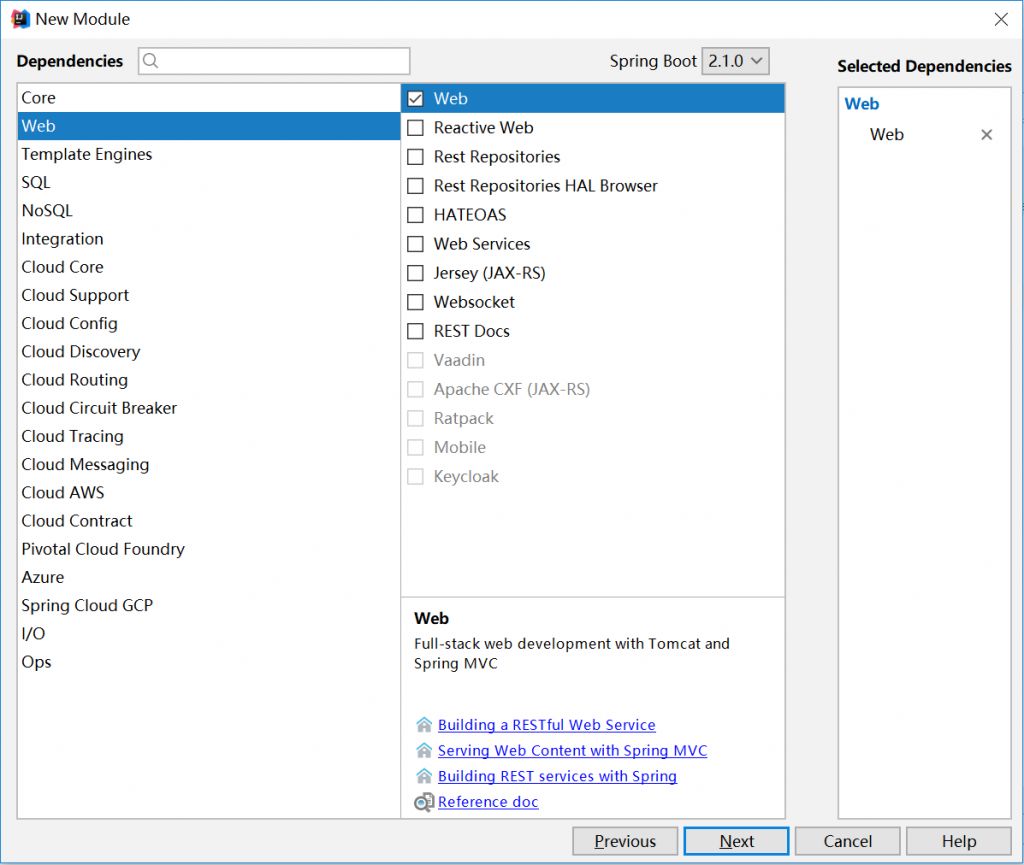
- 选择依赖,我们这里只选择web场景的依赖,点击Next
- 默认,不需要改动,点击Finish
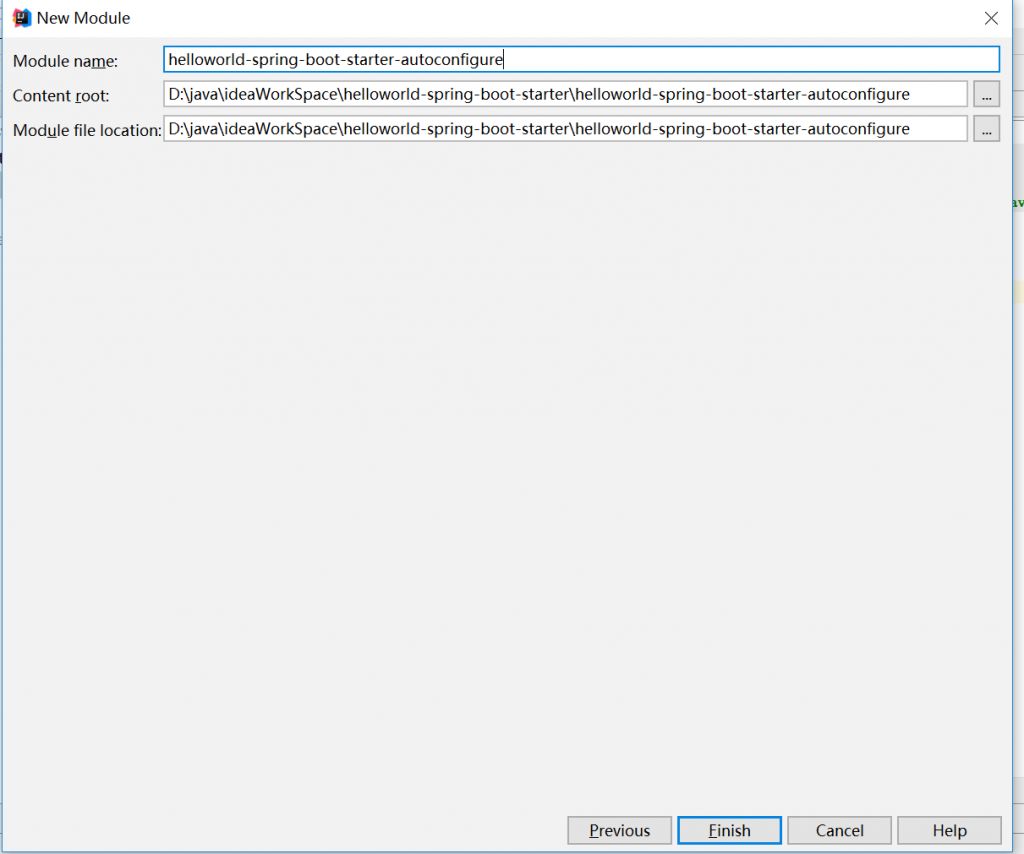
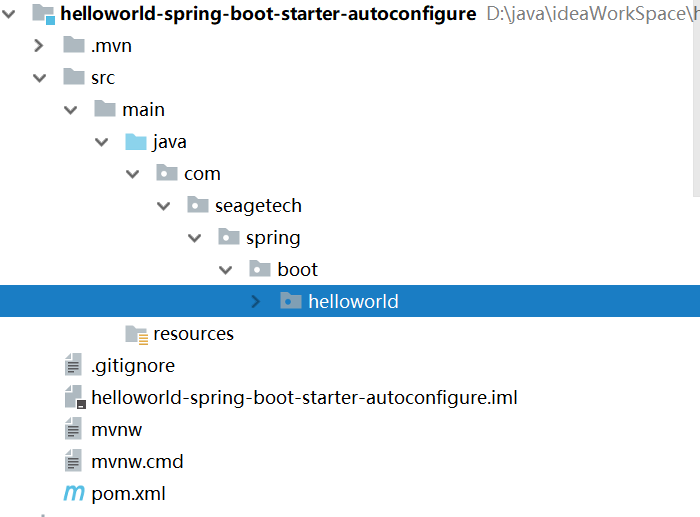
4) 删除 SpringBoot 自动创建的主配置类、resources 下所有文件(夹)以及 test 文件夹,最终项目结构如下:
pom.xml(已删除 test 测试模块的自动配置包以及 build 下的 Maven 插件)
<?xml version="1.0" encoding="UTF-8"?><project xmlns="http://maven.apache.org/POM/4.0.0" xmlns:xsi="http://www.w3.org/2001/XMLSchema-instance"xsi:schemaLocation="http://maven.apache.org/POM/4.0.0 http://maven.apache.org/xsd/maven-4.0.0.xsd"><modelVersion>4.0.0</modelVersion><groupId>com.seagetech.spring.boot</groupId><artifactId>helloworld-spring-boot-starter-autoconfigure</artifactId><version>0.0.1-SNAPSHOT</version><packaging>jar</packaging><name>helloworld-spring-boot-starter-autoconfigure</name><description>Demo project for Spring Boot</description><parent><groupId>org.springframework.boot</groupId><artifactId>spring-boot-starter-parent</artifactId><version>2.1.0.RELEASE</version><relativePath/></parent><properties><project.build.sourceEncoding>UTF-8</project.build.sourceEncoding><project.reporting.outputEncoding>UTF-8</project.reporting.outputEncoding><java.version>1.8</java.version></properties><dependencies><dependency><groupId>org.springframework.boot</groupId><artifactId>spring-boot-starter-web</artifactId></dependency></dependencies></project>
5) 在1.2节创建的 helloworld-spring-boot-starter 的 pom 下模块引入本节创建的 autoconfigure 模块:
<dependency><groupId>com.seagetech.spring.boot</groupId><artifactId>helloworld-spring-boot-starter-autoconfigure</artifactId><version>0.0.1-SNAPSHOT</version></dependency>
1.4 实现HelloWorld自动配置
1) 在 helloworld 包下新建 HelloWorldProperties 类,作为配置类,目的是后面使用这个自动配置,直接可以在 application.properties 文件中配置:
package com.seagetech.spring.boot.helloworld;import org.springframework.boot.context.properties.ConfigurationProperties;/*** HelloWorld属性配置类* @auther: wangzb* @date: 2018/11/13 22:21*/@ConfigurationProperties(prefix = "hello")public class HelloWorldProperties {/*** 打招呼的内容,默认为“World!”*/private String msg = "World!";public String getMsg() {return msg;}public void setMsg(String msg) {this.msg = msg;}}
2) 新建 HelloWorldService 接口,并实现:
接口:
/*** @auther: wangzb* @date: 2018/11/13 22:28*/public interface HelloWorldService {/*** 打招呼方法* @param name 人名,向谁打招呼使用* @return*/String sayHello(String name);}
实现类:
/*** @auther: wangzb* @date: 2018/11/13 22:33*/@Componentpublic class HelloWorldServiceImpl implements HelloWorldService{@Autowiredprivate HelloWorldProperties helloWorldProperties;/*** 打招呼方法** @param name 人名,向谁打招呼使用* @return*/@Overridepublic String sayHello(String name) {return "Hello " + name + " " + helloWorldProperties.getMsg();}}
新建 HelloWorldAutoConfiguration 配置类
/*** @auther: wangzb* @date: 2018/11/13 22:37*/@Configuration@ConditionalOnWebApplication@EnableConfigurationProperties({HelloWorldProperties.class})@Import(HelloWorldServiceImpl.class)public class HelloWorldAutoConfiguration {}
1.5 创建 spring.factories 文件
在 SpringBoot自动配置原理 中,我们提到 @EnableAutoConfiguration 的关键功能是使用 SpringFactoriesLoader.loadFactoryNames 方法来扫描具有 META-INF/spring.factories 文件的 jar 包,这样我们的自动配置类才能生效,所以我们在 autoconfigure 模块的 resources 下创建 META-INF/spring.factories 文件:
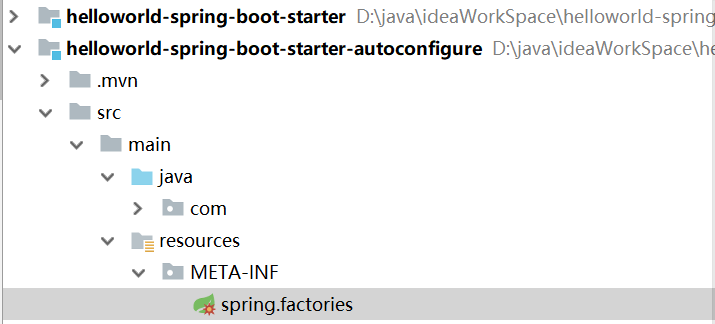
在 spring.factories 中写入:
org.springframework.boot.autoconfigure.EnableAutoConfiguration=\com.seagetech.spring.boot.helloworld.HelloWorldAutoConfiguration
2 helloworld 自动配置的使用
创建好 helloworld 自动配置项目后,接下来就是使用了,我们在 Idea 中使用 install 将1节中创建好的 starter/autoconfigure 模块打包到本地 Maven 创库,然后在 SpringBoot入门 章节创建的 sping-boot-demo 项目中使用,在其 pom 文件中引入:
<dependency><groupId>com.seagetech.spring.boot</groupId><artifactId>helloworld-spring-boot-starter</artifactId><version>0.0.1-SNAPSHOT</version></dependency>
在主配置类路径下创建 HelloWorldController :
package com.seagetech.springbootdemo;import com.seagetech.spring.boot.helloworld.HelloWorldService;import org.springframework.beans.factory.annotation.Autowired;import org.springframework.stereotype.Controller;import org.springframework.web.bind.annotation.RequestMapping;/*** @auther: wangzb* @date: 2018/11/17 11:17*/@Controllerpublic class HelloWorldController {@Autowiredprivate HelloWorldService helloWorldService;@RequestMapping(value = "/sayHello")public String sayHello(String name){return helloWorldService.sayHello(name);}}
启动项目,在浏览器输入:http://localhost:8080/sayHello?name=wangzb,浏览器返回:
我们在重启项目,重复以上步骤,浏览器响应:
3 元数据的配置
到目前为止,helloworld 的自动配置功能已实现,并且正确使用了,但还有一点不够完美,如果你也按上面步骤实现了自己的 helloworld 自动配置,在 application.properties 中配置 hello.msg 属性时,你会发现并没有提示你有关该配置的信息,但是如果你想配置 Tomcat 端口时,输入 server.port 是有提示的:

这种功能我们如何做呢,我们打开 SpringBoot入门 章节下载的 “spring-boot-reference.pdf” 文件,在目录中找到 “Appendix B. Configuration Metadata(附录B.配置元数据)”,下面我们使用谷歌来翻译下相关原文:
Spring Boot jars include metadata files that provide details of all supported configuration properties.The files are designed to let IDE developers offer contextual help and “code completion” as users are working with application.properties or application.yml files.
Spring Boot jar 包含元数据文件,提供所有支持的配置属性的详细信息。这些文件旨在让 IDE 开发人员使用 application.properties或 application.yml 文件像用户一样提供上下文帮助和“代码完成”
……
B.1 Metadata Format
Configuration metadata files are located inside jars under META-INF/spring-configurationmetadata.json They use a simple JSON format with items categorized under either “groups” or “properties” and additional values hints categorized under “hints”, as shown in the following example:
B.1 元数据格式
配置元数据文件位于 META-INF / spring-configuration-metadata.json下的 jar 中。它们使用简单的 JSON 格式,其中的项目分类为 “groups” 或 “properties” 和其他值提示分类在 “hints” 下。
….
看看它的例子:
{"groups": [{"name": "server","type": "org.springframework.boot.autoconfigure.web.ServerProperties","sourceType": "org.springframework.boot.autoconfigure.web.ServerProperties"},...],"properties": [{"name": "server.port","type": "java.lang.Integer","sourceType": "org.springframework.boot.autoconfigure.web.ServerProperties"},{"name": "server.address","type": "java.net.InetAddress","sourceType": "org.springframework.boot.autoconfigure.web.ServerProperties"},...],"hints": [{"name": "spring.jpa.hibernate.ddl-auto","values": [{"value": "none","description": "Disable DDL handling."},{"value": "validate","description": "Validate the schema, make no changes to the database."},{"value": "update","description": "Update the schema if necessary."}]]}
所以元数据是在位于 META-INF/spring-configuration-metadata.json 下配置的,下面就列出有关 groups、properties、hints 使用。
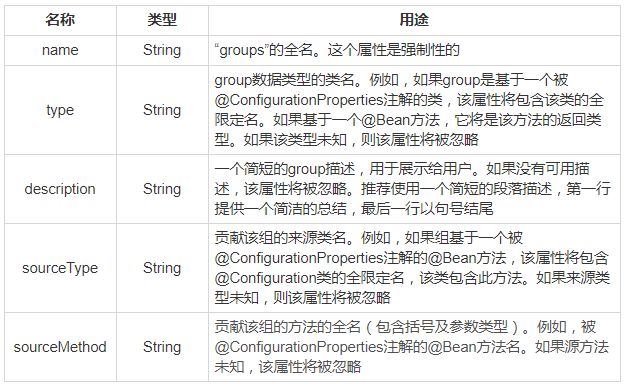
3.1 Group属性
“groups” 中包含的 JSON 对象可以包含下表中显示的属性:
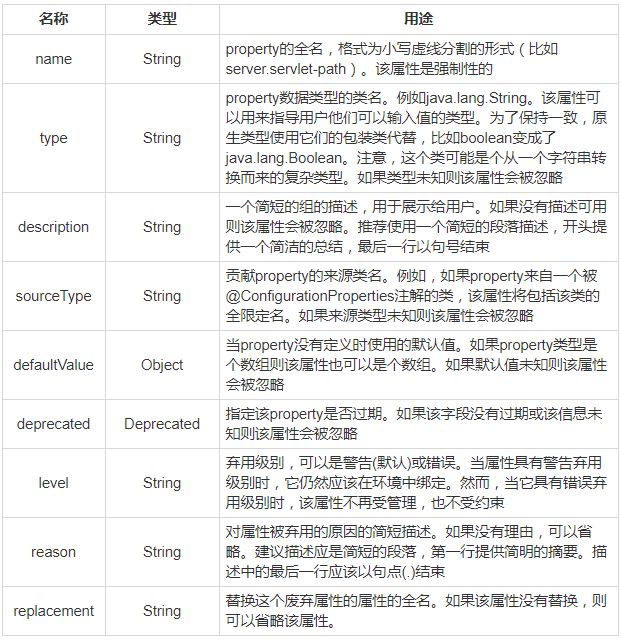
3.2 Property属性
properties 数组中包含的 JSON 对象可由以下属性构成:
3.3 hints属性
hints 数组中包含的 JSON 对象可以包含以下属性:
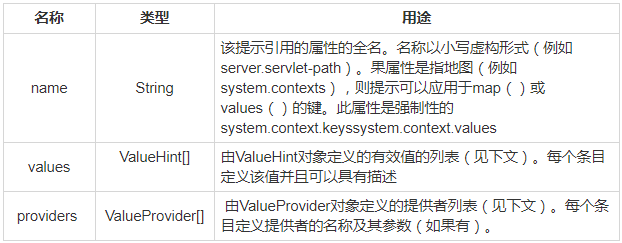
每个 “hints” 元素的 values 属性中包含的 JSON 对象可以包含下表中描述的属性:

每个 “hints” 元素的 providers 属性中的 JSON 对象可以包含下表中描述的属性:

3.4 配置元数据
所以如果想有更好的用户体验,可以为我们自定义的 starter 配置元数据,下面就为 HelloWorld 配置元数据。
在 META-INF 下创建 spring-configuration-metadata.json 文件:

在文件中输入如下内容:
{"hints":[{"name":"hello.msg","values":[{"value":"你好","description":"中文方式打招呼"},{"value":"Hi","description":"英文方式打招呼"}]}],"groups":[{"sourceType": "com.seagetech.spring.boot.helloworld.HelloWorldProperties","name": "hello","type": "com.seagetech.spring.boot.helloworld.HelloWorldProperties"}],"properties":[{"sourceType": "com.seagetech.spring.boot.helloworld.HelloWorldProperties","name": "hello.msg","type": "java.lang.String","description": "打招呼的内容","defaultValue": "Worlds"}]}
然后将 autoconfigure 模块重新打包,接下来就是在 spring-boot-demo 项目中使用,如下图所示,就有了属性的提示:


原文:https://shimo.im/docs/ywxu41XEYxYXYy3U/read

本文分享自微信公众号 - 码农沉思录(code-thinker)。
如有侵权,请联系 support@oschina.cn 删除。
本文参与“OSC源创计划”,欢迎正在阅读的你也加入,一起分享。


