前言
本文主要介绍了接口的扩展应用:设备相关的接口包括获取系统信息、网络状态、拨打电话、扫码等;导航栏的动态设置;下拉刷新、上拉加载更多的实现,通过动作链获取节点信息;用条件编译实现小程序、APP等多端兼容;提示框、Loading、模态弹窗等的交互反馈。
一、设备相关
1.系统信息
uni.getSystemInfo(OBJECT)接口用来异步获取系统信息。
OBJECT常见参数和含义如下:
参数名 |类型| 是否必填| 说明
-----|-----|-----|-----
success| Function| 是| 接口调用成功的回调
fail |Function| 否| 接口调用失败的回调函数
complete| Function| 否| 接口调用结束的回调函数(调用成功、失败都会执行)
success返回的常见参数和含义如下:
参数| 说明
-----|-----
brand| 手机品牌
model| 手机型号
pixelRatio| 设备像素比
screenWidth| 屏幕宽度
screenHeight| 屏幕高度
windowWidth |可使用窗口宽度
windowHeight| 可使用窗口高度
windowTop |可使用窗口的顶部位置
windowBottom| 可使用窗口的底部位置
version |引擎版本号
hello uniapp项目中,index.vue如下:
<template>
    <view>
        <button type="primary" @click="getinfo">获取系统信息</button>
    </view>
</template>

<script>
    export default {
        data() {
            return {
            }
        },
        onLoad() {
        },
        onShow() {
            console.log('index onshow')
        },
        onHide() {
            console.log('index onhide')
        },
        methods: {
            getinfo: function(){
                uni.getSystemInfo({
                    success:function(res){
                        console.log(res)
                    }
                })
            }
        }
    }
</script>

<style>

</style>
显示:
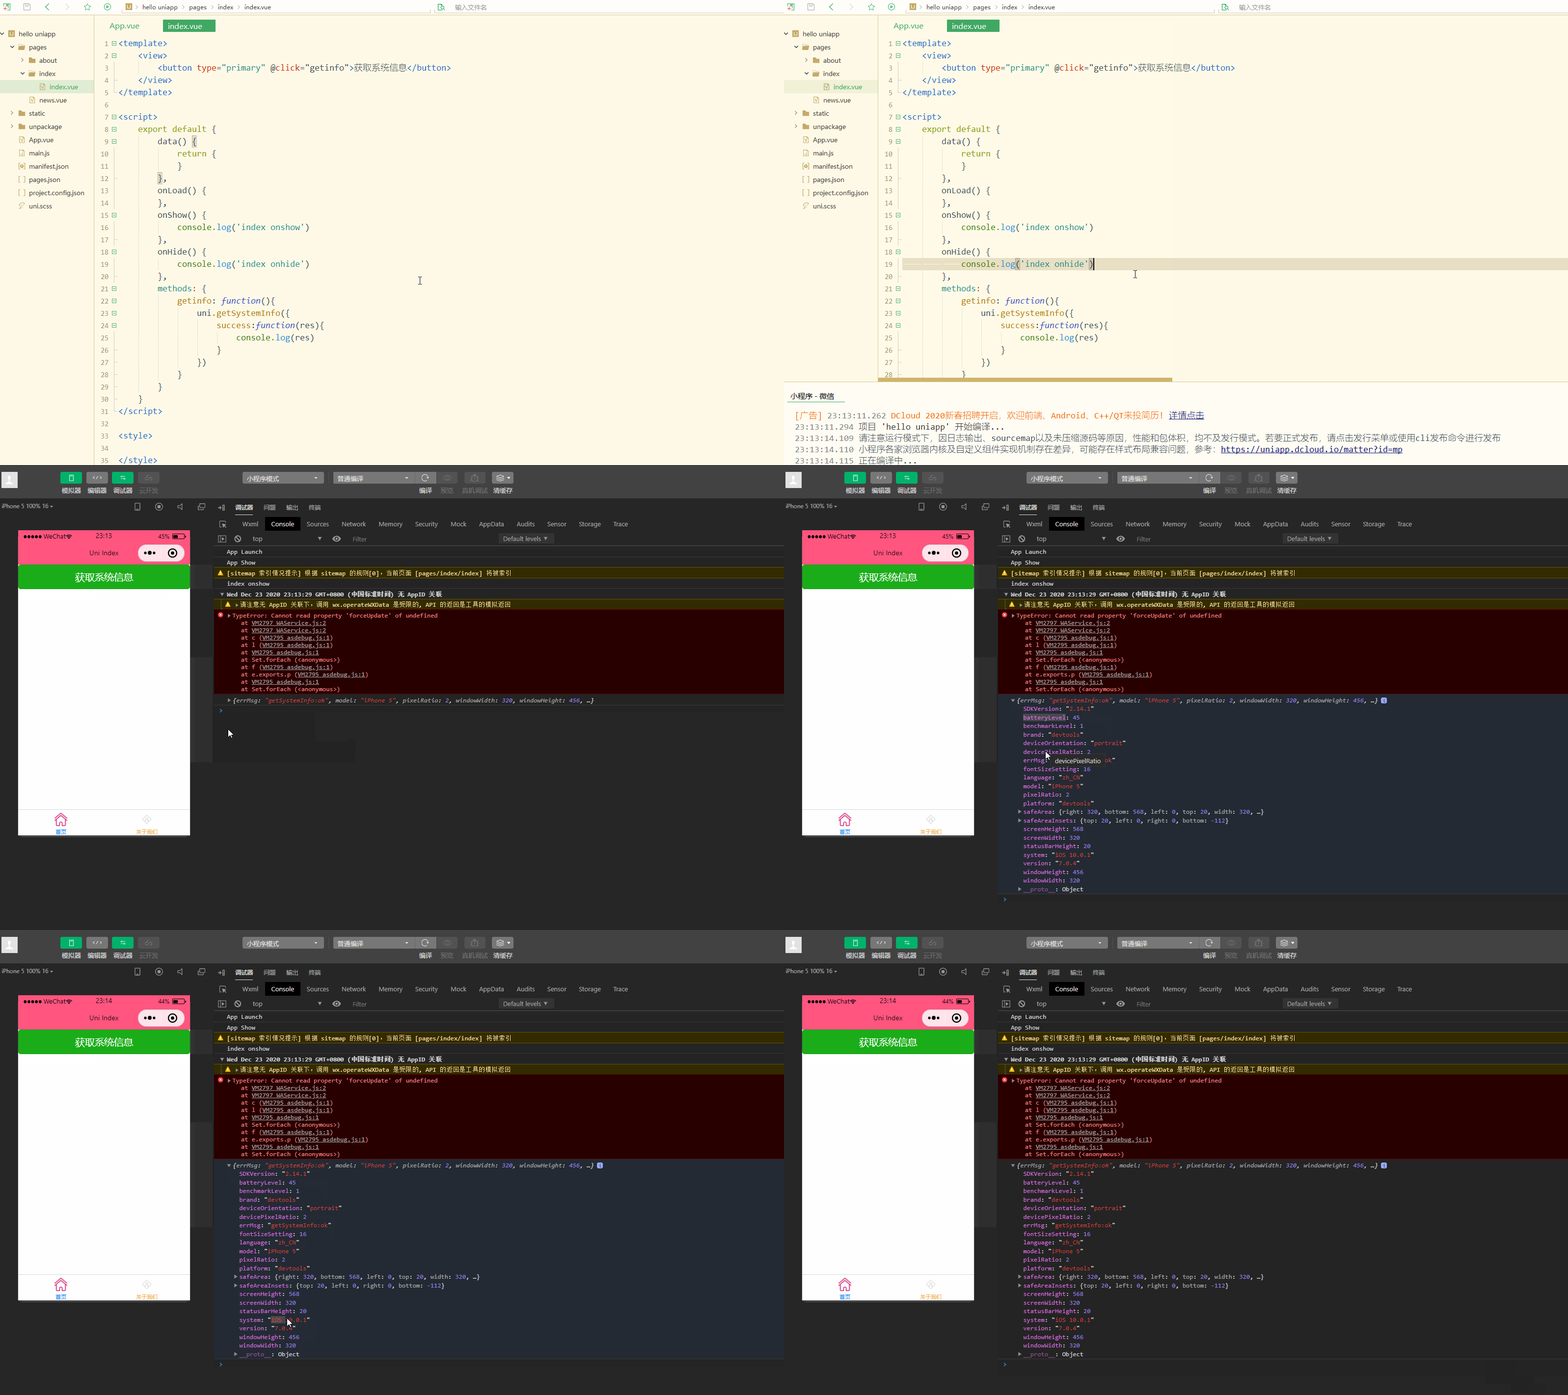
可以获取到当前设备比较全面的信息; 其中,pixelRatio是设备像素比,可以根据该值和实际设备计算选择合适的像素值。
除了使用uni.getSystemInfo(OBJECT)异步获取设备信息,还可以使用uni.getSystemInfoSync()同步获取系统信息;
uni.canIUse(String)可用于判断应用的 API、回调、参数、组件等是否在当前版本可用。
2.网络状态
uni.getNetworkType(OBJECT)用来获取网络类型。
OBJECT常见参数如下:
参数名| 类型| 必填| 说明
-----|-----|-----|-----
success| Function| 是| 接口调用成功,返回网络类型 networkType
fail| Function| 否| 接口调用失败的回调函数
complete| Function| 否| 接口调用结束的回调函数(调用成功、失败都会执行)
uni.onNetworkStatusChange(CALLBACK)用于监听网络状态变化。
CALLBACK返回参数及含义如下:
参数| 类型| 说明
-----|-----|-----
isConnected| Boolean| 当前是否有网络连接
networkType |String| 网络类型
如下:
<template>
    <view>
        <button type="primary" @click="getNetworkType">获取网络类型</button>
    </view>
</template>

<script>
    export default {
        data() {
            return {}
        },
        onLoad() {
        },
        onShow() {
            console.log('index onshow')
        },
        onHide() {
            console.log('index onhide')
        },
        methods: {
            getNetworkType: function(){
                uni.getNetworkType({
                    success:function(res){
                        console.log(res.networkType);
                    }
                });
                uni.onNetworkStatusChange(function(res){
                    console.log(res)
                })
            },
        }
    }
</script>

<style>

</style>
显示:
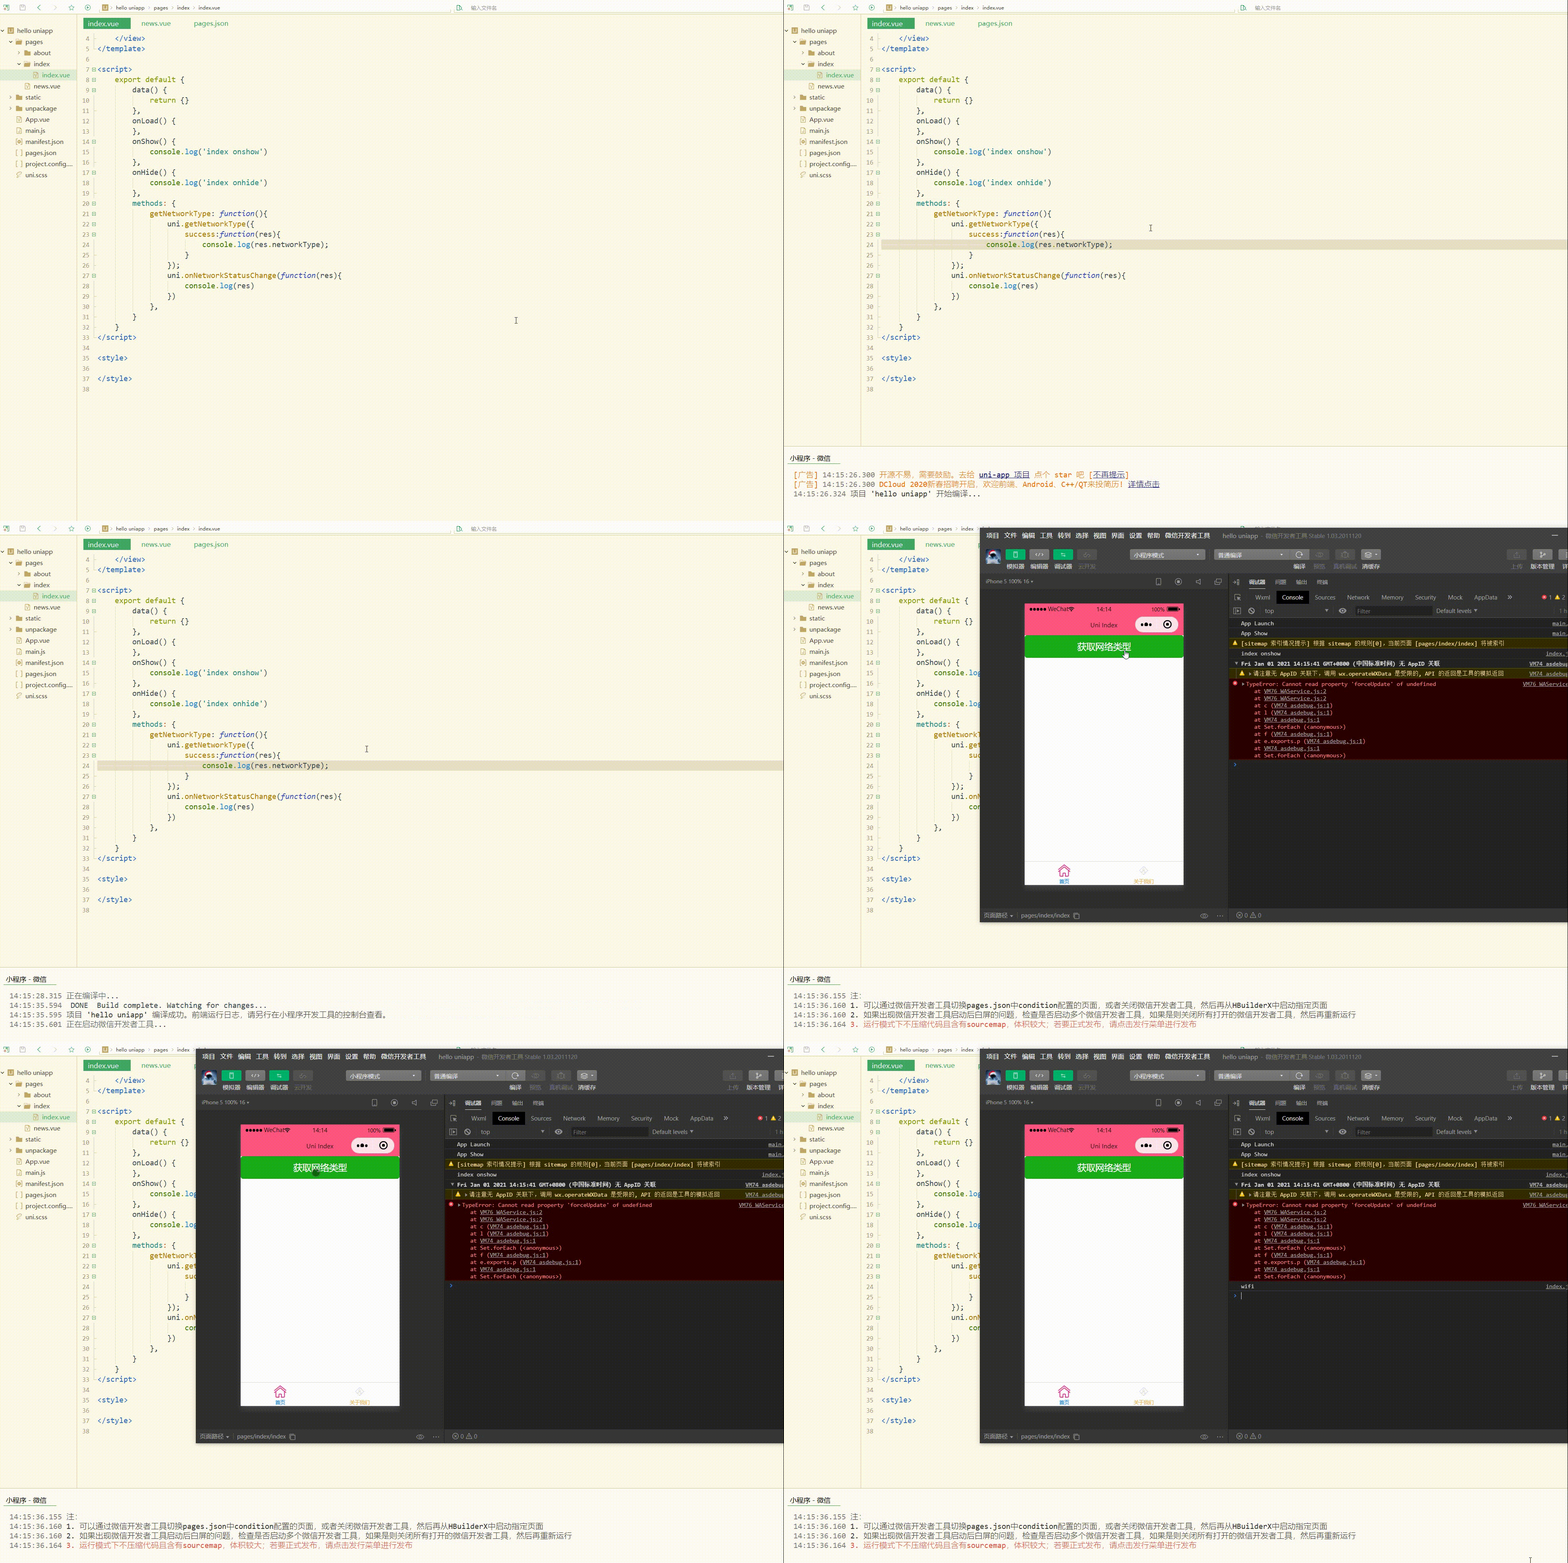
可以看到,获取到了当前的网络类型。
3.加速度计
uni.onAccelerometerChange(CALLBACK)用于监听加速度数据,频率为5次/秒,接口调用后会自动开始监听,可使用uni.offAccelerometer取消监听。
CALLBACK 返回参数和含义如下:
参数| 类型| 说明
-----|-----|-----
x| Number| X 轴
y| Number| Y 轴
z| Number| Z 轴
uni.startAccelerometer(OBJECT)用于开始监听加速度数据。
OBJECT参数和含义如下:
参数名| 类型| 默认| 必填| 说明
-----|-----|-----|-----|-----
interval| String| normal| 否| 接口调用成功的回调
success |Function|无| 否| 接口调用成功的回调
fail |Function| 无| 否| 接口调用失败的回调函数
complete| Function|无| 否| 接口调用结束的回调函数(调用成功、失败都会执行)
uni.stopAccelerometer(OBJECT)用于停止监听加速度数据。
OBJECT 参数和含义如下:
参数名| 类型| 必填| 说明
-----|-----|-----|-----
success| Function| 否| 接口调用成功的回调
fail |Function| 否| 接口调用失败的回调函数
complete |Function| 否| 接口调用结束的回调函数(调用成功、失败都会执行)
4.拨打电话
uni.makePhoneCall(OBJECT)用于拨打电话。
OBJECT 参数如下: 参数名| 类型| 必填| 说明 -----|-----|-----|----- phoneNumber| String| 是| 需要拨打的电话号码 success |Function| 否| 接口调用成功的回调 fail| Function| 否| 接口调用失败的回调函数 complete |Function| 否| 接口调用结束的回调函数(调用成功、失败都会执行)
如下:
<template>
    <view>
        <button type="primary" @click="tel">拨打电话</button>
    </view>
</template>

<script>
    export default {
        data() {
            return {}
        },
        onLoad() {
        },
        onShow() {
            console.log('index onshow')
        },
        onHide() {
            console.log('index onhide')
        },
        methods: {
            tel: function(){
                uni.makePhoneCall({
                    phoneNumber: '10086'
                })
            },
        }
    }
</script>

<style>

</style>
显示:
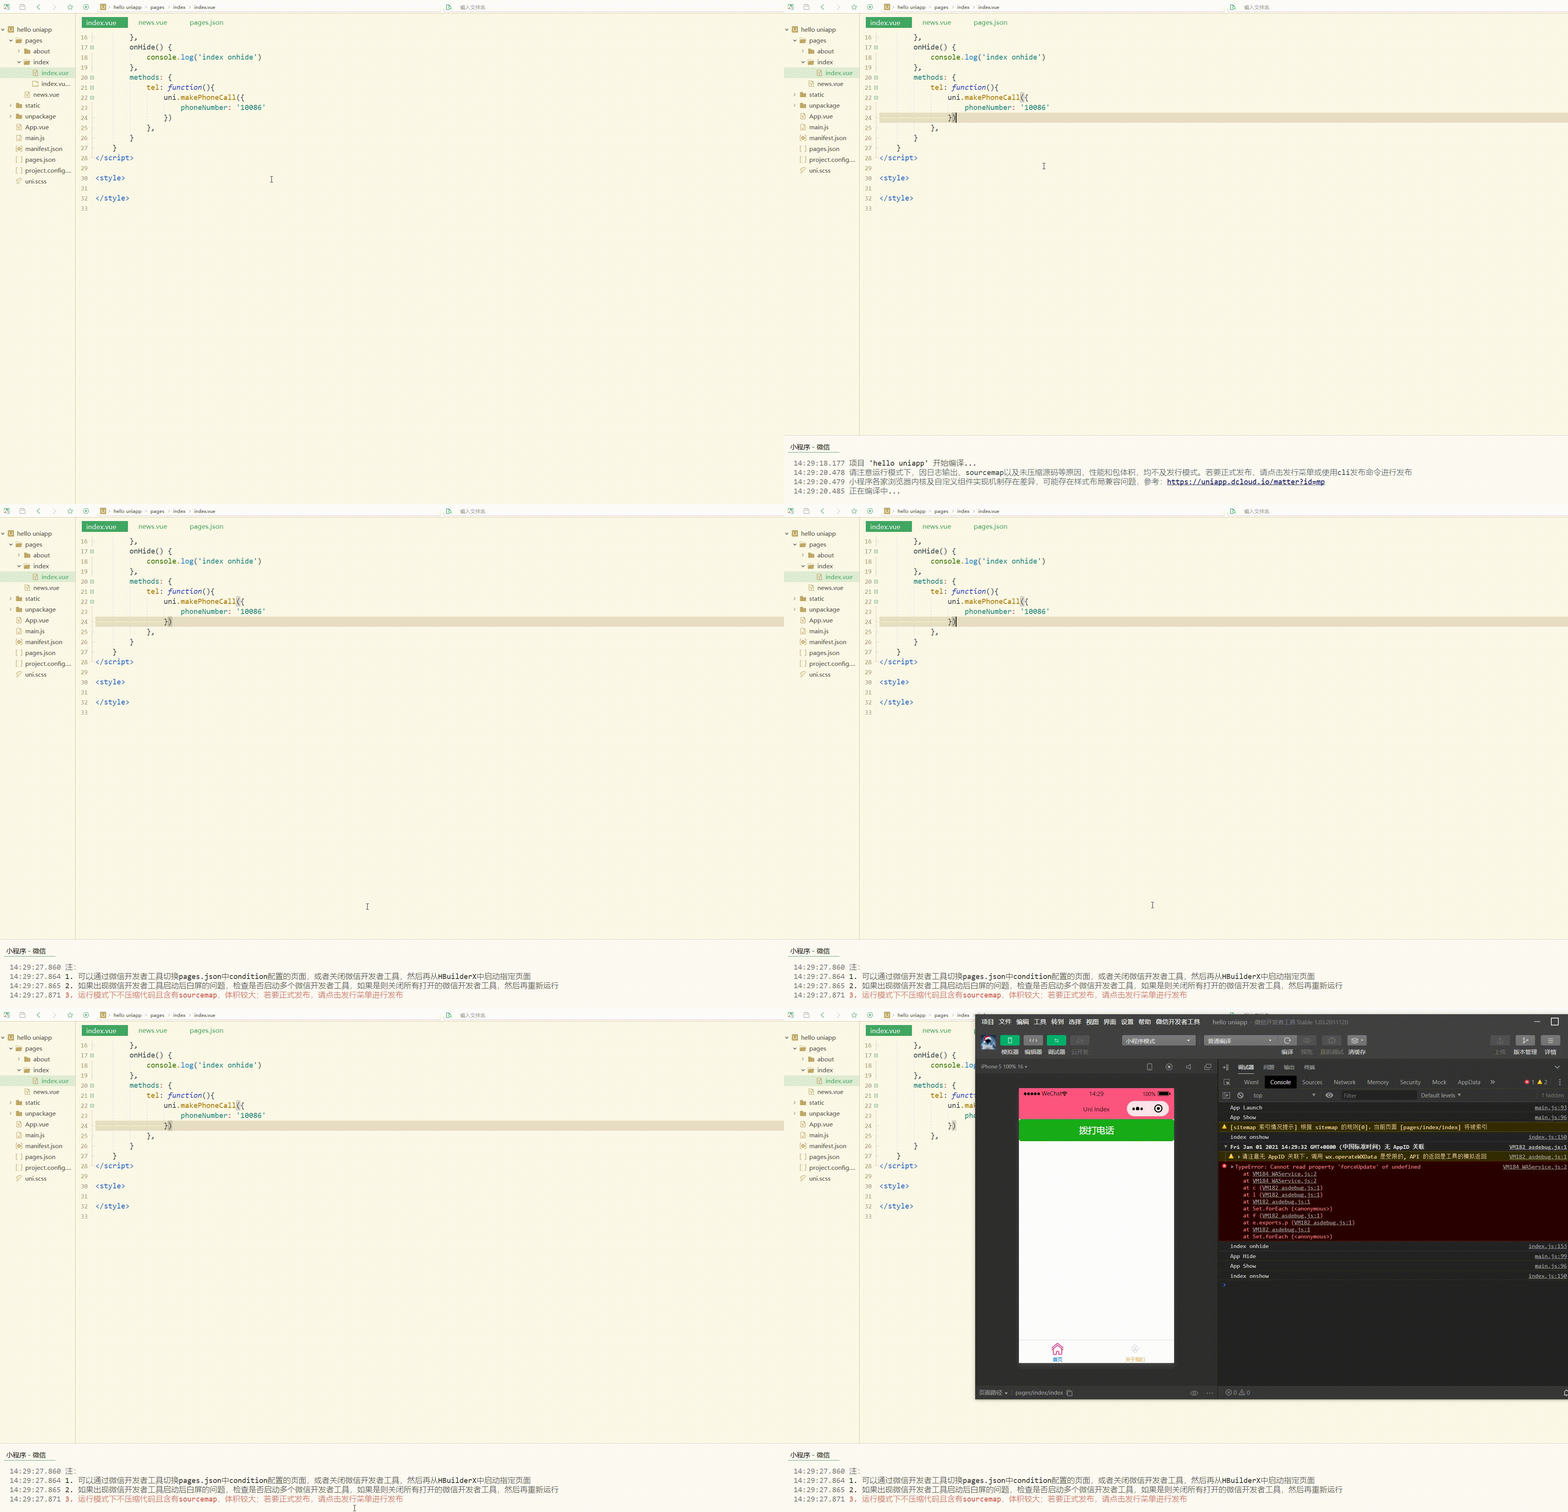
可以看到,模拟了拨打电话。
除了拨打电话,还可以实现发送短信等。
5.扫码
uni.scanCode(OBJECT)用于调起客户端扫码界面,并在扫码成功后返回对应的结果。
OBJECT 参数及其含义如下:
参数名| 类型| 必填| 说明
-----|-----|-----|-----
onlyFromCamera| Boolean| 否| 是否只能从相机扫码,不允许从相册选择图片
scanType |Array| 否| 扫码类型,参数类型是数组,二维码是'qrCode',一维码是'barCode',DataMatrix是‘datamatrix’,pdf417是‘pdf417’
success| Function| 否| 接口调用成功的回调
fail| Function| 否| 接口调用失败的回调函数(识别失败、用户取消等情况下触发)
complete |Function| 否| 接口调用结束的回调函数(调用成功、失败都会执行)
其中,success 返回参数如下:
参数| 说明
-----|-----
result| 所扫码的内容
scanType| 所扫码的类型
charSet |所扫码的字符集
path |当所扫的码为当前应用的合法二维码时,会返回此字段,内容为二维码携带的 path
简单使用如下:
<template>
    <view>
        <button type="primary" @click="sca">扫描二维码</button>
    </view>
</template>

<script>
    export default {
        data() {
            return {}
        },
        onLoad() {
        },
        onShow() {
            console.log('index onshow')
        },
        onHide() {
            console.log('index onhide')
        },
        methods: {
            sca: function(){
                uni.scanCode({
                    success:function(res){
                        console.log(res)
                    }
                })
            },
        }
    }
</script>

<style>

</style>
6.剪贴板
uni.setClipboardData(OBJECT)用于设置系统剪贴板的内容。
OBJECT参数和含义如下:
参数名| 类型| 必填| 说明
-----|-----|-----|-----
data| String| 是| 需要设置的内容
success| Function| 否| 接口调用成功的回调
fail |Function| 否| 接口调用失败的回调函数
complete |Function| 否| 接口调用结束的回调函数(调用成功、失败都会执行)
uni.getClipboardData(OBJECT)用于获取系统剪贴板内容。
OBJECT 参数和含义如下:
参数名| 类型| 必填与否| 说明
-----|-----|-----|-----
success| Function| 否| 接口调用成功的回调
fail |Function| 否| 接口调用失败的回调函数
complete| Function| 否| 接口调用结束的回调函数(调用成功、失败都会执行)
如下:
<template>
    <view>
        <button type="primary" @click="sca">复制文字</button>
        <text>{{txt}}</text>
    </view>
</template>

<script>
    var _self;
    export default {
        data() {
            return {
                txt: "hello"
            }
        },
        onLoad() {
            _self = this
        },
        onShow() {
            console.log('index onshow')
        },
        onHide() {
            console.log('index onhide')
        },
        methods: {

            sca: function(){
                uni.setClipboardData({
                    data: 'https://blog.csdn.net/CUFEECR',
                    success:function(res){
                        console.log(res);
                        uni.getClipboardData({
                            success:function(gres){
                                console.log(gres.data)
                                _self.txt = gres.data
                            }
                        })
                    }
                })
            },
        }
    }
</script>

<style>

</style>
显示:
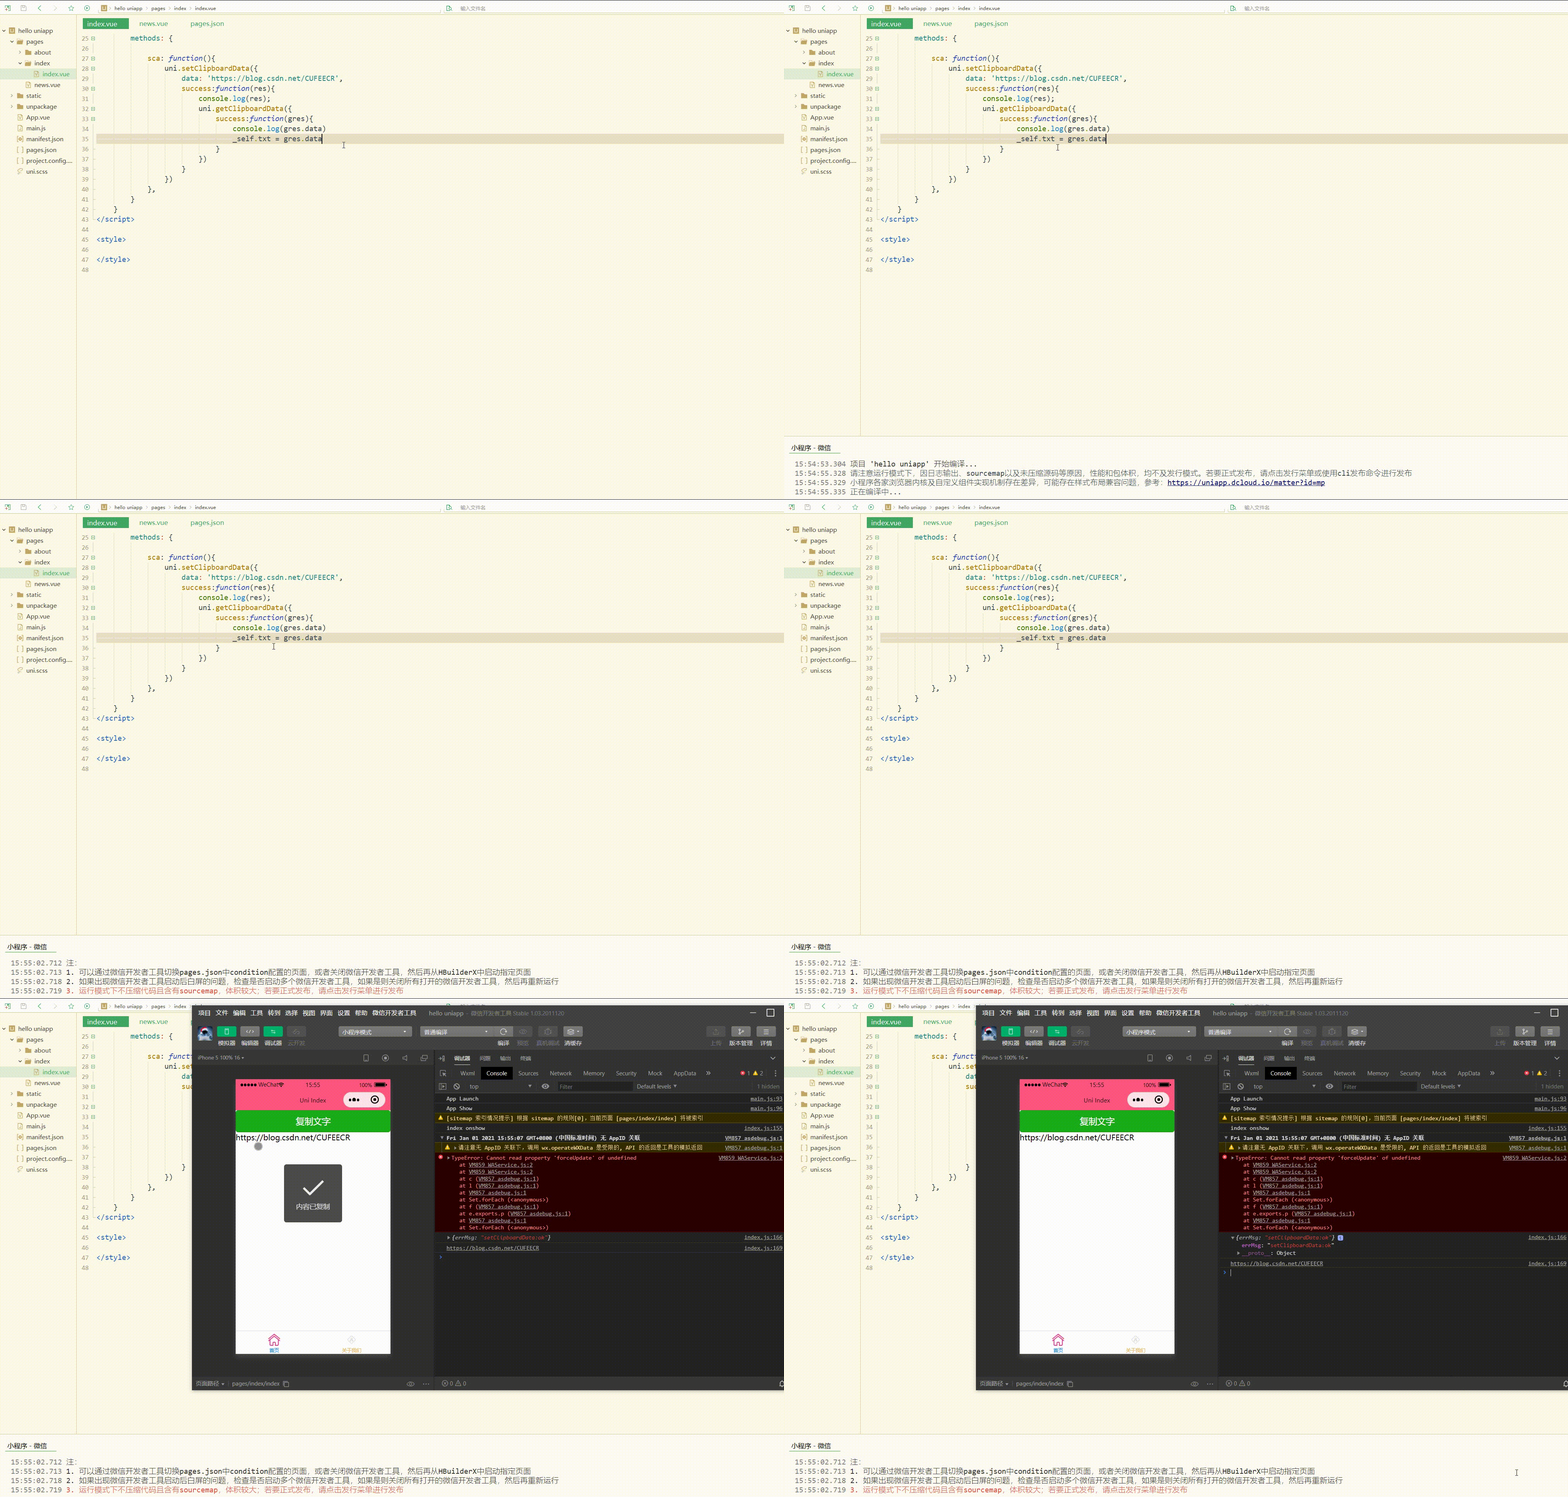
7.屏幕
uni.setScreenBrightness(OBJECT)用于设置屏幕亮度。
OBJECT 参数如下:
参数名| 类型| 必填与否| 说明
-----|-----|-----|-----
value| Number| 是| 屏幕亮度值,范围 0~1,0 最暗,1 最亮
success| Function| 否| 接口调用成功的回调
fail |Function| 否| 接口调用失败的回调函数
complete |Function| 否| 接口调用结束的回调函数(调用成功、失败都会执行)
uni.getScreenBrightness(OBJECT)用于获取屏幕亮度。
OBJECT 参数如下:
参数名| 类型| 必填与否| 说明
-----|-----|-----|-----
success| Function| 否| 接口调用成功的回调
fail |Function| 否| 接口调用失败的回调函数
complete |Function| 否| 接口调用结束的回调函数(调用成功、失败都会执行)
uni.setKeepScreenOn(OBJECT)用于设置是否保持常亮状态。仅在当前应用生效,离开应用后设置失效。
OBJECT 参数如下:
参数名| 类型| 必填与否| 说明
-----|-----|-----|-----
keepScreenOn| Boolean| 是| 是否保持屏幕常亮
success| Function| 否| 接口调用成功的回调
fail |Function| 否| 接口调用失败的回调函数
complete |Function| 否| 接口调用结束的回调函数(调用成功、失败都会执行)
例如:
<template>
    <view>
        <button type="primary" @click="srn">设置屏幕亮度</button>
    </view>
</template>

<script>
    var _self;
    export default {
        data() {
            return {
                txt: "hello"
            }
        },
        onLoad() {
            _self = this
        },
        onShow() {
            console.log('index onshow')
        },
        onHide() {
            console.log('index onhide')
        },
        methods: {
            srn: function(){
                uni.setScreenBrightness({
                    value: 0.1,
                    success:function(){
                        console.log('set success')
                    }
                })
            },
        }
    }
</script>

<style>

</style>
7.振动
uni.vibrate(OBJECT)用于使手机发生振动。
OBJECT 参数如下: 参数名| 类型| 必填与否| 说明 -----|-----|-----|----- success| Function| 否| 接口调用成功的回调 fail |Function| 否| 接口调用失败的回调函数 complete |Function| 否| 接口调用结束的回调函数(调用成功、失败都会执行)
uni.vibrateLong(OBJECT)用于使手机发生较长时间的振动(400ms),uni.vibrateShort(OBJECT)用于使手机发生较短时间的振动(15ms),OBJECT参数与uni.vibrate(OBJECT)相同。
8.手机联系人
uni.addPhoneContact(OBJECT)调用后,用户可以选择将该表单以“新增联系人”或“添加到已有联系人”的方式,写入手机系统通讯录,完成手机通讯录联系人和联系方式的增加。
参数名| 类型| 必填与否| 说明
-----|-----|-----|-----
photoFilePath| String| 否| 头像本地文件路径
lastName| String| 否| 姓氏
firstName| String| 是| 名字
mobilePhoneNumber| String| 否| 手机号
workPhoneNumber| String| 否| 工作电话
email| String| 否| 电子邮件
url| String| 否| 网站
success| Function| 否| 接口调用成功的回调
fail |Function| 否| 接口调用失败的回调函数
complete| Function| 否| 接口调用结束的回调函数(调用成功、失败都会执行)
二、导航设置
之前导航栏是通过配置实现的,但是不够灵活,这时可以使用接口实现导航栏。
uni.setNavigationBarTitle(OBJECT)用于动态设置当前页面的标题。
OBJECT参数如下:
参数名| 类型| 必填与否| 说明
-----|-----|-----|-----
title| String| 是| 页面标题
success| Function| 否| 接口调用成功的回调
fail |Function| 否| 接口调用失败的回调函数
complete| Function| 否| 接口调用结束的回调函数(调用成功、失败都会执行)
uni.setNavigationBarColor(OBJECT)用于设置页面导航条颜色。如果需要进入页面就设置颜色,请延迟执行,防止被框架内设置颜色逻辑覆盖。
OBJECT参数如下:
参数名| 类型| 必填与否| 说明
-----|-----|-----|-----
frontColor| String| 是| 前景颜色值,包括按钮、标题、状态栏的颜色,仅支持 #ffffff 和 #000000
backgroundColor |String| 是| 背景颜色值,有效值为十六进制颜色
animation| Object| 否| 动画效果,{duration,timingFunc}
success| Function| 否| 接口调用成功的回调函数
fail |Function| 否| 接口调用失败的回调函数
complete| Function| 否| 接口调用结束的回调函数(调用成功、失败都会执行)
uni.showNavigationBarLoading(OBJECT)用于在当前页面显示导航条加载动画,uni.hideNavigationBarLoading(OBJECT)在当前页面隐藏导航条加载动画。
它们的OBJECT参数如下:
参数名| 类型| 必填与否| 说明
-----|-----|-----|-----
success| Function| 否| 接口调用成功的回调函数
fail |Function| 否| 接口调用失败的回调函数
complete| Function| 否| 接口调用结束的回调函数(调用成功、失败都会执行)
示例如下:
<template>
    <view>
        <button type="primary" @click="setTitle">设置标题</button>
    </view>
</template>

<script>
    var _self;
    export default {
        data() {
            return {
                txt: "hello"
            }
        },
        onLoad() {
            uni.showNavigationBarLoading();
        },
        onShow() {
            console.log('index onshow')
        },
        onHide() {
            console.log('index onhide')
        },
        methods: {
            setTitle: function(){
                uni.setNavigationBarTitle({
                    title: 'hello...'
                });
                uni.hideNavigationBarLoading();
            },
        }
    }
</script>

<style>

</style>
显示:
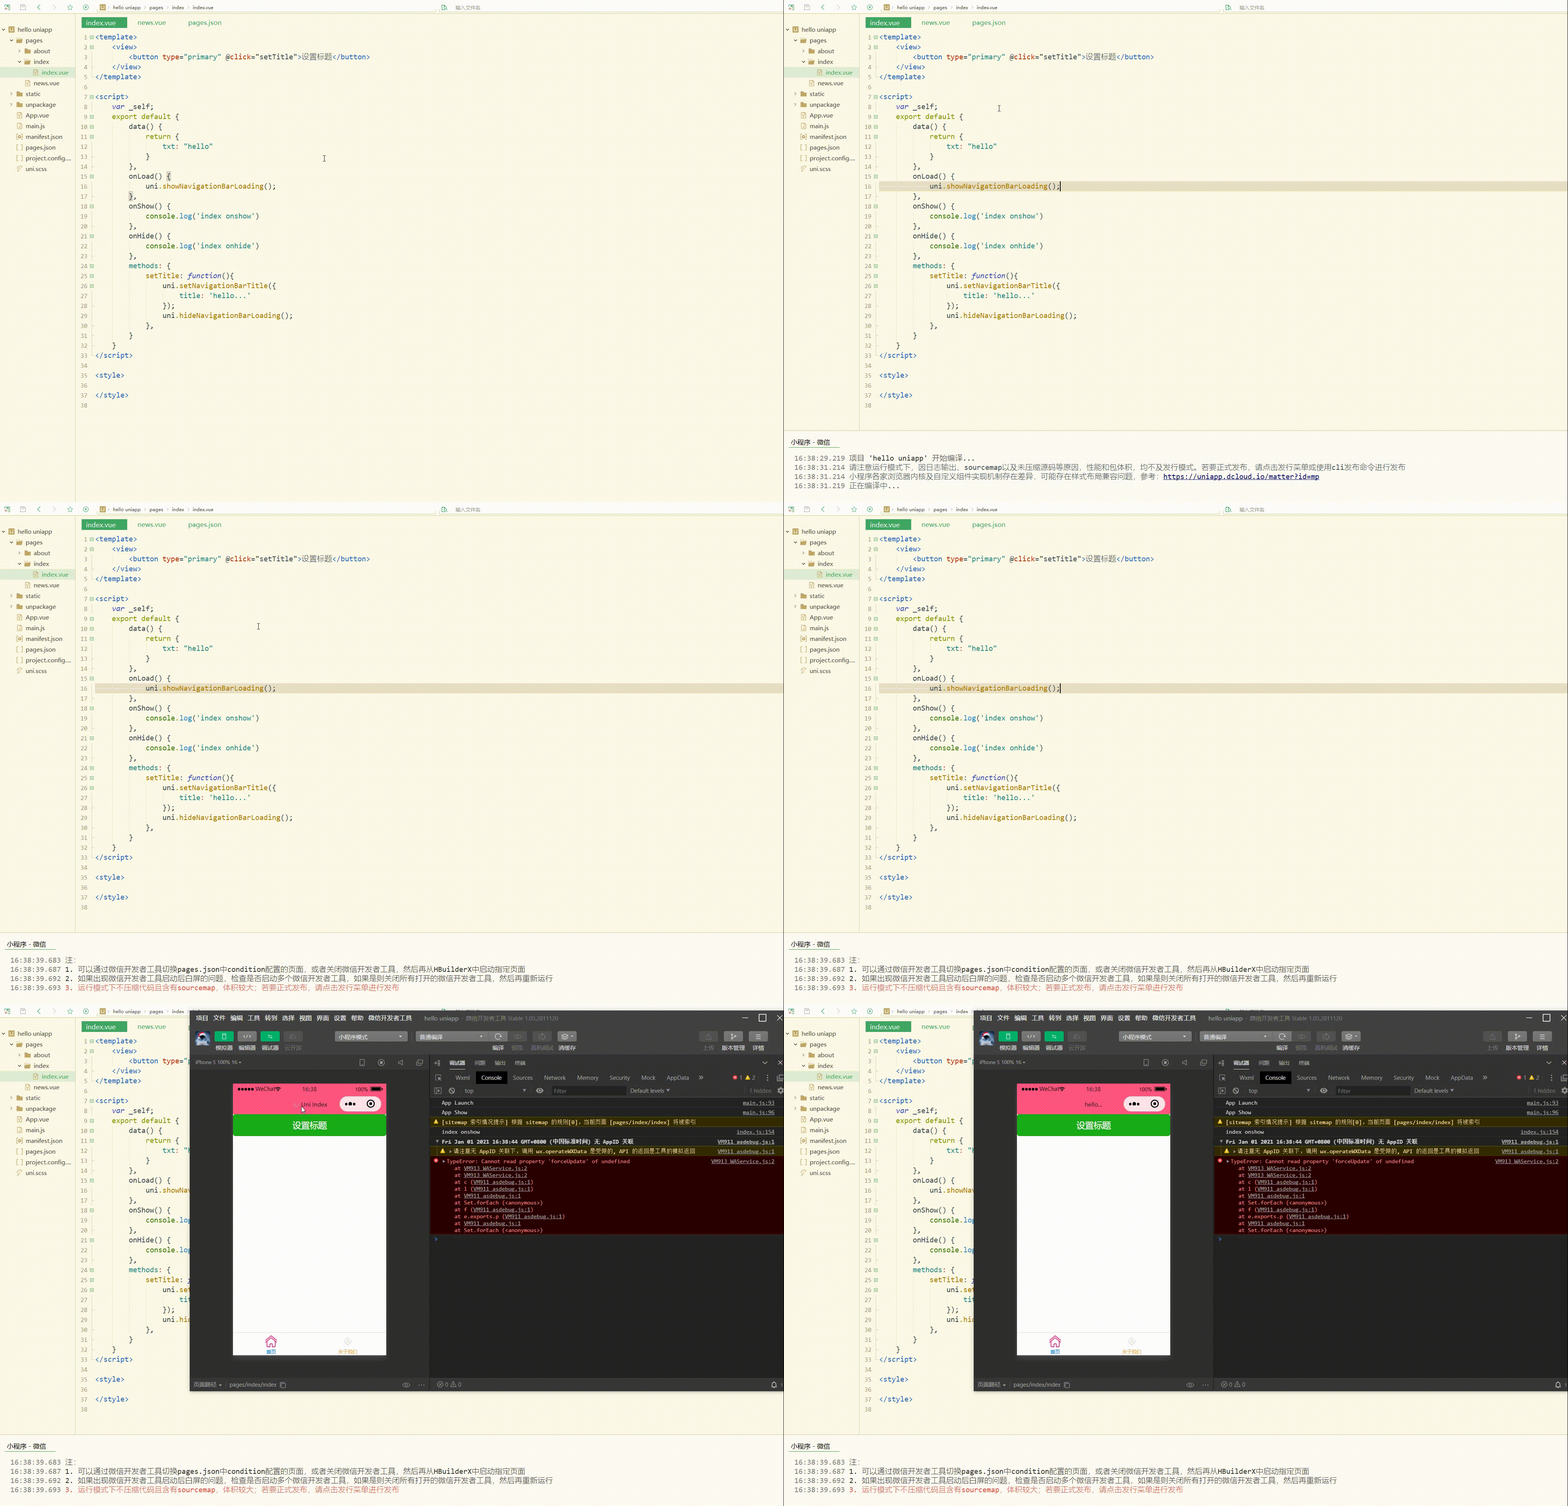
可以看到,实现了设置标题和控制加载。
三、界面下拉、上拉和节点信息
1.下拉刷新
onPullDownRefresh是一个处理函数,和onLoad等生命周期函数同级,用于监听该页面用户下拉刷新事件。
使用前,需要在 pages.json 里,找到的当前页面的pages节点,并在 style 选项中开启 enablePullDownRefresh;
当处理完数据刷新后,uni.stopPullDownRefresh 可以停止当前页面的下拉刷新。
uni.startPullDownRefresh(OBJECT)用于开始下拉刷新,调用后触发下拉刷新动画,效果与用户手动下拉刷新一致。
参数名| 类型| 必填与否| 说明
-----|-----|-----|-----
success| Function| 否| 接口调用成功的回调函数
fail |Function| 否| 接口调用失败的回调函数
complete| Function| 否| 接口调用结束的回调函数(调用成功、失败都会执行)
uni.stopPullDownRefresh()用于停止当前页面下拉刷新。
如下:
<template>
    <view>
        <view v-for="(item, index) in newslist" class="newslist">{{item}}</view>
    </view>
</template>

<script>
    var _self;
    export default {
        data() {
            return {
                newslist: []
            }
        },
        onLoad() {
            _self = this
        },
        onShow() {
            console.log('index onshow')
        },
        onHide() {
            console.log('index onhide')
        },
        onPullDownRefresh() {
            this.getNews()
        },
        methods: {
            getNews: function() {
                uni.showNavigationBarLoading();
                uni.request({
                    url: 'https://demo.hcoder.net/index.php?user=hcoder&pwd=hcoder&m=list1&page=1',
                    success:function(res){
                        console.log(res);
                        var newslist = res.data.split('--hcSplitor--');
                        _self.newslist = newslist;
                        uni.stopPullDownRefresh();
                        uni.hideNavigationBarLoading();
                    }
                })
            }
        }
    }
</script>

<style>
    .newslist {
        line-height: 2em;
        padding: 20px;
    }
</style>
显示:
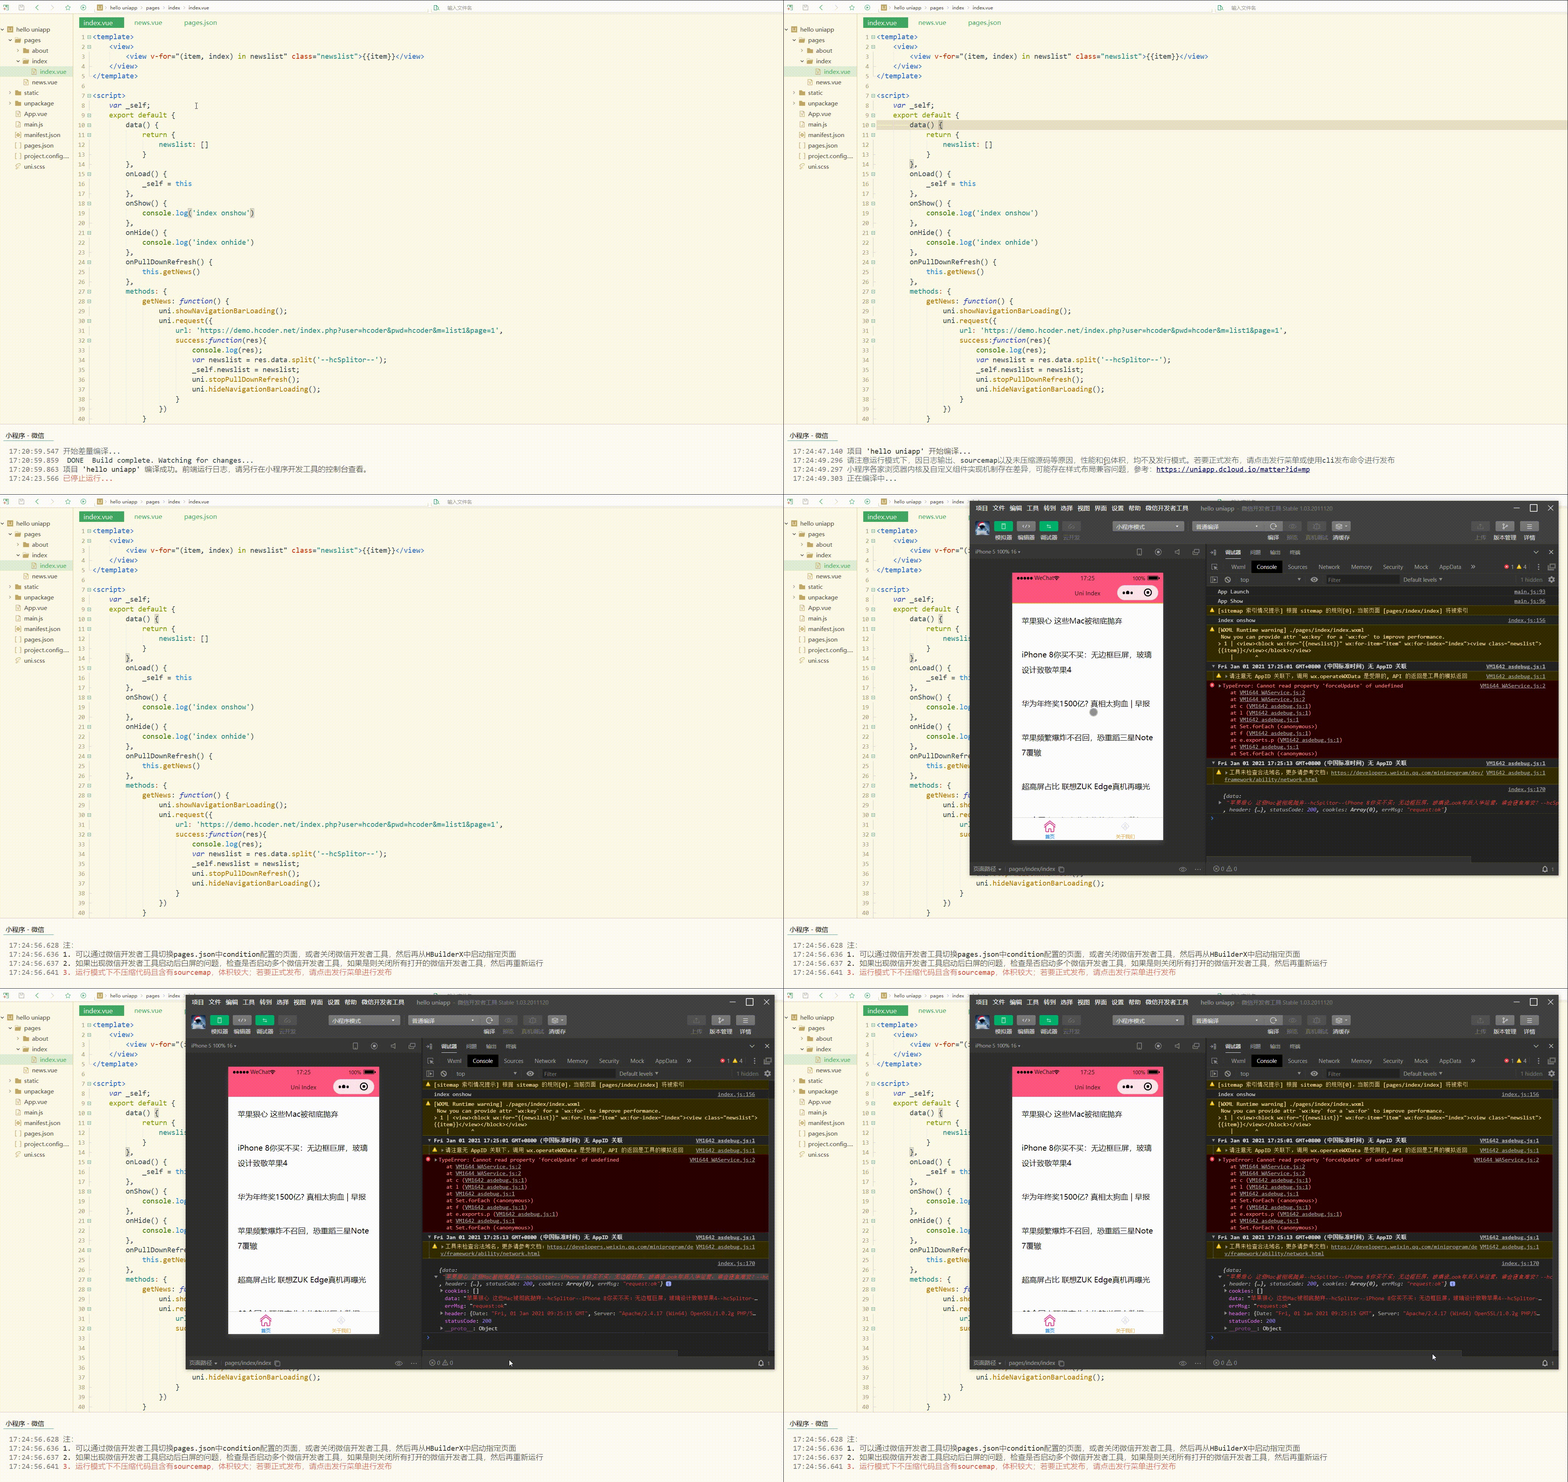
可以看到,实现了下拉刷新加载数据。
2.案例--上拉加载更多
上拉加载更多有两种实现方式:
- 通过scroll-view组件,识别滚动区域,滚动到底部出发加载事件;
- 识别页面滚动到底部来触发加载事件。
这里使用第二种方式,即生命周期函数onReachBottom来实现,即滚动条滚动到底部时触发事件。
初步实现如下:
<template>
    <view>
        <view v-for="(item, index) in newslist" class="newslist">{{item}}</view>
    </view>
</template>

<script>
    // 添加page全局变量
    var _self, page;
    export default {
        data() {
            return {
                newslist: []
            }
        },
        onLoad() {
            _self = this
        },
        onShow() {
            console.log('index onshow')
        },
        onHide() {
            console.log('index onhide')
        },
        onPullDownRefresh() {
            this.getNews()
        },
        onReachBottom() {
            this.getMoreNews()
        },
        methods: {
            getNews: function() {
                page = 1;
                uni.showNavigationBarLoading();
                uni.request({
                    url: 'https://demo.hcoder.net/index.php?user=hcoder&pwd=hcoder&m=list1&page='+page,
                    success:function(res){
                        console.log(res);
                        var newslist = res.data.split('--hcSplitor--');
                        _self.newslist = _self.newslist.concat(newslist);
                        uni.stopPullDownRefresh();
                        uni.hideNavigationBarLoading();
                        page++;
                    }
                })
            },
            getMoreNews: function() {
                uni.showNavigationBarLoading();
                uni.request({
                    url: 'https://demo.hcoder.net/index.php?user=hcoder&pwd=hcoder&m=list1&page='+page,
                    success:function(res){
                        console.log(res);
                        uni.hideNavigationBarLoading();
                        if(res.data == null){
                            return false
                        };
                        var newslist = res.data.split('--hcSplitor--');
                        _self.newslist = newslist;
                        uni.stopPullDownRefresh();
                        page++;
                    }
                })
            }
        }
    }
</script>

<style>
    .newslist {
        line-height: 2em;
        padding: 20px;
    }
</style>
其中,添加全局变量page用于指定需要请求的数据的页数; 定义函数分别实现第一次获取数据和加载更多数据。
显示:
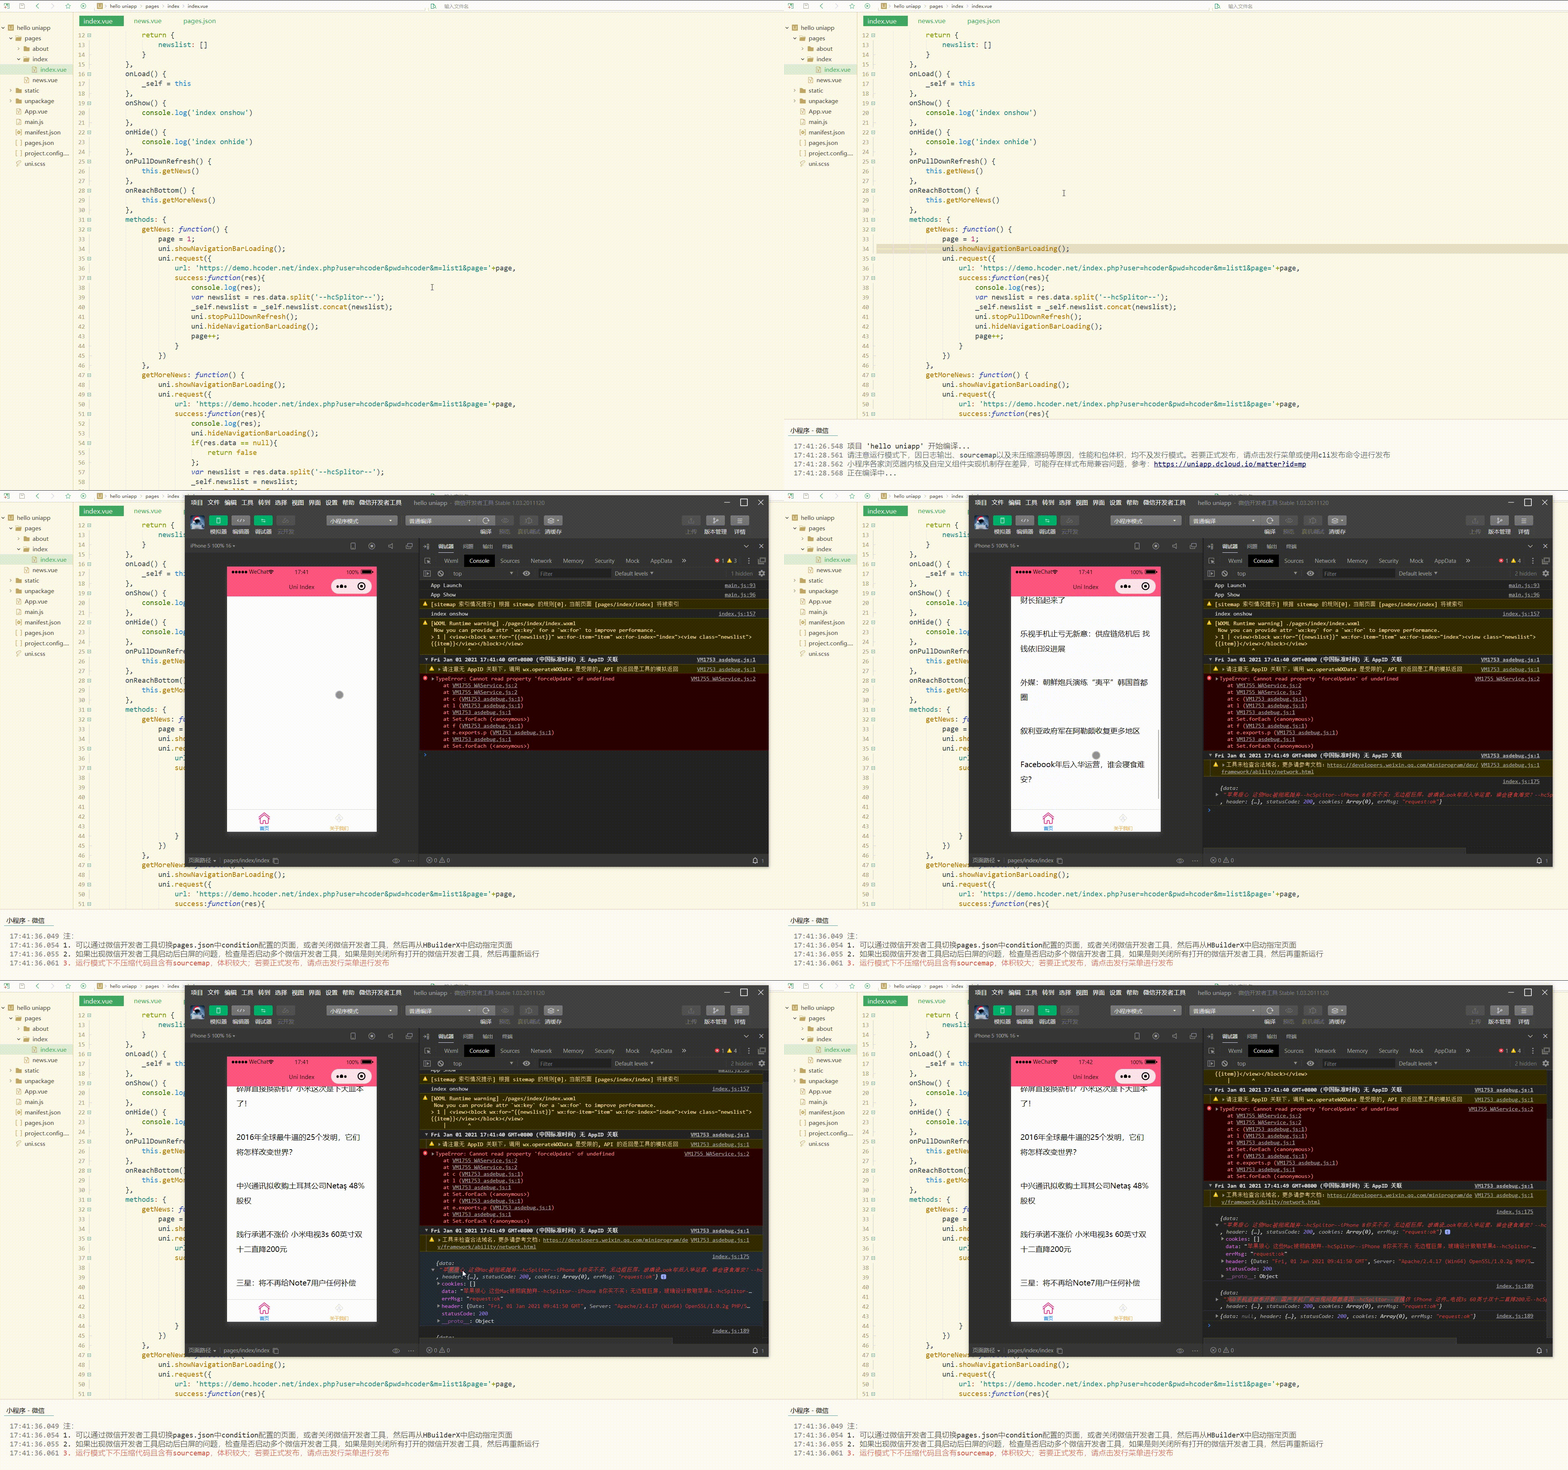
可以看到,加载了2页数据后,就不能再加载数据了。
此时还可以进行完善,如添加“加载更多”文本提示。 如下:
<template>
    <view>
        <view v-for="(item, index) in newslist" class="newslist">{{item}}</view>
        <view class="loading">{{loadingText}}</view>
    </view>
</template>

<script>
    // 添加page、timer全局变量
    var _self, page, timer = null;
    export default {
        data() {
            return {
                newslist: [],
                loadingText: "下拉加载"
            }
        },
        onLoad() {
            _self = this
        },
        onShow() {
            console.log('index onshow')
        },
        onHide() {
            console.log('index onhide')
        },
        onPullDownRefresh() {
            this.getNews()
        },
        onReachBottom() {
            if(timer != null){
                clearTimeout(timer)
            };
            timer = setTimeout(function(){
                _self.getMoreNews()
            }, 500);
        },
        methods: {
            getNews: function() {
                page = 1;
                uni.showNavigationBarLoading();
                uni.request({
                    url: 'https://demo.hcoder.net/index.php?user=hcoder&pwd=hcoder&m=list1&page='+page,
                    success:function(res){
                        console.log(res);
                        var newslist = res.data.split('--hcSplitor--');
                        _self.newslist = _self.newslist.concat(newslist);
                        uni.stopPullDownRefresh();
                        uni.hideNavigationBarLoading();
                        page++;
                    }
                })
            },
            getMoreNews: function() {
                if(_self.loadingText == "已加载完毕"){
                    return false
                };
                _self.loadingText = "加载中";
                uni.showNavigationBarLoading();
                uni.request({
                    url: 'https://demo.hcoder.net/index.php?user=hcoder&pwd=hcoder&m=list1&page='+page,
                    success:function(res){
                        console.log(res);
                        uni.hideNavigationBarLoading();
                        if(res.data == null){
                            _self.loadingText = "已加载完毕";
                            return false
                        };
                        var newslist = res.data.split('--hcSplitor--');
                        _self.newslist = newslist;
                        uni.stopPullDownRefresh();
                        _self.loadingText = "加载更多";
                        page++;
                    }
                })
            }
        }
    }
</script>

<style>
    .newslist {
        line-height: 2em;
        padding: 20px;
    }
    .loading {
        line-height: 2em;
        text-align: center;
        color: #DD524D;
        margin-top: 30px;
    }
</style>
使用延时器让页面先渲染完,再加载数据;
同时在getMoreNews函数中,先判断是否加载完毕,如果已加载完毕则可以不再执行该函数。
显示:
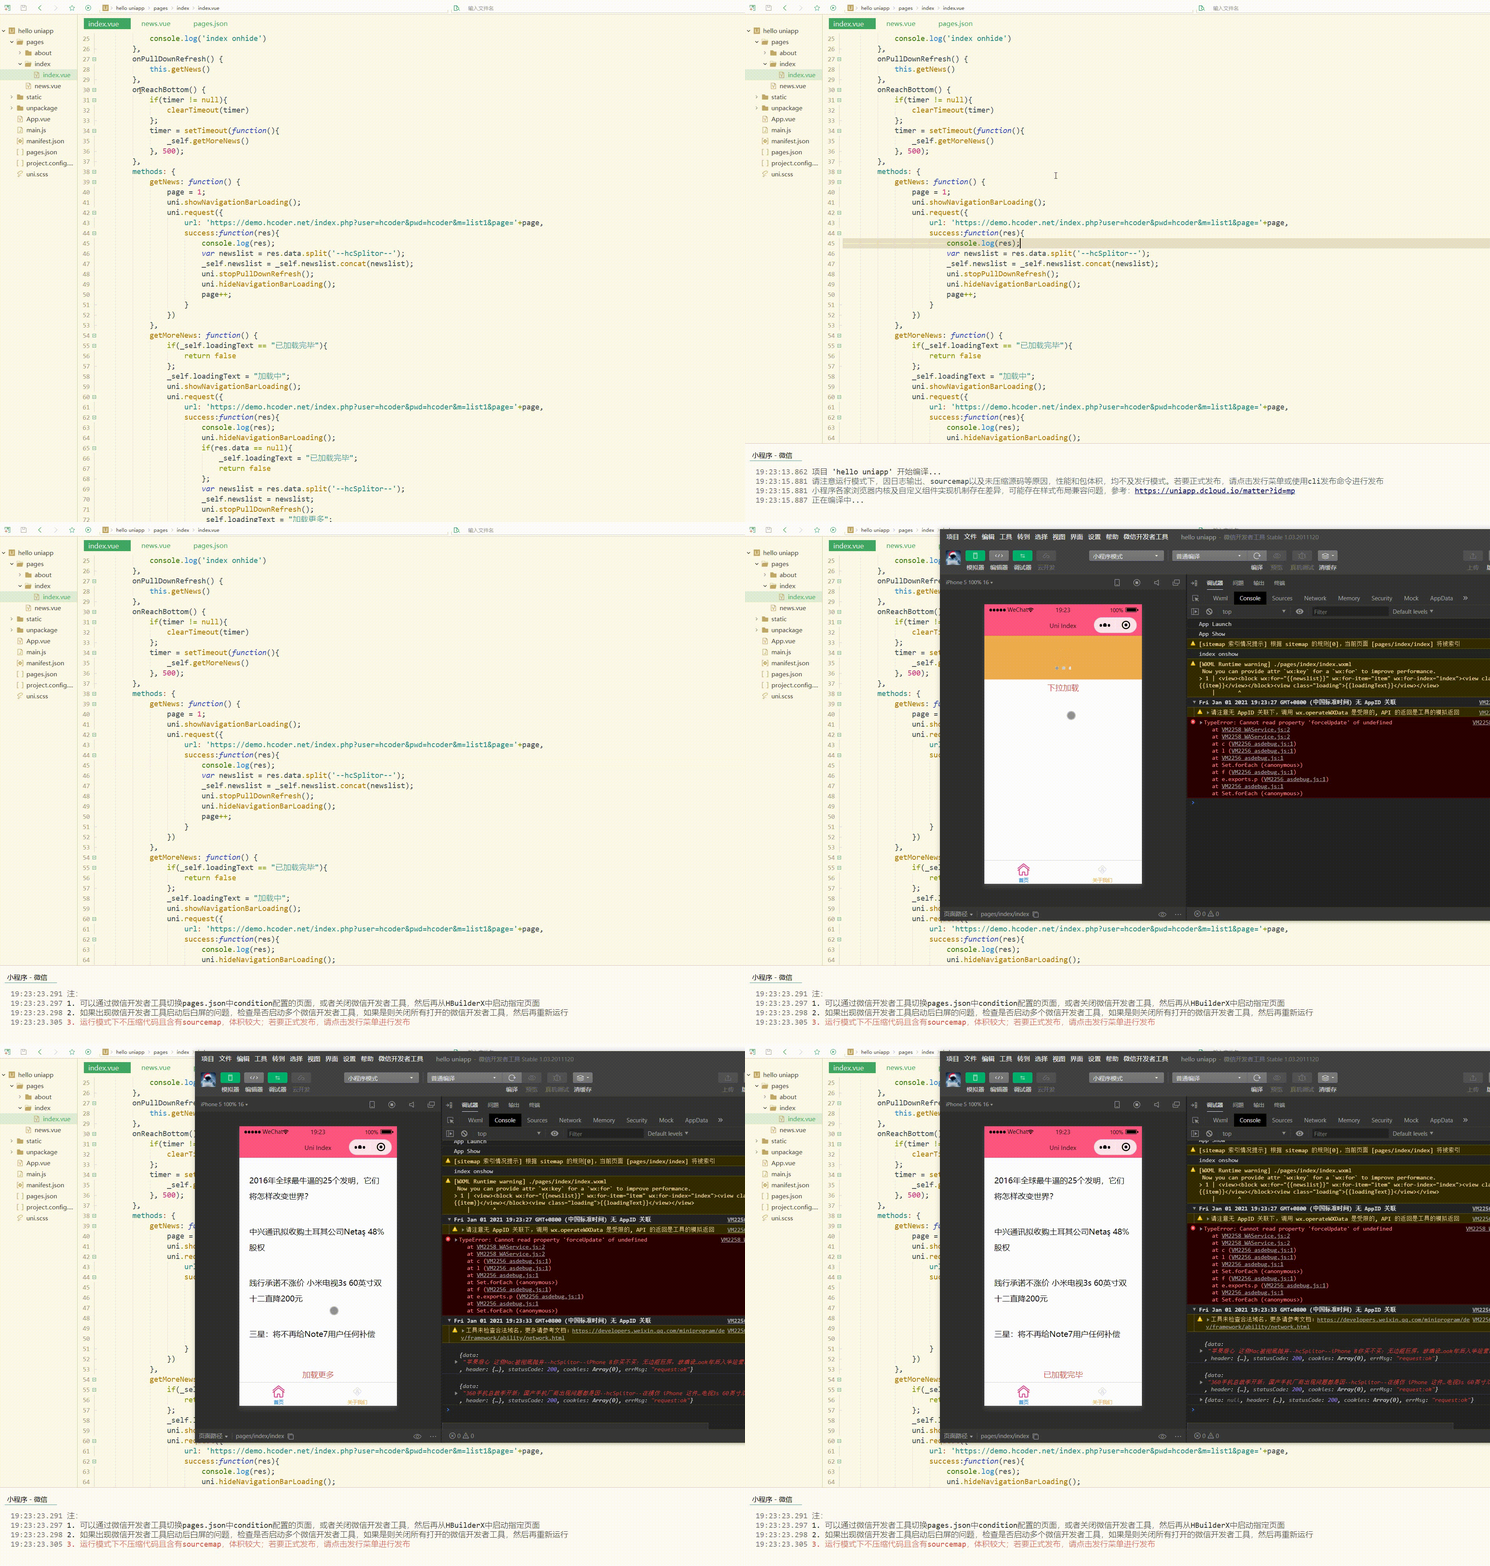
显然,此时表现更好。
3.获取节点信息
uni.createSelectorQuery()创建一个 SelectorQuery 对象,这个对象可以调用 select 等方法选择节点,并使用 boundingClientRect 等方法选择需要查询的信息;
selectorQuery.select(selector)在当前页面下选择第一个匹配选择器 selector 的节点,返回一个 NodesRef 对象实例,可以用于获取节点信息;
nodesRef.fields(object,callback)获取节点的相关信息,第一个参数是节点相关信息配置(必选),第二参数是方法的回调函数,参数是指定的相关节点信息;
selectorQuery.exec(callback)执行所有的请求,请求结果按请求次序构成数组,在callback的第一个参数中返回。
其中,nodesRef.fields(object,callback)的object参数的常见属性和含义如下:
字段名| 类型| 默认值| 必填|含义
-----|-----|-----|-----|-----
id| Boolean| false| 否| 是否返回节点 id
dataset| Boolean| false| 否| 是否返回节点 dataset App、微信小程序、H5
rect| Boolean| false| 否| 是否返回节点布局位置(left right top bottom)
size |Boolean| false| 否| 是否返回节点尺寸(width height)
scrollOffset |Boolean| false| 否| 是否返回节点的 scrollLeft scrollTop,节点必须是 scroll-view 或者 viewport
简单使用如下:
<template>
    <view class="">
        <view class="" style="width: 500upx; height: 300upx; background: #F0AD4E;" id="demo">
            Container
        </view>
    </view>
</template>

<script>
    var _self;
    export default {
        data() {
            return {

            }
        },
        onLoad() {
            _self = this;
        },
        onReady: function() {
            console.log('Ready...');
            uni.createSelectorQuery().select('#demo').fields({
                size: true,
                id: true,
                rect: true,
                scrollOffset: true
            }, function(res) {
                console.log(res)
            }).exec()
        },
        onShow() {},
        onHide() {},
        methods: {},
    }
</script>

<style>

</style>
显示:
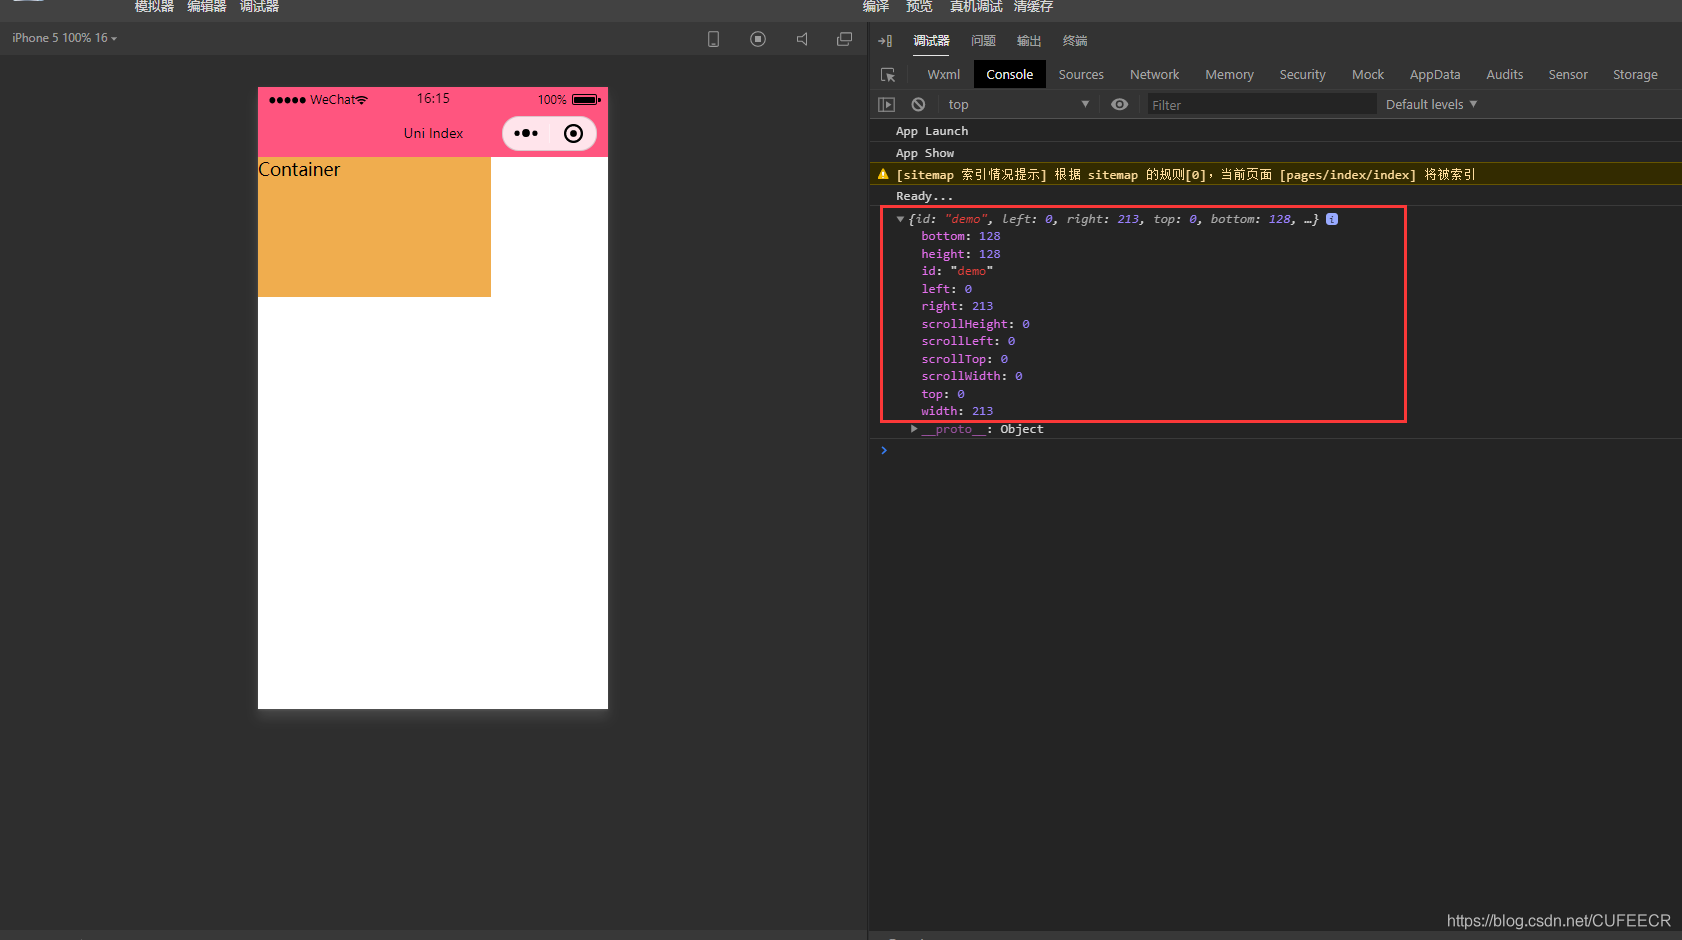
可以看到,获取到了指定元素的相关信息;
返回的节点信息中包含了元素的大小,包括尺寸和布局位置等,可以根据这些数据结合uni.getSystemInfo(OBJECT)获取到的设备像素比给元素计算、设置合理的位置和大小。
四、跨端兼容
很多时候,每个平台有自己的一些特性,小程序和APP上实现是有一定区别的,可能不一定能兼容所有平台。
此时需要使用条件编译,即用特殊的注释作为标记,在编译时根据这些特殊的注释,将注释里面的代码编译到不同平台,即使用#ifdef、#ifndef和#endif来判断平台类型,其中:
符号|含义
-----|-----
#ifdef|if defined 仅在某平台存在
#ifndef|if not defined 除了某平台均存在
%PLATFORM%|平台名称
对于API、组件、样式等,有不同的注释方式,具体如下:
方式|适用平台
-----|-----
API和pages.json|// #ifdef PLATFORM和// #endif
组件|<!-- #ifdef PLATFORM -->和<!-- #endif -->
样式|/* #ifdef PLATFORM */和/* #endif */
测试如下:
<template>
    <view>
        <!-- #ifdef MP-WEIXIN -->
        <view class="wx">微信小程序</view>
        <!-- #endif -->
        <!-- #ifdef APP-PLUS -->
        <view class="h5">H5+APP</view>
        <!-- #endif -->
    </view>
</template>

<script>
    export default {
        data() {
            return {
            }
        },
        onLoad() {
            //#ifdef MP-WEIXIN
            console.log('wx...')
            //#endif
            //#ifdef APP-PLUS
            console.log('app...')
            //#endif
        },
        onShow() {
            console.log('index onshow')
        },
        onHide() {
            console.log('index onhide')
        },
        methods: {
        }
    }
</script>

<style>
</style>
显示:
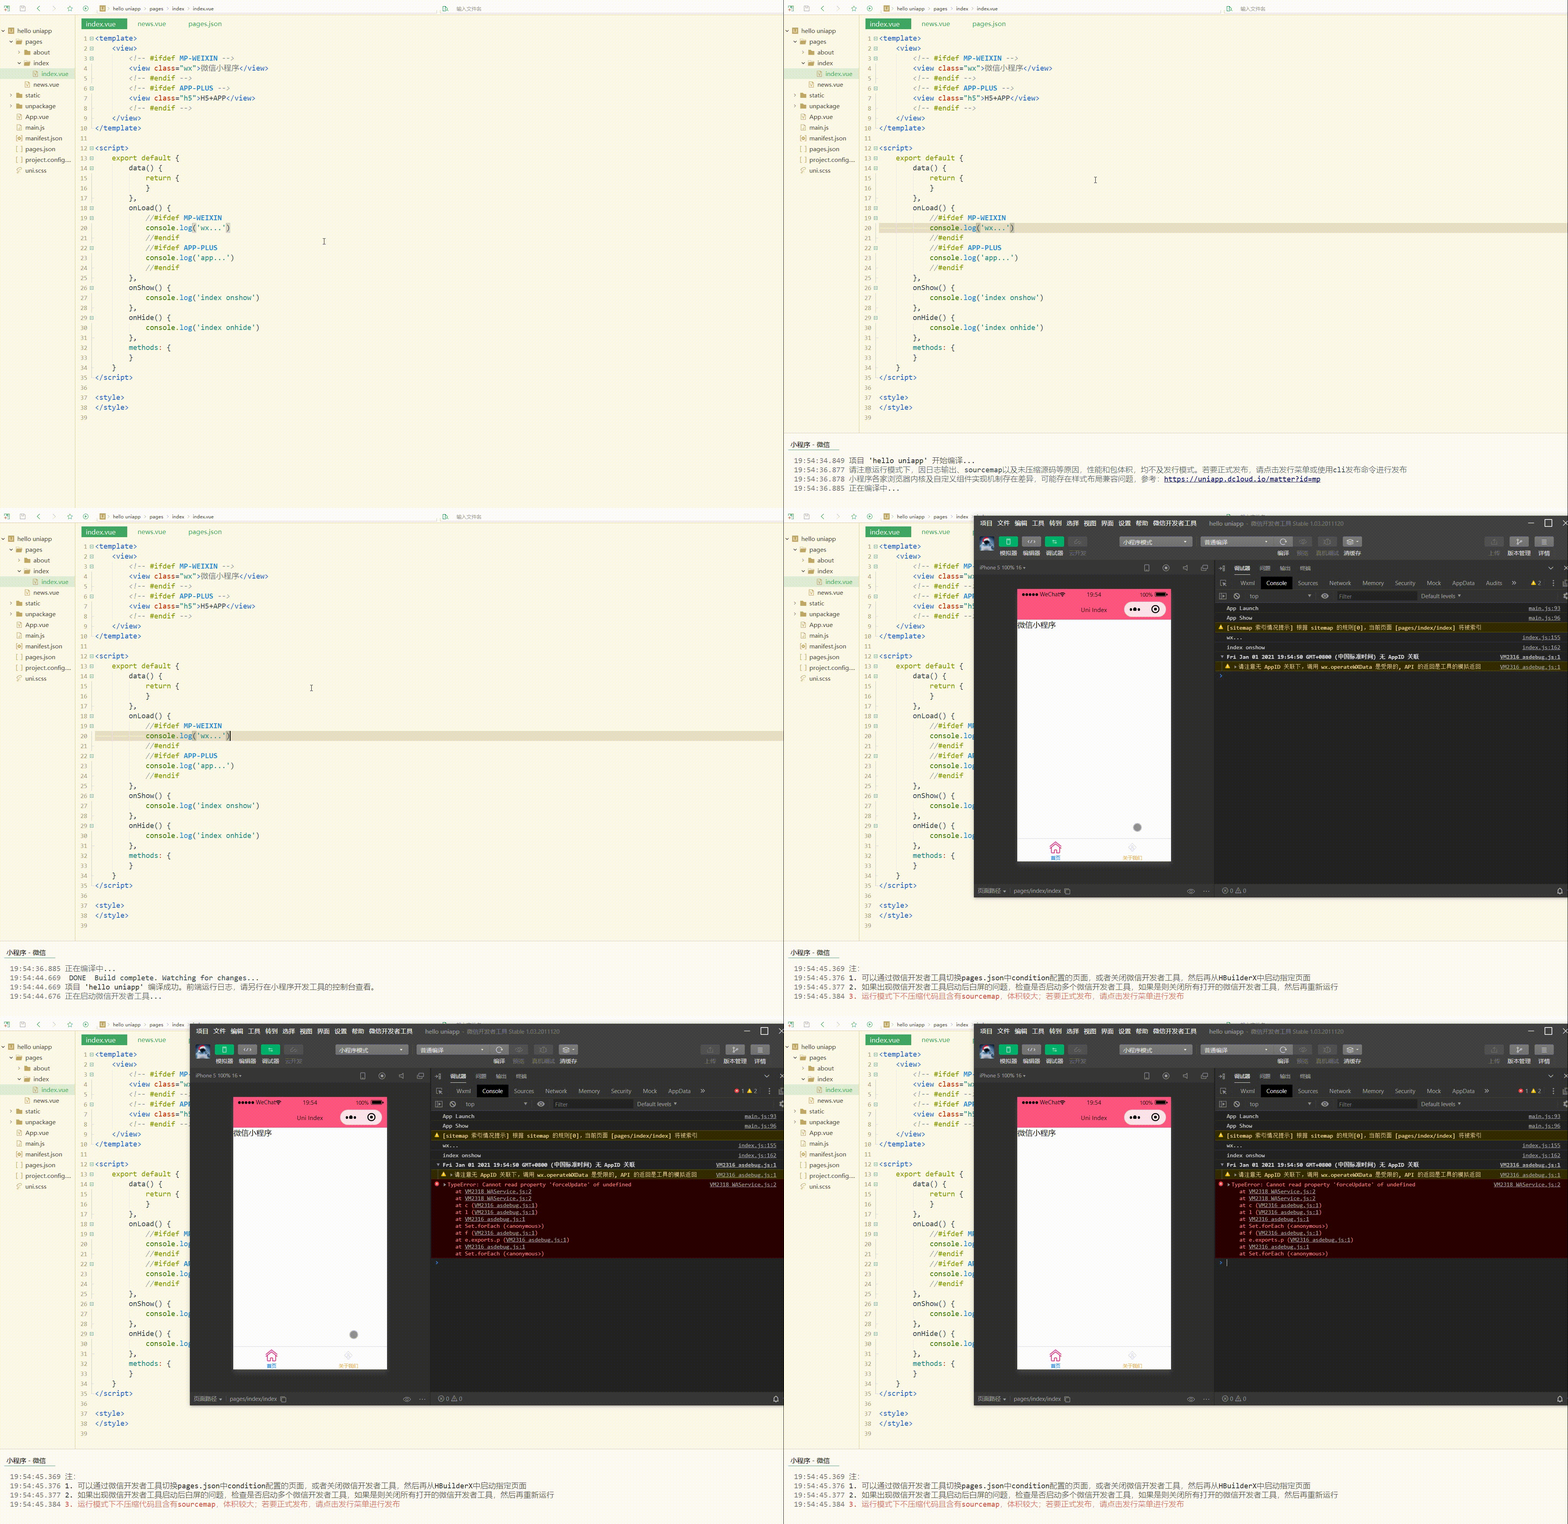
显然,判断出了当前为微信小程序平台。
五、交互反馈
交互反馈包括提示框、加载等的设置。
1.showToast(OBJECT)和hideToast()
分别用于显示和隐藏消息提示框。
OBJECT参数和含义如下:
参数名| 类型| 必填与否| 说明
-----|-----|-----|-----
title| String| 是| 提示的内容,长度与 icon 取值有关
icon| String| 否| 图标,有效值详见下方说明。
image| String| 否| 自定义图标的本地路径
mask| Boolean| 否| 是否显示透明蒙层,防止触摸穿透,默认:false
duration| Number| 否| 提示的延迟时间,单位毫秒,默认:1500
position |String| 否| 纯文本轻提示显示位置,填写有效值后只有 title 属性生效, 有效值详见下方说明。
success |Function| 否| 接口调用成功的回调函数
fail |Function| 否| 接口调用失败的回调函数
complete |Function| 否| 接口调用结束的回调函数(调用成功、失败都会执行)
2.showLoading(OBJECT)和hideLoading()
前者用于显示 loading 提示框,需主动调用后者才能关闭提示框。
OBJECT参数和含义如下:
参数名| 类型| 必填与否| 说明
-----|-----|-----|-----
title| String| 是| 提示的内容
mask| Boolean| 否| 是否显示透明蒙层,防止触摸穿透,默认:false
success |Function| 否| 接口调用成功的回调函数
fail |Function| 否| 接口调用失败的回调函数
complete |Function| 否| 接口调用结束的回调函数(调用成功、失败都会执行)
测试如下:
<template>
    <view>
        <button type="default" @click="showToast">显示提示框</button>
        <button type="default" @click="showLoading">显示并关闭Loading提示框</button>
    </view>
</template>

<script>
    export default {
        data() {
            return {
            }
        },
        onLoad() {
        },
        onShow() {
            console.log('index onshow')
        },
        onHide() {
            console.log('index onhide')
        },
        methods: {
            showToast: function(){
                uni.showToast({
                    title: 'hello...',
                    icon: 'success'
                })
            },
            showLoading: function(){
                uni.showLoading({
                    title: 'loading...',
                    mask: true,
                    success:function(){
                        setTimeout(function(){
                            uni.hideLoading()
                        }, 3000)
                    }
                })
            }
        }
    }
</script>

<style>
</style>
显示:
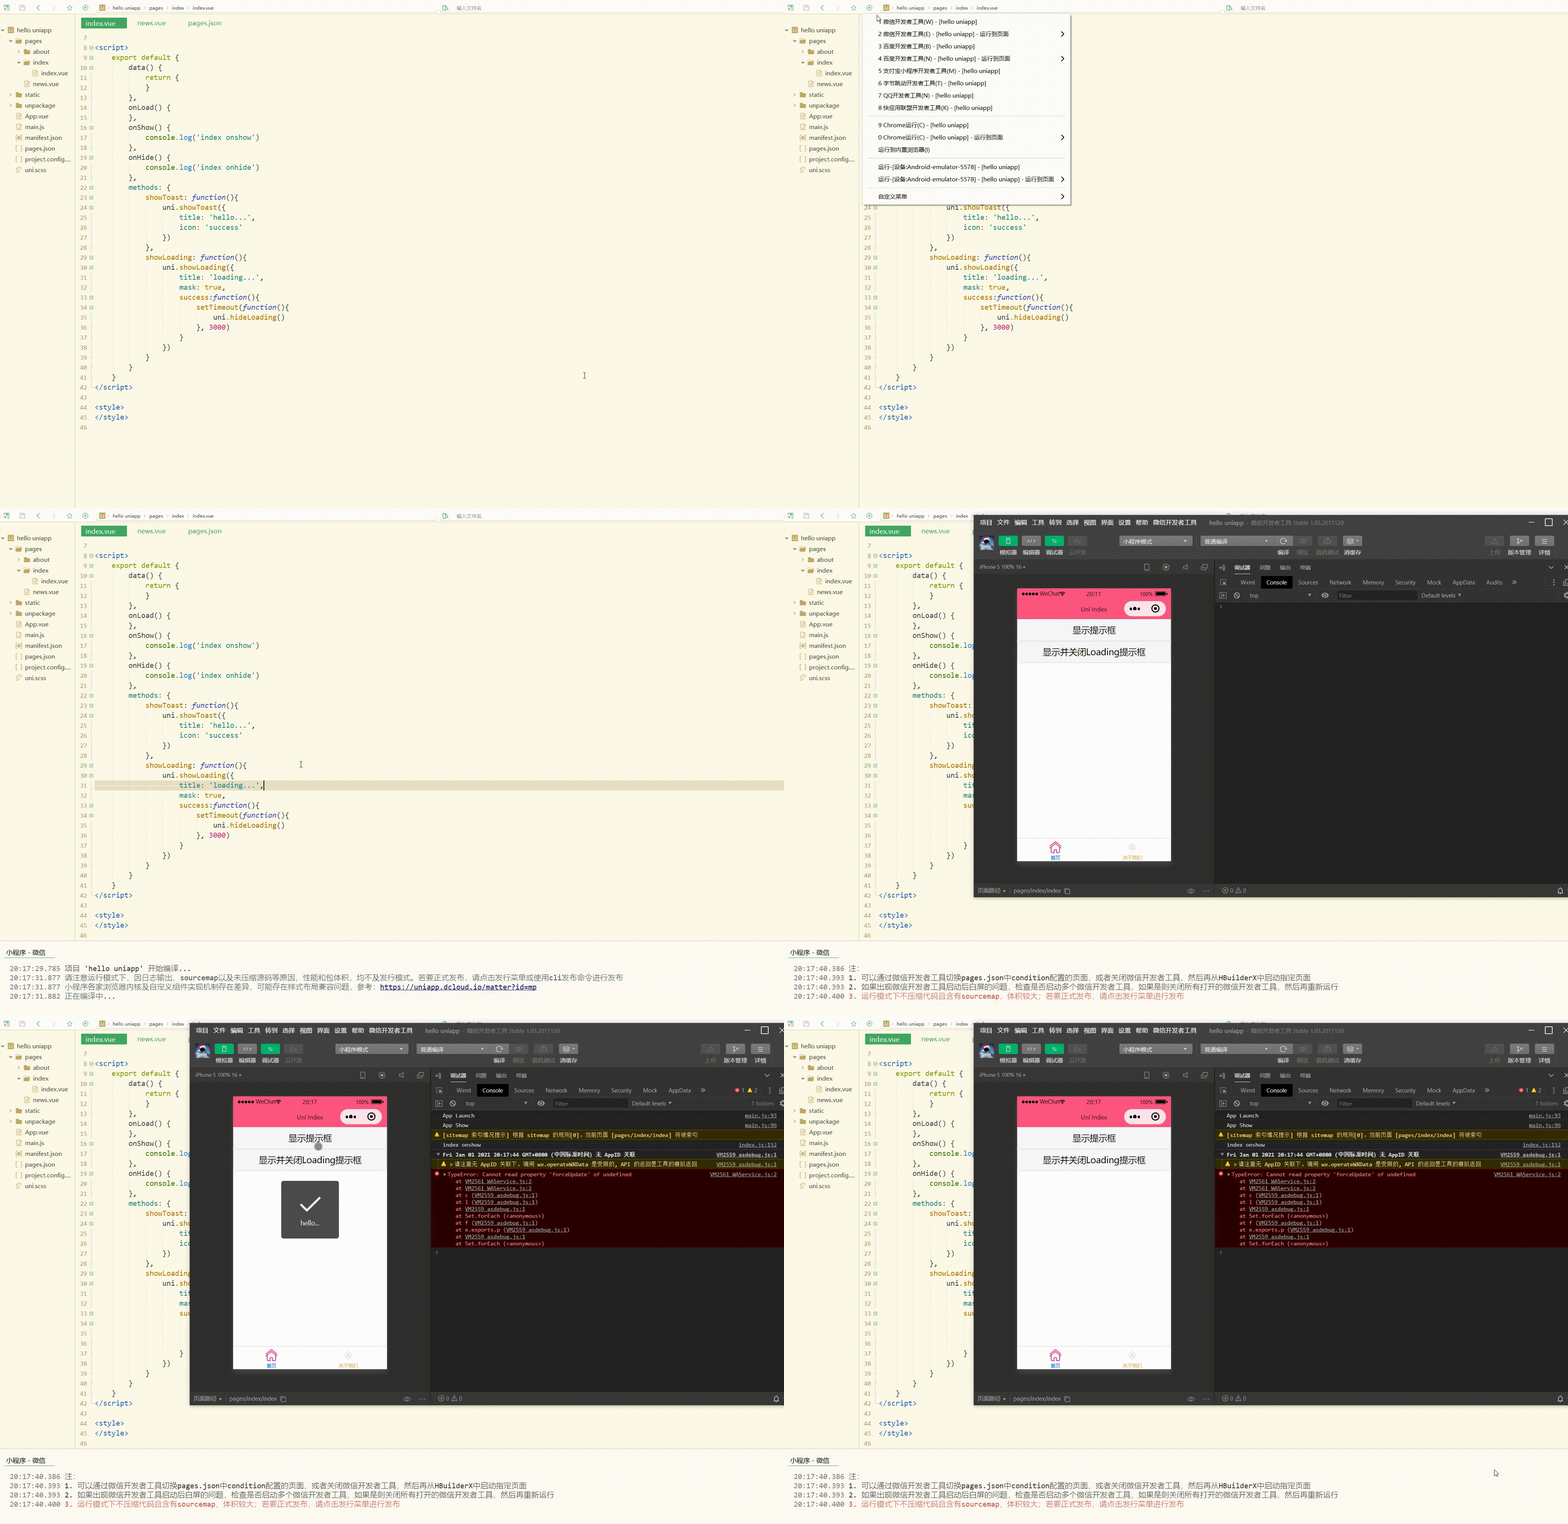
可以看到,可正常显示、关闭提示框和loading。
3.showModal(OBJECT)
用于显示模态弹窗,类似于标准 html 的消息框alert、confirm。
OBJECT参数和含义如下:
参数名| 类型| 必填与否| 说明
-----|-----|-----|-----
title| String| 否| 提示的标题
content |String| 否| 提示的内容
showCancel |Boolean| 否| 是否显示取消按钮,默认为 true
cancelText |String| 否| 取消按钮的文字,默认为"取消",最多 4 个字符
cancelColor |HexColor| 否| 取消按钮的文字颜色,默认为"#000000"
confirmText |String| 否| 确定按钮的文字,默认为"确定",最多 4 个字符
confirmColor| HexColor| 否| 确定按钮的文字颜色,H5平台默认为"#007aff",微信小程序平台默认为"#3CC51F",百度小程序平台默认为"#3c76ff"
fail| Function| 否| 接口调用失败的回调函数
complete |Function| 否| 接口调用结束的回调函数(调用成功、失败都会执行)
4.showActionSheet(OBJECT)
用于显示操作菜单。
OBJECT参数和含义如下:
参数名| 类型| 必填与否| 说明
-----|-----|-----|-----
itemList| Array
fail |Function| 否| 接口调用失败的回调函数
complete |Function| 否| 接口调用结束的回调函数(调用成功、失败都会执行)
测试如下:
<template>
<view>
<button type="default" @click="showModal">显示模态弹窗</button>
<button type="default" @click="showActionSheet">显示操作菜单</button>
</view>
</template>
<script>
var actions = ['Music', 'Reading'];
export default {
data() {
return {
}
},
onLoad() {
},
onShow() {
console.log('index onshow')
},
onHide() {
console.log('index onhide')
},
methods: {
showModal: function(){
uni.showModal({
title: 'hello...',
content: 'Modal Window',
success:function(res){
if(res.confirm){
console.log('Confirm')
}else if(res.cancel){
console.log('Cancel')
}
}
})
},
showActionSheet: function(){
uni.showActionSheet({
itemList: actions,
success:function(res){
console.log(actions[res.tapIndex])
},
fail:function(res){
console.log(res.errMsg)
}
})
}
}
}
</script>
<style>
</style>
显示:
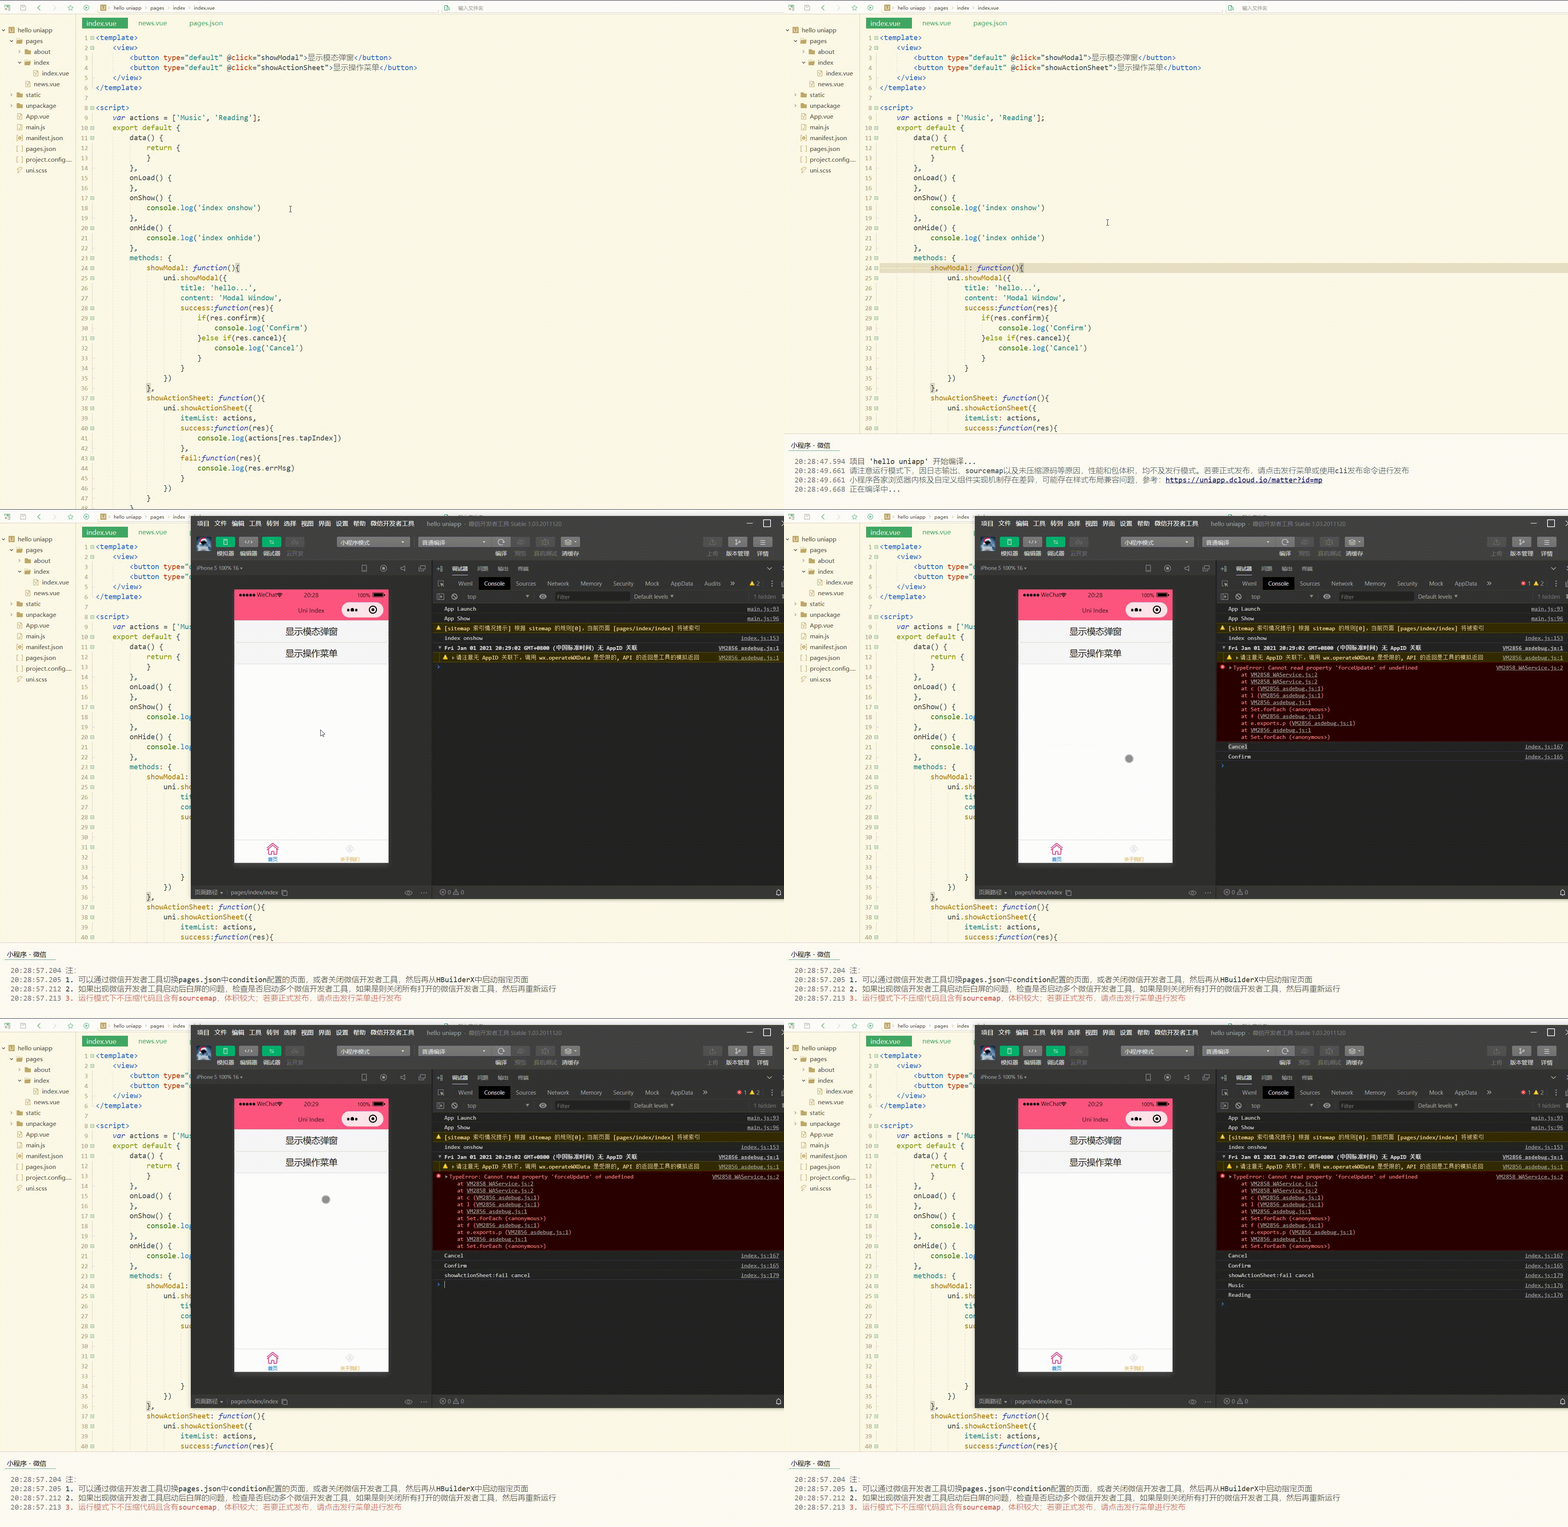
可以看到,可以对模态弹窗和操作菜单进行操作。
总结
uni-app的家口为开发者提供了丰富的功能,包括设备、界面等,我们只需要直接调用即可实现所需功能,减少了自己开发的麻烦,有利于快速开发。
本文原文首发来自博客专栏移动应用开发,由本人转发至https://www.helloworld.net/p/KP9ru5af3lHmw,其他平台均属侵权,可点击https://blog.csdn.net/CUFEECR/article/details/112067894查看原文,也可点击https://blog.csdn.net/CUFEECR浏览更多优质原创内容。


