Redis 5.0.5 安装文档(Install manual)
一、单实例安装
标题
内容
测试环境
Centos 7
虚拟机
vbox
redis版本
redis 5.0.5
1.编译安装redis
#使用wget从官网现在redis数据库tar压缩包
$ wget http://download.redis.io/releases/redis-5.0.5.tar.gz
#使用tar解压tar压缩包
$ tar xzf redis-5.0.5.tar.gz
#进入redis解压后的目录
$ cd redis-5.0.5
#使用make编译安装redis数据库,直接make会报错,详细错误信息查看第5节错误分析内容
$ make MALLOC=libc
2.redis编译测试
#直接make test报错,需要安装相关依赖包,运行测试时候需要tcl-Tool Command Language 包
$ yum install tcl
#执行make test 测试
$ make test
测试结果如下: 
3.运行redis数据库
运行完成编译后,在源码文件夹中的src文件夹中会生成redis相关的二进制文件。运行编译好的二进制文件启动redis数据库: The binaries that are now compiled are available in the src directory. Run Redis with:
#运行redis-server 二进制执行文件,启动redis服务端程序。
$ src/redis-server
redis server启动如下图: 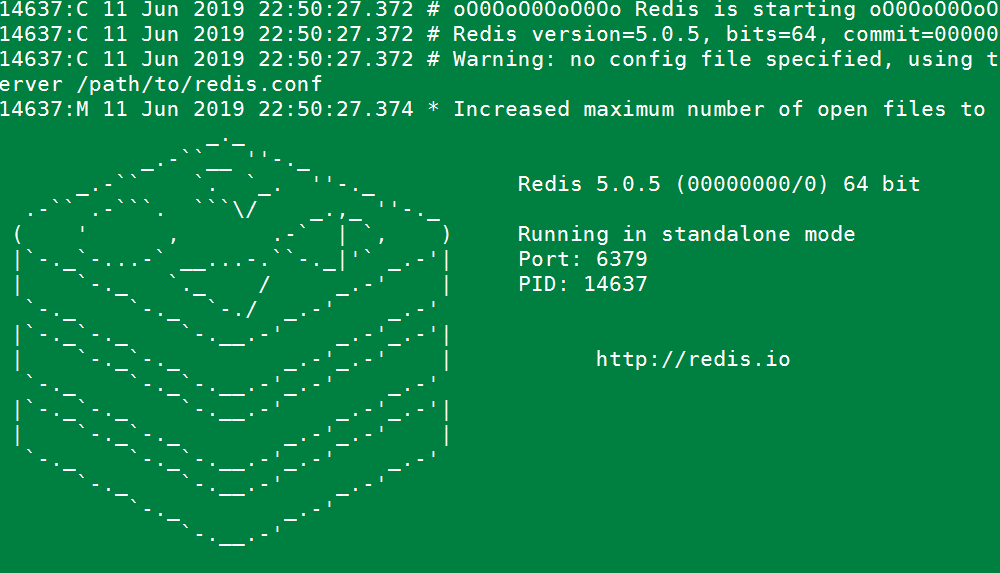
可以使用redis-cli命令连接数据库与数据库服务端进行交互。 You can interact with Redis using the built-in client:
#运行redis-cli启动数据库客户端,连接默认redis数据库
$ src/redis-cli
#测试redis数据库,插入一个foo bar 键值对
redis> set foo bar
#插入成功
OK
#获取foo key的值
redis> get foo
"bar"
4.redis性能测试
redis 数据库自带性能测试工具,工具名称:redis-benchmark,使用此工具对数据库进行性能测试。 #####redis-benchmark具体使用参数
Invalid option "-help" or option argument missing

Usage: redis-benchmark [-h <host>] [-p <port>] [-c <clients>] [-n <requests>] [-k <boolean>]

 -h <hostname>      Server hostname (default 127.0.0.1)
 -p <port>          Server port (default 6379)
 -s <socket>        Server socket (overrides host and port)
 -a <password>      Password for Redis Auth
 -c <clients>       Number of parallel connections (default 50)
 -n <requests>      Total number of requests (default 100000)
 -d <size>          Data size of SET/GET value in bytes (default 3)
 --dbnum <db>       SELECT the specified db number (default 0)
 -k <boolean>       1=keep alive 0=reconnect (default 1)
 -r <keyspacelen>   Use random keys for SET/GET/INCR, random values for SADD
  Using this option the benchmark will expand the string __rand_int__
  inside an argument with a 12 digits number in the specified range
  from 0 to keyspacelen-1. The substitution changes every time a command
  is executed. Default tests use this to hit random keys in the
  specified range.
 -P <numreq>        Pipeline <numreq> requests. Default 1 (no pipeline).
 -e                 If server replies with errors, show them on stdout.
                    (no more than 1 error per second is displayed)
 -q                 Quiet. Just show query/sec values
 --csv              Output in CSV format
 -l                 Loop. Run the tests forever
 -t <tests>         Only run the comma separated list of tests. The test
                    names are the same as the ones produced as output.
 -I                 Idle mode. Just open N idle connections and wait.

Examples:

 Run the benchmark with the default configuration against 127.0.0.1:6379:
   $ redis-benchmark

 Use 20 parallel clients, for a total of 100k requests, against 192.168.1.1:
   $ redis-benchmark -h 192.168.1.1 -p 6379 -n 100000 -c 20

 Fill 127.0.0.1:6379 with about 1 million keys only using the SET test:
   $ redis-benchmark -t set -n 1000000 -r 100000000

 Benchmark 127.0.0.1:6379 for a few commands producing CSV output:
   $ redis-benchmark -t ping,set,get -n 100000 --csv

 Benchmark a specific command line:
   $ redis-benchmark -r 10000 -n 10000 eval 'return redis.call("ping")' 0

 Fill a list with 10000 random elements:
   $ redis-benchmark -r 10000 -n 10000 lpush mylist __rand_int__

 On user specified command lines __rand_int__ is replaced with a random integer
 with a range of values selected by the -r option.
use redis-benchmark tools test redis performance . ######使用redis-benchmark 测试redis性能
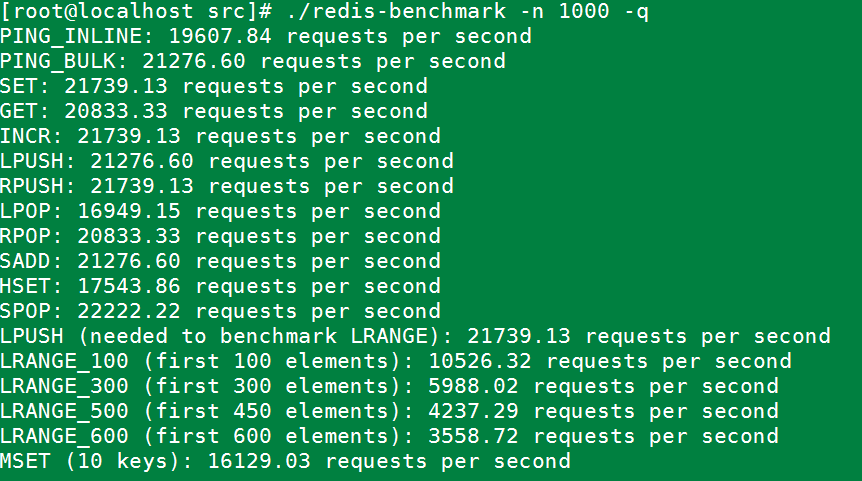
#实例同时执行 1000 个请求来检测性能
./redis-benchmark -n 1000 -q
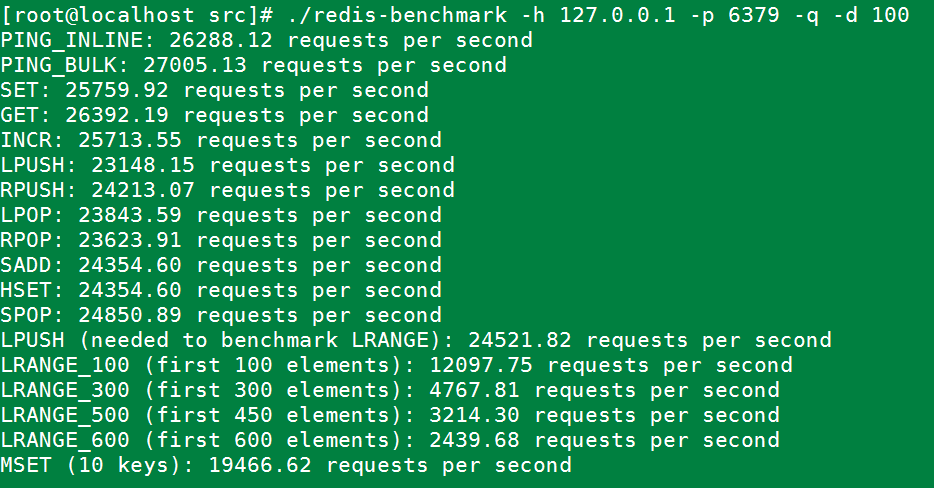
#测试存取大小为100字节的数据包的性能
redis-benchmark -h 127.0.0.1 -p 6379 -q -d 100
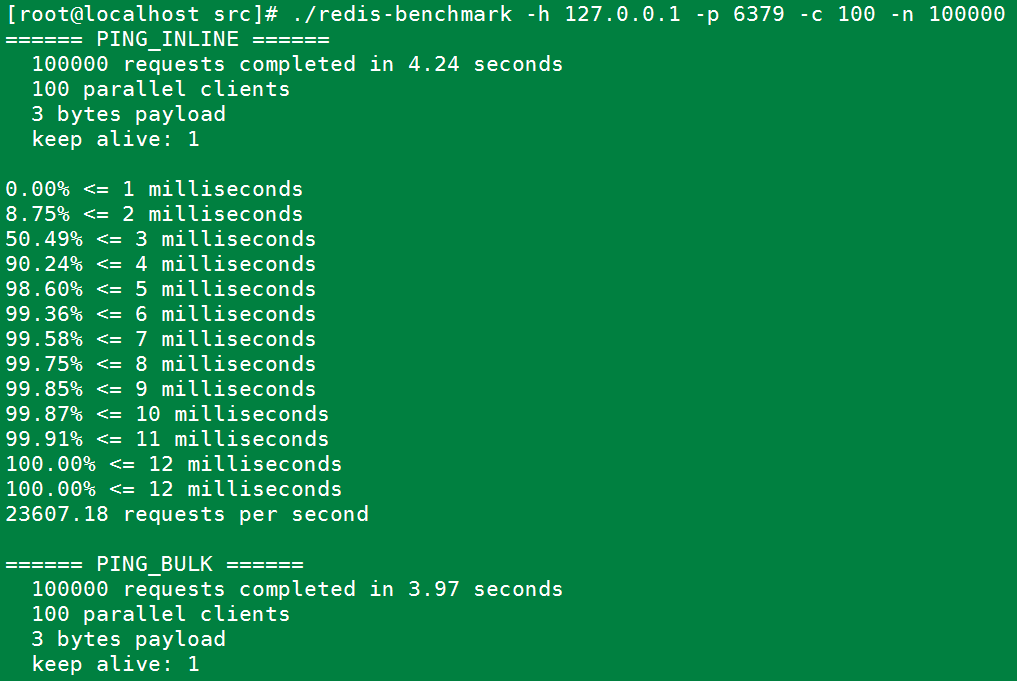
#100个并发连接,100000个请求,检测host为localhost 端口为6379的redis服务器性能
redis-benchmark -h 127.0.0.1 -p 6379 -c 100 -n 100000
5.错误记录与分析
直接make报如下错误: 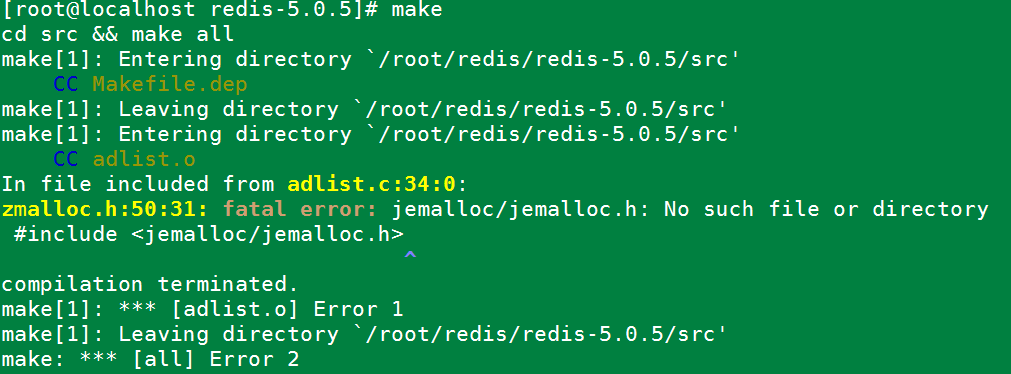
原因是jemalloc重载了Linux下的ANSI C的malloc和free函数。解决办法:make时添加参数。
make MALLOC=libc
运行后编译成功。如下图: 


